
These days, computers are essential, and we can’t survive a day without them. We deal with many file types on our computer, and if we don’t like any particular file, we delete it.
However, when you click the delete button on a file, you are not deleting it from your computer. Instead, every deleted file on Windows was moved to the Recycle Bin, which uses valuable space on the hard drive.
Everyone knows how to empty the Recycle Bin, but we often forget to do such a simple task. We keep files in the recycle bin until we run out of storage space.
Schedule Windows to Empty Recycle Bin Automatically
So, what if I tell you that you can automatically schedule Windows to empty Recycle Bin? There are many ways to configure the Recycle Bin on Windows 10 to empty automatically.
But, in this article, we will share the easiest method to automatically schedule Windows to empty the recycle bin.
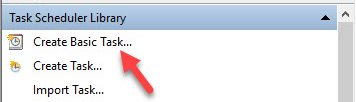
1. First of all, open the Task Scheduler on your Windows. You can do that by searching for it in the start menu or using the run command “taskschd.msc” in the Run windows.

2. After the Task Scheduler opens up on your computer, click on the option Create Basic task located under the Action category in the right panel.
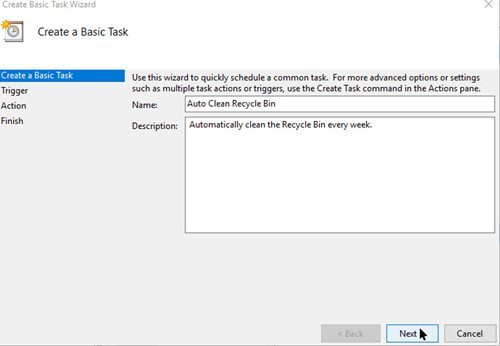
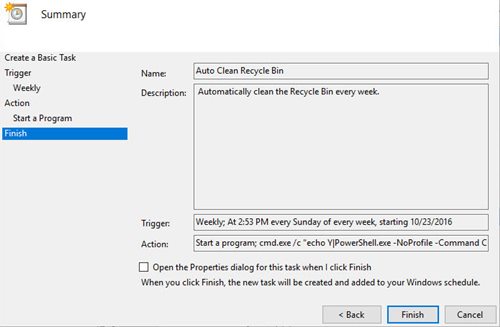
3. You will now see the task creation wizard from where you need to enter the name, click the Next button, and set up the time interval for your action or the task.
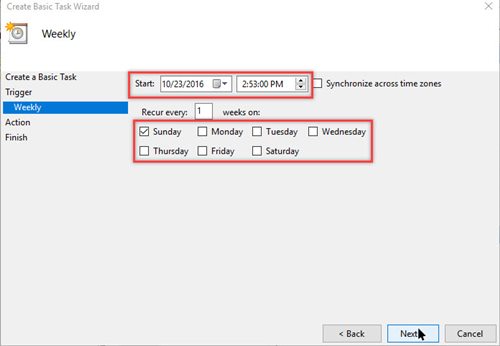
4. After that, click on the Next button again and set up other options until you reach the screen where you will be asked to set the action.
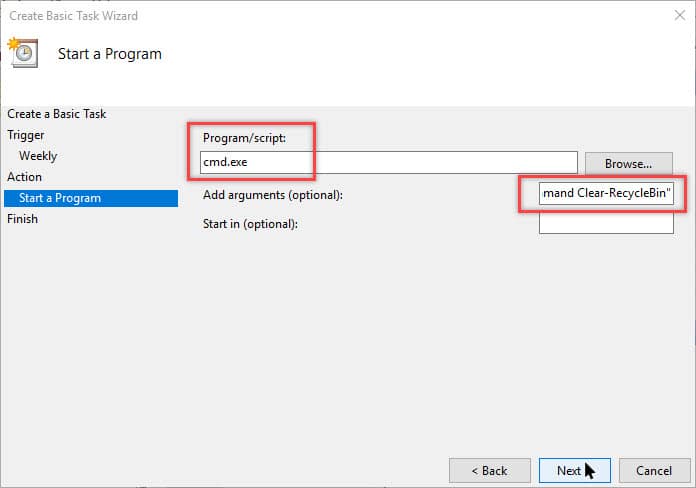
5. Click on the Next button, and then on the next screen, type in “cmd.exe” on the Program/Script field. Next, paste the below command in the ‘Add Arguments’ field.
/c "echo Y|PowerShell.exe -NoProfile -Command Clear-RecycleBin"
6. Now, you need to review all the settings. Then, finally, click on the Finish button.
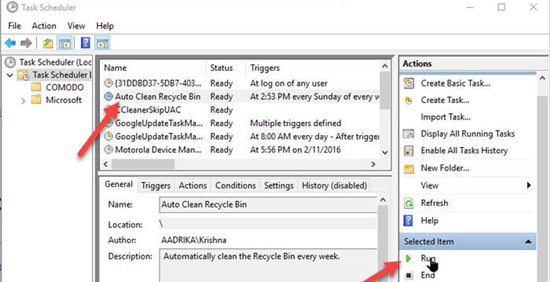
7. To check the scheduled task, select the task from the main window of Task Scheduler and then click on Run. It should empty the recycle bin automatically.
That’s it! You are done. This is how you can schedule Windows to empty the recycle bin automatically.
2) Using Storage Sense
Windows 10 has a storage management feature known as ‘Storage Sense’. The feature is meant to free up storage space on your device. You can use Storage Sense to delete files stored on the Recycle bin automatically. Here’s how to use the Storage Sense feature.
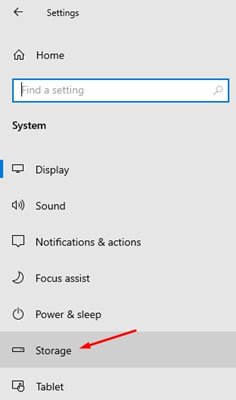
1. Open the Settings app on your Windows 10 device and click on the System option.

2. On the left pane, click on the Storage option.
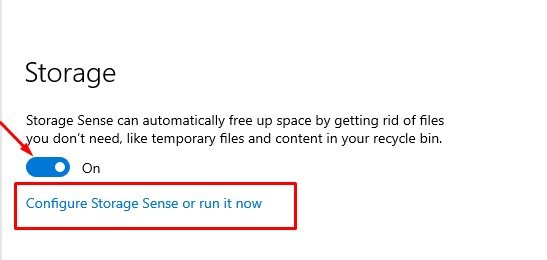
3. Enable toggle for Storage Sense.
4. Next, click on the Configure Storage sense or run it now option.
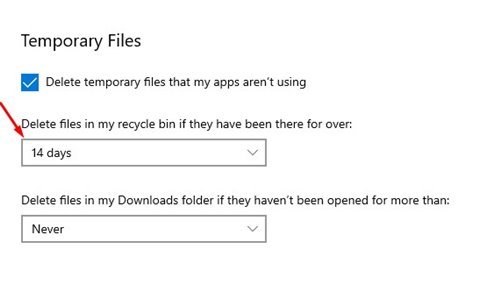
5. Check the option for Deleting temporary files that my apps aren’t using. Next, under the Recycle bin drop-down menu, select how often you want Storage sense to clear recycle bin files.
That’s it! You are done. Now Storage sense will automatically delete the files stored in the Recycle bin.
So, this is how you can schedule Windows to empty recycle bin automatically. I hope this article helped you! Please share it with your friends also. If you have any doubts about this, let us know in the comment box below.


")