
Indeed, Google Chrome is right now the most used web browser. The web browser is available for almost all platforms, including Windows, macOS, Android, Linux, and iOS.
Compared to all other web browsers for desktop, Google Chrome offers more features and options.
Also, you can install several extensions to improve or expand the functionality of the web browser. Although there’s no limitation on installing extensions on the browser, several extensions can slow down the web browser and increase your PC’s RAM & CPU consumption.
Let’s admit; there are times when we all have wanted to block extension installation in Chrome.
There might be various reasons why one wants to block extension installation on Chrome. Maybe they don’t want other users to install extensions or just want to improve their web browser’s performance.
Also Read: 5 Best Google Chrome Extensions to Download Videos
Steps to Block Extension Installation in Chrome Browser
Whatever might be the reason, if you are using Windows 10 Professional, you can disable Chrome extension installation right away. So, in this article, we will share a step-by-step guide on how to prevent people from installing extensions in Chrome. Let’s check out.
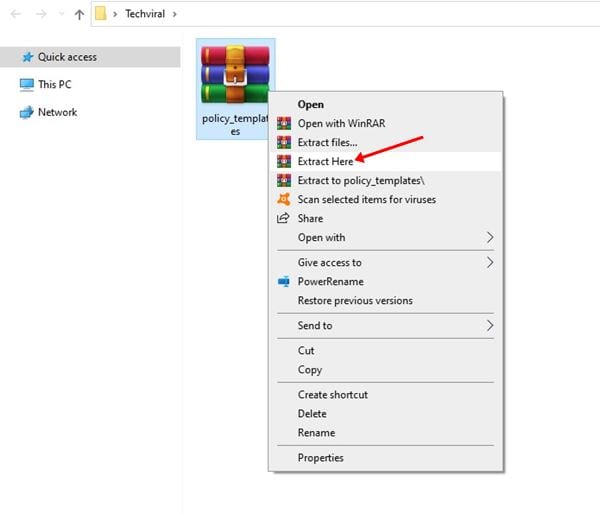
Step 1. First of all, download the Chrome Policy templates zip file on your computer. Once done, use Winzip or WinRar to unzip the file on your computer.
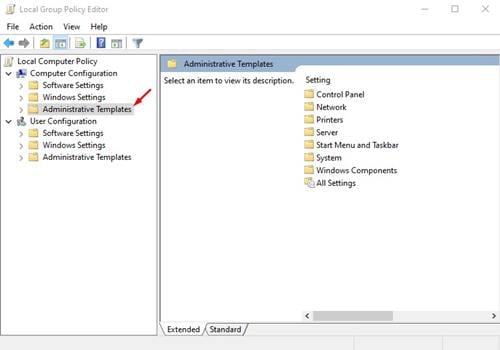
Step 2. Now press Windows Key + R to open the Run dialog box. Next, type in ‘gpedit.msc’ and hit the Enter button.

Step 3. This would take you to the Local Group Policy Editor. Now on the left pane, navigate to the Computer Configuration > Administrative Templates.
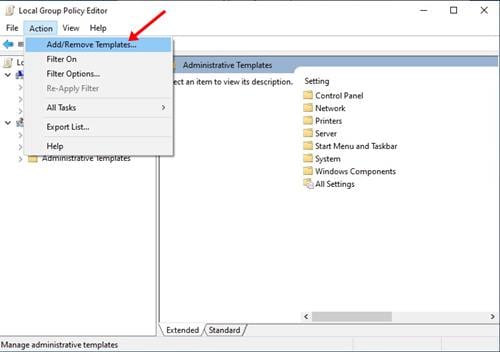
Step 4. Now click on the ‘Action’ menu and select the option ‘Add/Remove Templates’
Step 5. On the Add/Remove Templates window, click on the ‘Add’ button.

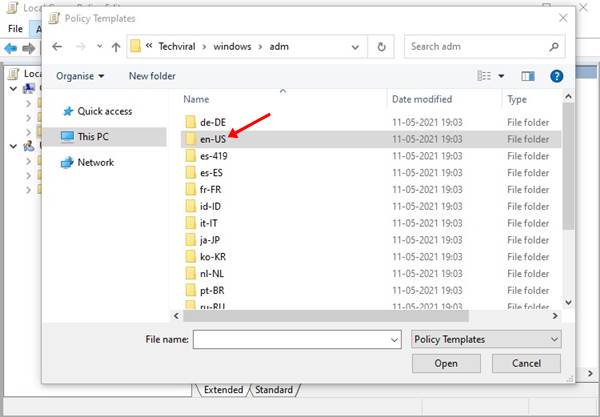
Step 6. Now navigate to the folder where you have extracted the Chrome Policy templates. Now navigate to the policy_templates > windows > adm. Next, double click on the ‘en-US’ language folder.
Step 7. Next, select the ‘chrome.adm’ file.

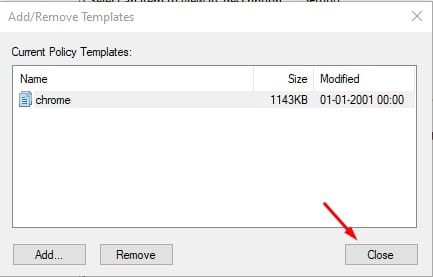
Step 8. Once selected, click on the ‘Close’ button.
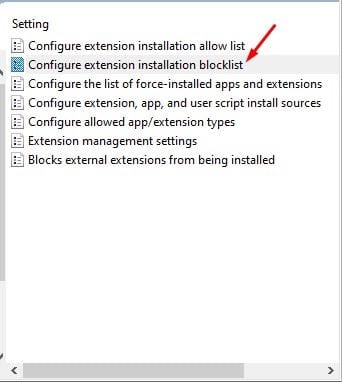
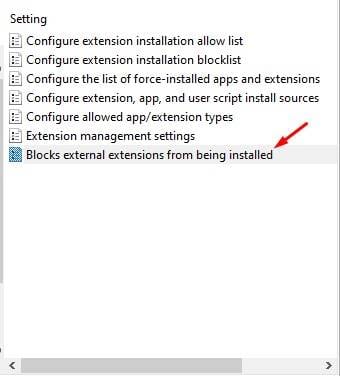
Step 9. Now on the Local Group Policy editor, navigate to the Computer Configuration > Administrative Templates > Classic Administrative Templates (ADM) > Google > Google Chrome > Extensions

Step 10. Once done, on the right pane, double click on the ‘Configure extension installation blocklist’
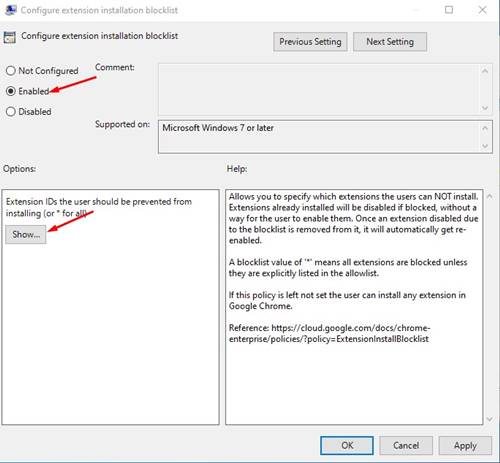
Step 11. Next, select the option ‘Enabled‘ and click on the ‘Show’ button as shown below.
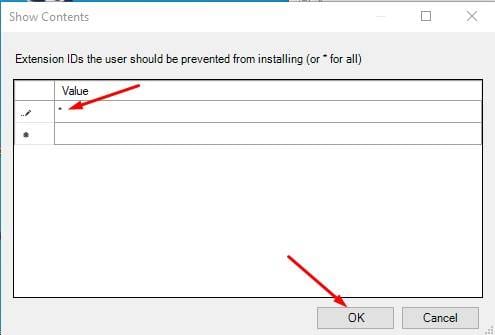
Step 12. On the Show Contents window, type an asterisk (*) in the value box and click on the ‘Ok‘ button.
Step 13. Next, double click on the ‘Blocks external extensions from being installed’ setting.
Step 14. Select ‘Enabled‘ and click on the ‘Ok’ button.

That’s it! You are done. Now no one can install extensions on the Chrome web browser.
So, this article is all about how to block extension installation in the Chrome browser. I hope this article helped you! Please share it with your friends also. If you have any doubts about this, let us know in the comment box below.


