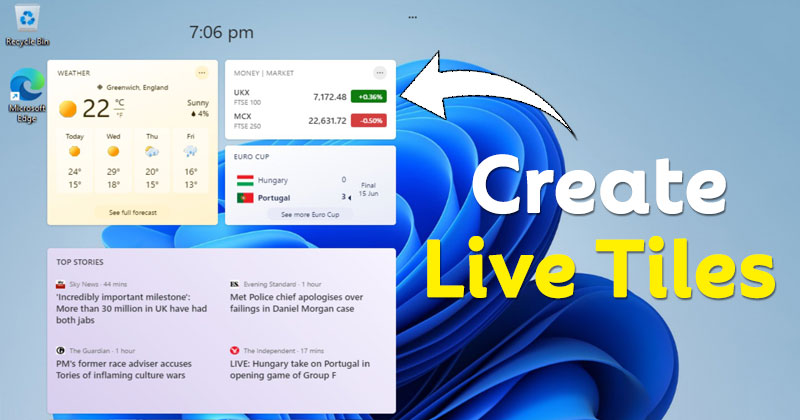
Back in Windows 10, Microsoft introduced a new visual feature called ‘Live Tiles’. If you don’t know, Live Tiles are the sometimes-rotating squares representing links for launching specific programs.
For example, you can have Live tiles for Weather, News, etc. Clicking on the Live tiles will launch the original app or redirect you to the official webpage. Live Tiles were of great use and looked great, but it’s not meant for everyone.
Live Tiles were said to hamper the performance of a PC. If you are using a high-end PC, you won’t notice a difference in performance, but it seriously affects the performance of mid-end computers/laptops.
Due to this reason, Microsoft decided to ditch Live Tiles entirely in Windows 11. As a replacement, Windows 11 introduced a new modern-looking centered Start Menu. However, people who have extensively used Live Tiles might be unhappy with the change and want to get Live Tiles back in Windows 11.
So, if you used to use Live Tiles on Windows 10 and want to get the same feature on the new Windows 11, you are reading the right guide. In this article, we will share a step-by-step guide on how to get Live Tiles on Windows 11. Let’s check out.
Steps to Create Live Tiles in Windows 11
To get Live Tiles on Windows 11, we will use a third-party app known as Live Tiles Anywhere. The app brings the Live Tiles functionality to your Windows 11 operating system. So, let’s check out.
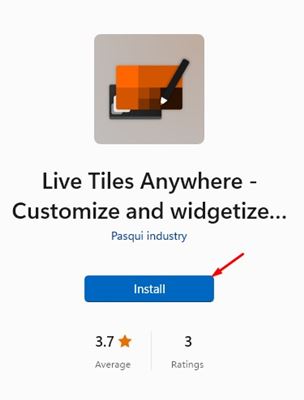
1. First of all, open Microsoft Store on your Windows 11 and search for Live Tiles Anywhere. Alternatively, click on this link to open the app page directly on the Microsoft Store.
2. Now, on the Microsoft Store app listing page, click on the Install button as shown below.
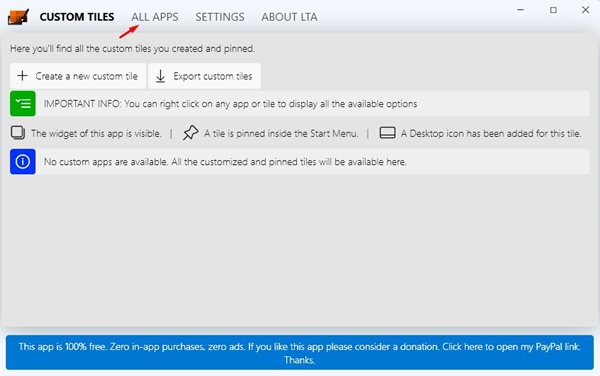
3. Now, wait until the program downloads & installs on your system. Once installed, open the app and click on the All Apps button at the top.
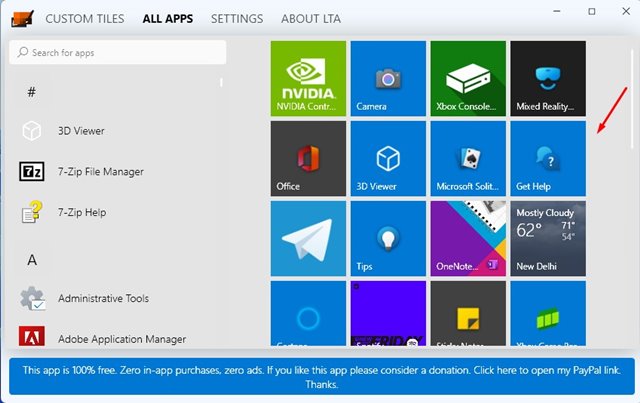
4. You will find all your installed apps on the next screen. Right-click on the app and select the Create a widget option.
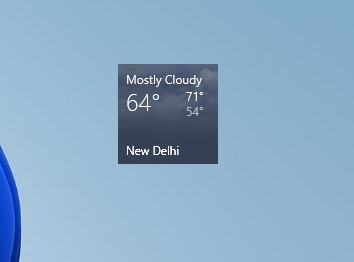
5. This will create a live tile widget on your desktop. You can move the Tile anywhere with your mouse cursor.
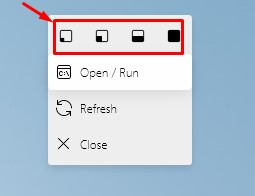
6. Right-click on the widget and select between the four different sizes.
That’s it! You are done. This is how you can create Live Tiles on Windows 11.
How to Create Custom Live Tile on Windows 11
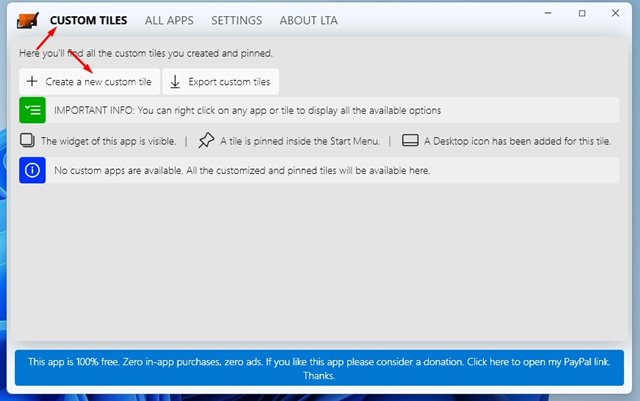
Well, if you are trying to create a Live tile for an app that’s not displayed on the App panel, you need to create a new custom tile.
1. First of all, click on the Create a new custom tile button.
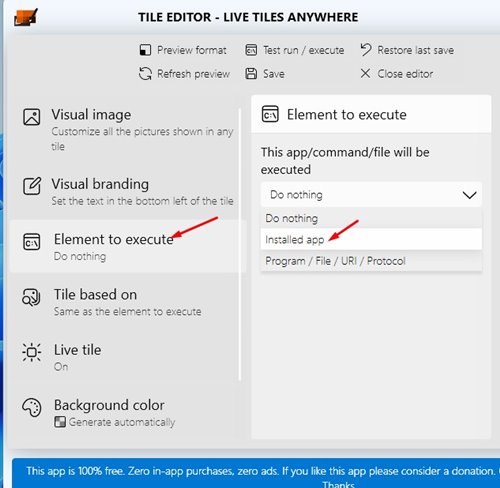
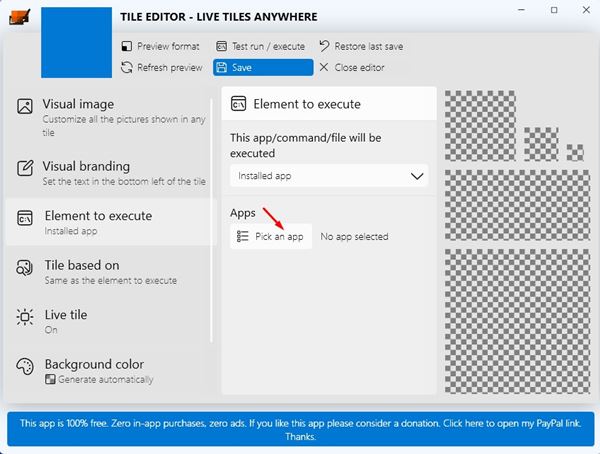
2. On the left pane, select the Element to execute section. Select installed app under the This app/command/file will be executed on the right.
3. Next, click on the Pick an app option as shown below.
4. Now, select the app for which you want to create Live Tiles.
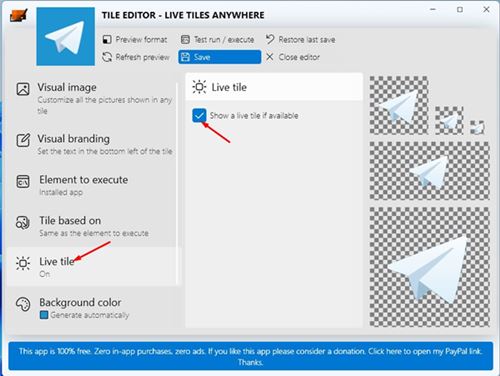
5. Now, click on the Live Tile on the left pane. On the right, enable ‘Show a live tile if available’. Once done, click on the Save button as shown below.
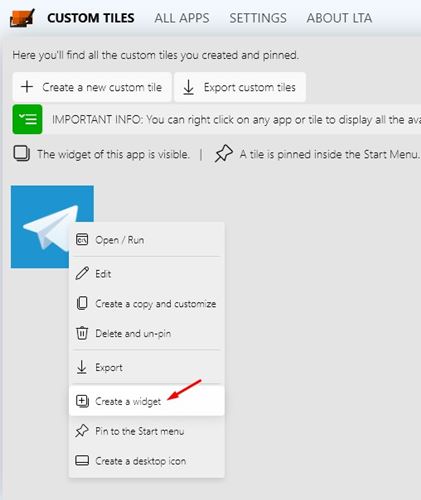
6. This will create the custom live tile. Now right click on the Tile and select the Create a widget option.
That’s it! You are done. This is how you can create custom live tiles on Windows 11.
Live Tiles on Windows 10 used to be a great feature, but it was a massive flop. It didn’t receive support and love from the users. However, many users still used the live Tiles. You can use this app to create live tiles for your most-used apps like Your Phone, WhatsApp, etc. I hope this article helped you! Please share it with your friends also.
