
Well, if you have just switched to Windows 10 from an older version of Windows, you might feel overwhelmed by the visual changes. Compared to the older version of Windows, Windows 10 has more features and customization options.
The new start menu of Windows 10 is still a big deal for regular users, especially for those who have recently switched. The new Start menu looks different, and it has something known as the app ‘Tiles.’
The App tiles are displayed on the right-hand side of the Start menu. Some of them are ‘Live’ and display animations, while others remain still.
Also Read: How to Change the Color of the Start Menu in Windows 10
Create New Tile Groups on Windows 10 Start Menu
A few days ago, we shared an article on how to pin specific settings to the Start menu. Today, we will discuss how to create tile groups on the Windows 10 start menu.
You can easily create Tile Groups on the Start menu. Once created, you can add certain apps & settings by dragging them into the groups. In this article, we will share a step-by-step guide on how to create tile groups on Windows 10 Start menu in 2021.
1. First of all, press the Windows key to open the Start menu. You can also click the Start button to open the Start menu.
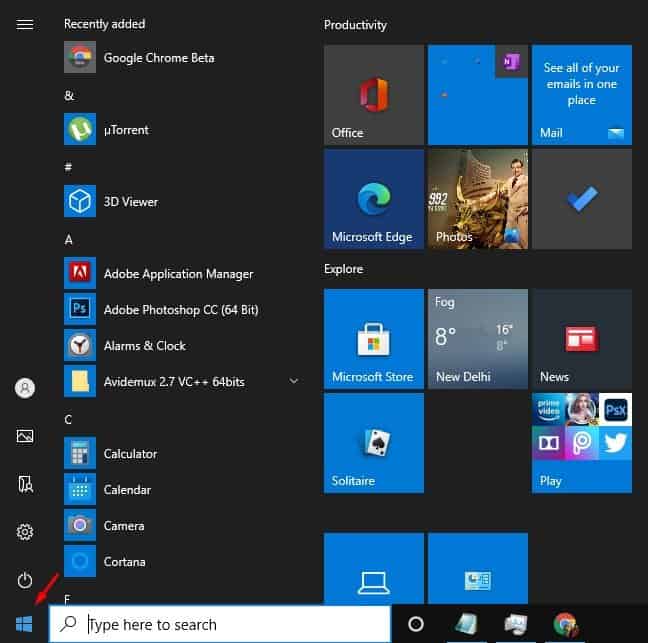
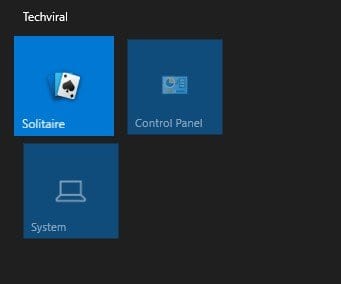
2. On the right-hand side, find the system settings that you want to assign into groups. For example, I want to assign the System and Control panel to a new tile group.

3. Now hover the pointer over the group, and you will see an option Name Group.
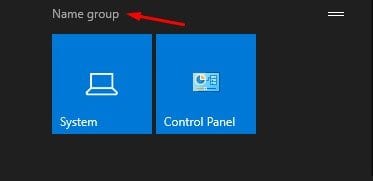
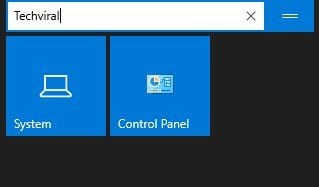
4. Click on the ‘Name Group’ option and type in whatever name you want to give your tiles group.
5 .Once done, right-click on the specific group tile and select the option ‘Resize’. The resize option allows you to organize and arrange the tiles in your group to your liking.
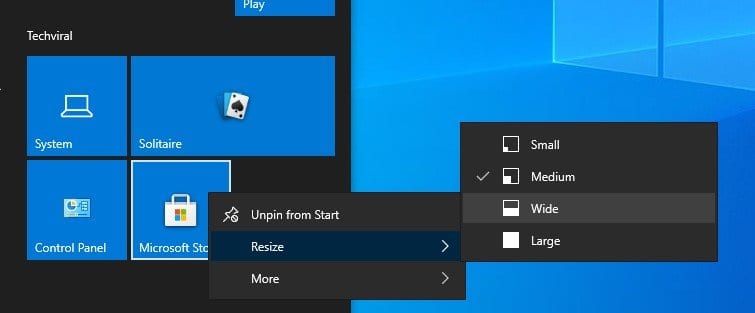
6. You can even add more tiles to existing tile groups. For that, just drag and drop the tiles into an existing group.
That’s it! You are done. This is how you can create a Tile Group in Windows 10 start menu. With this method, you can create unlimited tile groups in Windows 10 start menu.
So, this article is all about how to create a tile group in Windows 10 start menu. I hope this article helped you! Please share it with your friends also. If you have any doubts related to this, let us know in the comment box below.

")
")