
If you have been reading tech news regularly, you might know that recently Microsoft added Android app support on Windows 11. As of now, Windows 11 supports apps that are available on the Amazon App store.
Right now, Amazon Appstore doesn’t have lots of apps. But since Windows 11 now supports Android apps, what about installing the Google Play Store? Google Play Store on Windows 11 will let you install the apps you use on your Android device.
Also read: How to Run Android Apps on Windows 11
Install Google Play Store on Windows 11
So, if you want to install Google Play Store on Windows 11, you are reading the right guide. Below, we have shared a step-by-step guide on installing Google Play Store on Windows 11.
Uninstall Windows System for Android
The first thing you need to do is to uninstall the existing version of the Windows Subsystem for Android. The Google Play Store support is not available in the older version of Windows Subsystem for Android.
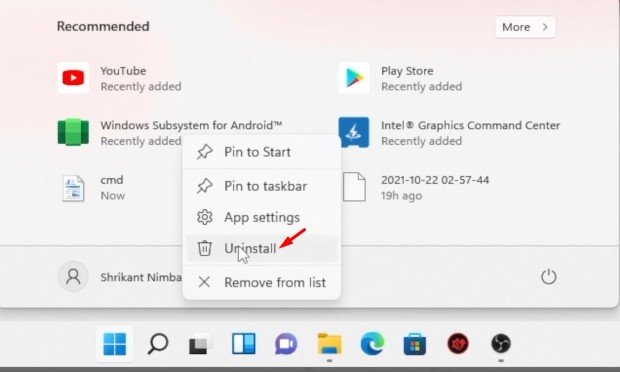
To uninstall WSA, you first need to click on the Start button, search Windows Subsystem for Android and uninstall it. Once you uninstall the WSA, all the apps will be gone.
Turn on the Developer Mode
After uninstalling the older version of the Windows Subsystem for Android, you need to turn on the Developer Mode.
To turn on the Developer Mode, you need to open Windows 11 search and type in Developer Settings. Then, open the Developer Settings from the list of options.
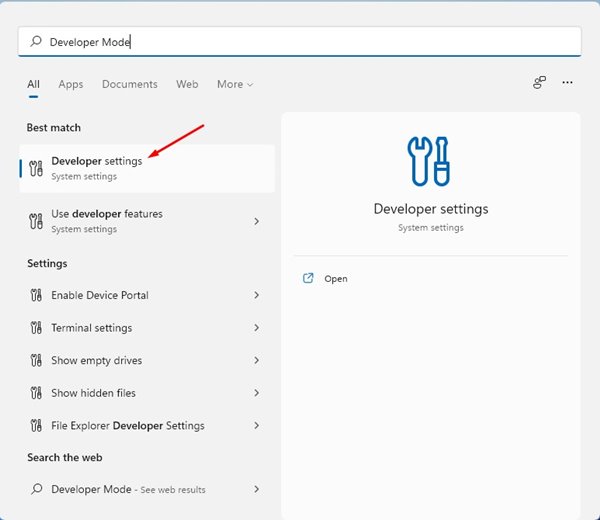
On the next page, enable the Developer Mode option, as shown in the screenshot below.

Download the Windows Subsystem for Android Package/Kernel File
The next step includes downloading the Windows Subsystem for the Android package. Again, make sure to use the same Package that we have shared below.
Any other version of WSA won’t work with the Google Play Store. So, it’s best to download the file that we have shared above.
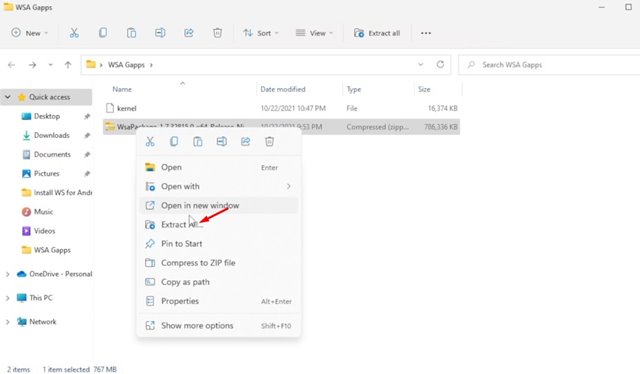
Download the Package and extract it into a new folder.
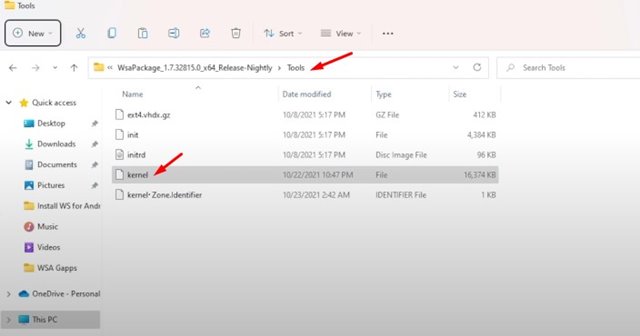
Next, you need to download the Kernel file that we have shared below.
Next, move to the WSA folder that you have extracted and open the Tools folder. On the Tools folder, paste the kernel file that you have downloaded.
Install Windows Subsystem for Android
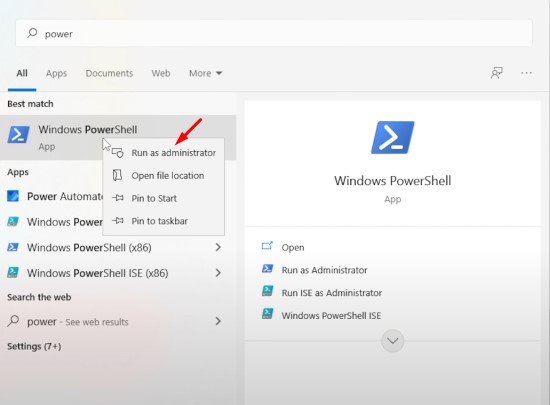
Once done with the above steps, you need to install the Windows Subsystem for Android. To install it, open Windows 11 search and type in Powershell. Right-click on Powershell and select Run as administrator.
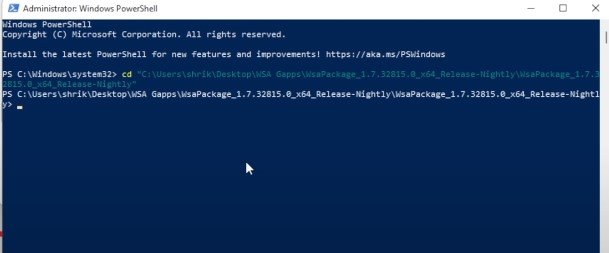
On the Powershell Window, enter the cd command followed by the extracted WSA folder location- cd “Your extracted WSA folder location”
For example – cd "C:\User\Amarnath\Location of the extracted WSA folder"
Important: Replace ‘Location of the extracted WSA Folder’ with the actual address.
Next, execute the below command on the Powershell:
Add-AppxPackage -Register .\AppxManifest.xml
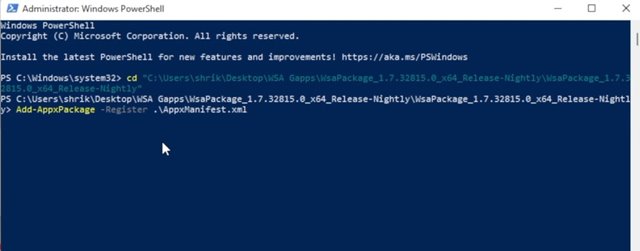
That’s it! This will install the Windows Subsystem for Android on your Windows 11 PC.
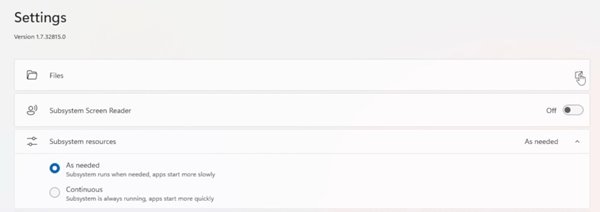
Enable Developer Mode in WSA
The next step includes enabling Developer mode in WSA. For that, open Windows 11 search and type in Windows Subsystem for Android. Then, open WSA from the list.
Next, you need to enable the Developer Mode option, as shown in the screenshot below.
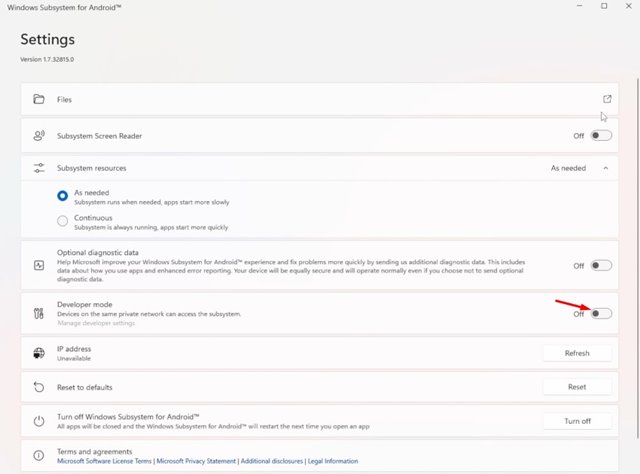
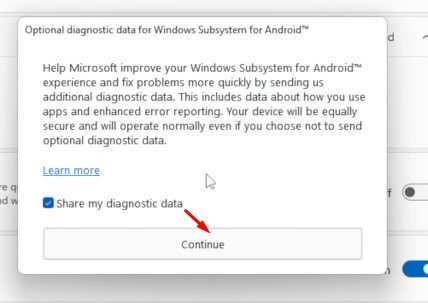
Next, click on the Files button, as shown in the screenshot below.
Now on the diagnostic data pop-up, click on the Continue button.
Installing Google Play Store
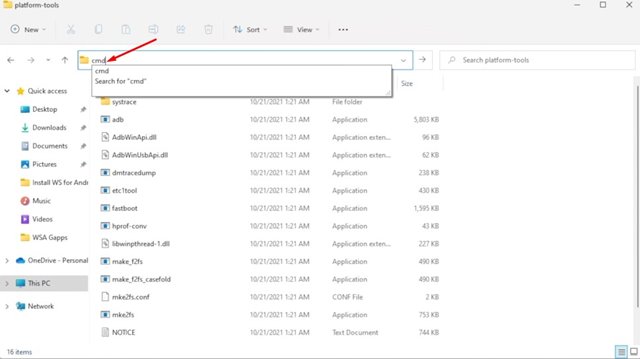
We are nearing the end of the tutorial. Here we need to make a few changes to enable the Google Play Store on Windows 11 PC.
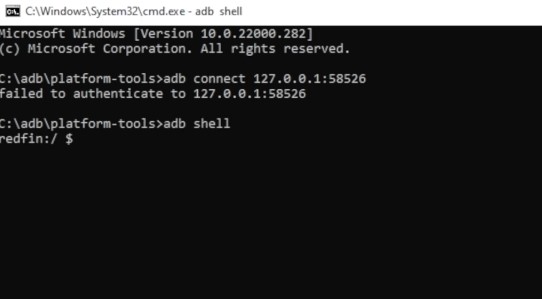
For that, you need to navigate to the C:\adb\platform tools folder. Now on the File Explorer address bar, type in CMD and hit the Enter button.
On the Command prompt, type in adb connect and your localhost address and hit the Enter button. For example, adb connect 127.18.155.80:585
Note: Replace 127.18.155.80:585 with your Localhost address.
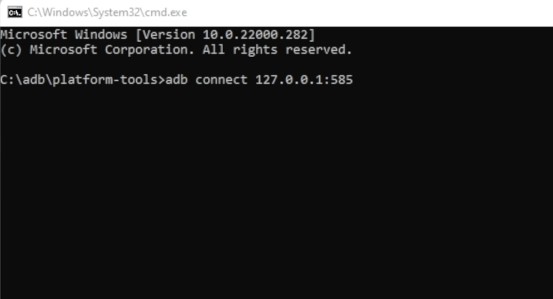
If you don’t know your localhost address, you can find it in the Settings of Windows Subsystem for Android.
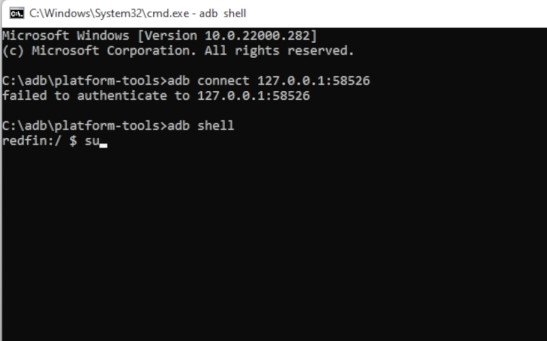
Next, type in adb shell on the Command Prompt and hit the Enter button.
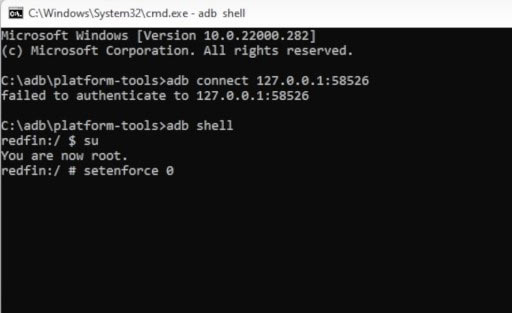
Next, type in su and hit the Enter button.
Now you need to type in setenforce 0 and hit the Enter button.
Accessing the Google Play Store
If you have followed the steps carefully, the Google Play Store will be up and running on your system. Just open the Windows 11 start menu and click on the Google Play Store Icon.

You will be asked to sign in with your Google Account. Simply sign in, and you can install the apps directly from the Play Store.
That’s it! You are done. This is how you can install the Android subsystem with Google Play Store on Windows 11. I hope this article helped you! Please share it with your friends also. If you have any doubts, let us know in the comment box below.
")

")
Hello. I did exactly as you suggested and tried it a few times. but every time after a while google play and other apks disappeared. Windows Subsystem for Android is still there. Why this? Any solution?
Thanks, so far this is working great. The only thing missing from this is an explanation of what C:\adb\platform tools is. I only had it because I tried fallowing another guide that didn’t work.