
Well, if we look around, we will find that Android and iOS are now the most used mobile operating system. It’s true that Android is right now the most popular mobile operating system, but iOS is not far away. If we talk about iPhones or iOS devices, smartphones have been changed a lot over the past few years.
Despite the increasing storage size of new generation iPhones, it’s really easy to fill up the storage quickly, especially if you store music files on it. Look, storage management is always been a difficult part of mobile devices, but both Android and iOS provide a built-in storage optimizer that can help you free up some storage space.
We have already shared lots of articles on how to increase storage space on Android. Hence, in this article, we will be talking about how to optimize your iPhone’s Music storage to automatically free up space.
The feature to free up music files is hidden inside the Music app. The feature basically allows you to choose how you want your music to be stored on the iPhone. Once you have hit the assigned storage space, the songs that you haven’t played for a while will be deleted automatically.
How to Optimize your iPhone’s Music Storage to Automatically Free Up Space
So, in this article, we are going to share an easy method that would help you offload music files automatically from your iOS device. So, let’s check out how to use optimized storage for Music on your iPhone 2019.
Step 1. First of all, open Settings on your iPhone. This is the hub for all your configuration that could be altered on the device to make it perform some preferred tasks etc.
Step 2. Once you have the Settings app opened on your device look for the option named “Music” which would be located solely in the list of choices. Tap on the music button.
Step 3. In the top half of the Music, settings see that if iCloud Music Library is switched on or not. If it is disabled from there, then you have to make sure that this option is enabled first.

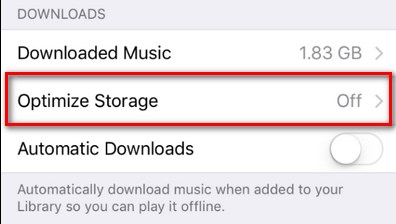
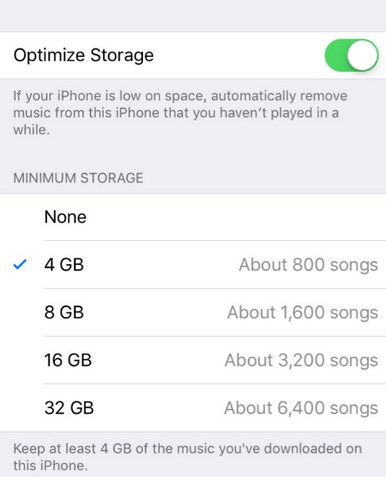
Step 4. Now scroll down to the bottom of the screen and look for the option Optimize Storage and then just click on it. Toggle the Optimize Storage On from there and select your preferred minimum storage that you wish to be preserved for the music. If you choose up the None value for the minimum storage, then the iOS would delete most music that could be removed successfully to gain free space. Except for the none value, you could also select up the 4, 8, 16 or 32 GB value dependently on the storage you wish to be freed.
The storage would be released only when the storage of your device gets to full so just go on working with your device and fill as much music as you want. From now on, it will automatically remove the music files which were not touched for a while.
Also Read: How to Install Georestricted Apps on iPhone
So, this is all about how to optimize your iPhone’s music storage to automatically free up storage. Hope this article helped you share it with your friends also. If you have any doubts related to this, let us know in the comment box below.


