The previous month, Microsoft introduced its new desktop operating system – Windows 11, to the world. Compared to Windows 10, Windows 11 has more features and offers a complete design overhaul.
However, the problem with Windows 11 is that Microsoft has upped the system requirements to run the operating system. So, even if your PC supports Windows 10, it doesn’t mean it can run Windows 11.
Your PC needs to meet the minimum requirements to run Windows 11. Your PC needs to have a TPM 2.0 chip to install Windows 11.
A few days ago, Microsoft rolled out its first preview of Windows 11, allowing Windows Insider users to test the new operating system. So, if your PC supports Windows 11 and has joined the Windows Insider program, you can get the free upgrade right now.
However, if your PC can’t run Windows 11, you can apply themes, skins, and icons to make Windows 10 look like Windows 11. Hence, this article will share a detailed guide on using the best Windows 11 themes, skins, Icons, and Wallpaper. Let’s check out.
Create a System Restore Point
Before using the utilities we have shared in this article, you need to create a restore point. It’s important to back up the operating system before making any system-level change. Here’s how to create a restore point in Windows.
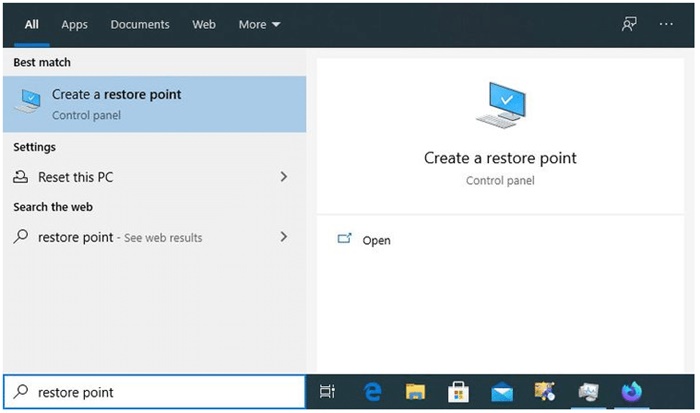
- Open Windows 10 search, type Create a restore point and select it from the results list.
- Switch to the System Protection tab and click on the Create button.
- Now type a description for the restore point.
- Now select Create > Ok button to create the restore point.
This is how easy it is to create a restore point in Windows 10 computer.
How to Make Windows 10 Look Like Windows 11 (Customize Windows 10)
As we all know, Microsoft introduced several new wallpapers with Windows 11. Windows 11 wallpaper is just a part of customization.
1) Download Windows 11 Wallpapers
You can download the new wallpapers on your existing Windows 10 PC or Laptop to make it look like Windows 11. So, download the new Windows 11 wallpapers on your PC.
After downloading the Windows 11 wallpapers, right-click on it and select the Set as background option. This will set the wallpaper on your Windows 10 pc.
2) Apply Windows 11 Themes/Skins & Icons to Windows 10
Once done with the wallpaper, you need to install the Windows 11 skin pack. However, before installing a skin pack, creating a system restore point is recommended because installing skin requires registry modification.
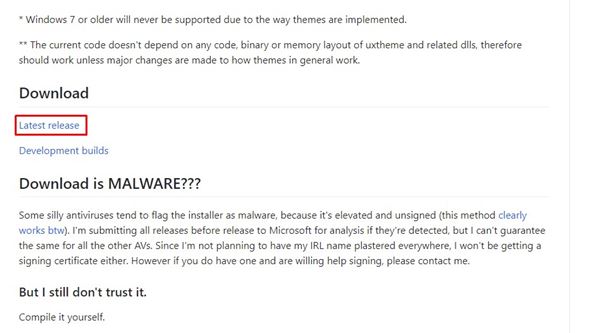
1. Head to this link and download the latest SecureUxTheme on your PC.
2. Next, download the Windows 11 for Windows 10 theme on your PC. You might be asked to create a DeviantArt account to download the theme.

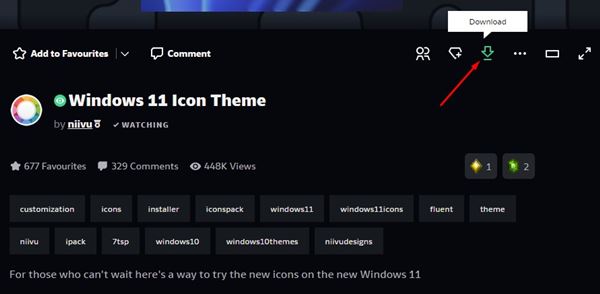
3. Next, download the Windows 11 Icon Theme from the same developer.
4. Now, place both the theme and icon pack in the same folder and extract the files.
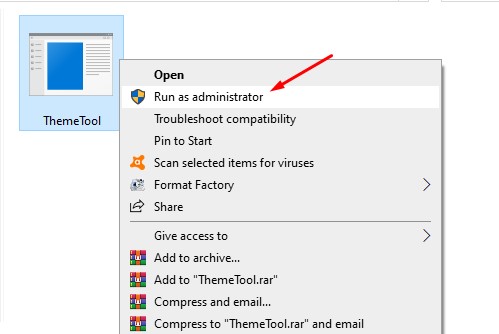
5. Next, right-click on the SecureUXTheme installer file and select the Run as administrator option. Complete the installation and then restart your PC.
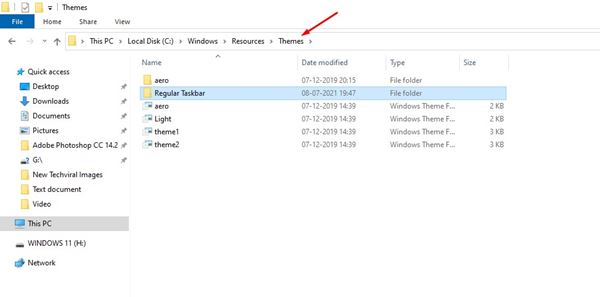
6. Now, open the folder where you have stored the Theme and Icon pack. Inside the theme folder, locate Windows 10 themes sub-folder. Inside that, you will find two more sub-folders for taskbar sizes. Copy the size that you prefer.


7. Paste the folder to the C:\Windows\Resources\Themes
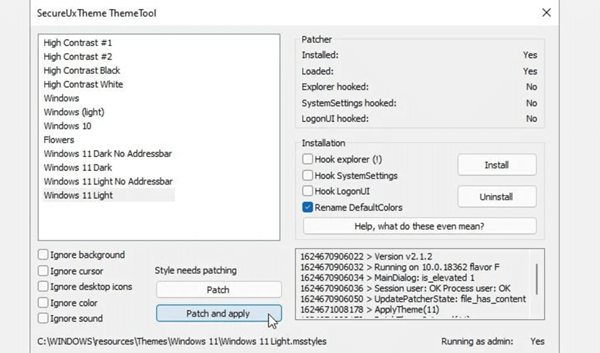
8. Re-run the SecureUXTheme file, and you will notice a new theme. Select the new theme and click the Patch and Apply button.
To apply the Windows 11 icon pack, download the 7TSP GUI from DeviantArt. It’s a tool that lets you apply custom icon packs on Windows 10.
That’s it! You are done. This is how you can use SecureUXtheme to change Windows 10’s look into Windows 11.
3) Easier Method to Change theme
Well, the above method is a bit complicated. So if you are looking for a more straightforward method to make Windows 10 look like Windows 11, you must follow this method.
1. Download the Windows 11 SkinPack on your Windows 10 PC.
2. Once downloaded, you will find Windows 11 SkinPack.sfx file. Right-click on the file and select the ‘Extract here’ option.
3. You will be prompted to enter the password. The password is skinpacks.com
4. Once extracted, run the installer file. This will install the theme on your system.
5. Now head to Settings > Personalization > Themes. Find the Windows 11 theme and apply it from there.
That’s it! You are done. This is a more straightforward method to make Windows 10 look like Windows 11.
4) Center Taskbar Icons
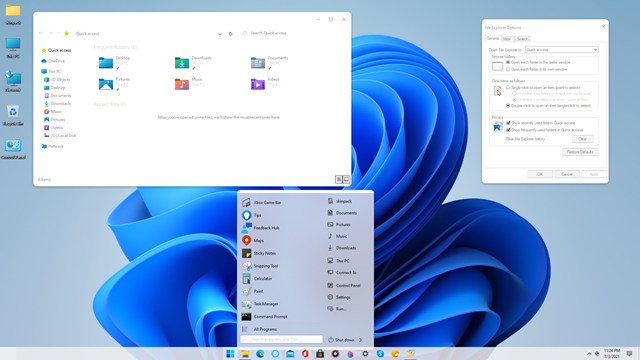
After applying the Windows 11 wallpapers, themes, and icon packs on your Windows 10 computer, your PC might look similar to Windows 11. However, if you want a more refined look, you can choose to center the taskbar icons.
To center the taskbar icons in Windows 10, follow the How to Center the Taskbar Icons in Windows 10. In that guide, we have shared a step-by-step tutorial on center taskbar icons in Windows 10.
So, this guide is all about the best Windows 11 themes, skins, and icon packs. I hope this article helped you! Please share it with your friends also. If you have any doubts, let us know in the comment box below.
")
")

Hello !
Doesn’t this batch requieres Build 1903 and above ?
I’ve been told to only use iPack from insider, just offering the new system icons.