
IP Address is a unique address that every internet-connected device has. When we connect our smartphones, tablet, laptops, or any other device to the local network, it gets a unique IP Address. The main purpose of an IP Address is to distinguish every device connected to the network.
Suppose if you have five computers connected to a single network, then the IP Address for all the connected computers will be different. Each of the devices connected to the network will have its own IP Address, and it will be unique. However, sometimes users face common IP Address issues like ‘Windows has detected an IP Address conflict’.
The error message ‘Windows Has Detected An IP Address Conflict’ generally occurs when two devices have the same IP Address on the network. The error message prevents users from accessing the internet.
Fix ‘Windows has detected an IP Address conflict’ Error
So, if you are also getting the network error ‘Windows has detected an IP Address conflict’, then you need to do some workaround given below. In this article, we are going to share some of the best methods to resolve the ‘Windows has detected an IP Address conflict’
1. Restart Your Router
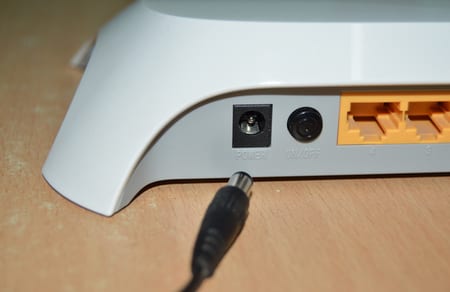
The ‘Windows has detected an IP Address conflict’ error message generally occurs when the router fails to assign an appropriate IP Address to the computer. So, if that was the case, then you need to restart your router to resolve the network error.
You need to press the Power button located on the backside of your router to turn it off. Once turned off, wait for a few minutes and then power on again.
2. Remove the Static IP Address
If the above method failed to fix the ‘Windows has detected an IP Address conflict’ error message, then you need to remove the Static IP Address. Follow some of the simple steps given below to remove the Static IP Address from Windows.
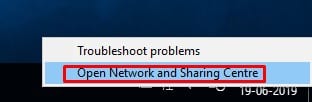
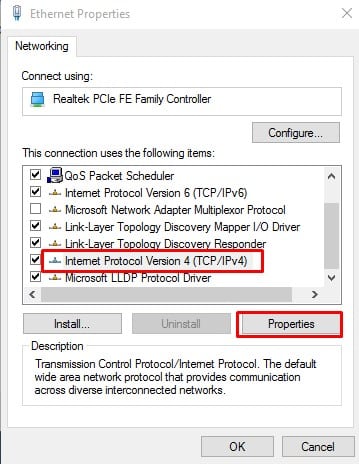
Step 1. First of all, right-click on the Network icon and then click on ‘Open Network and Sharing Center’
Step 2. Now click on the network adapter that you are using.
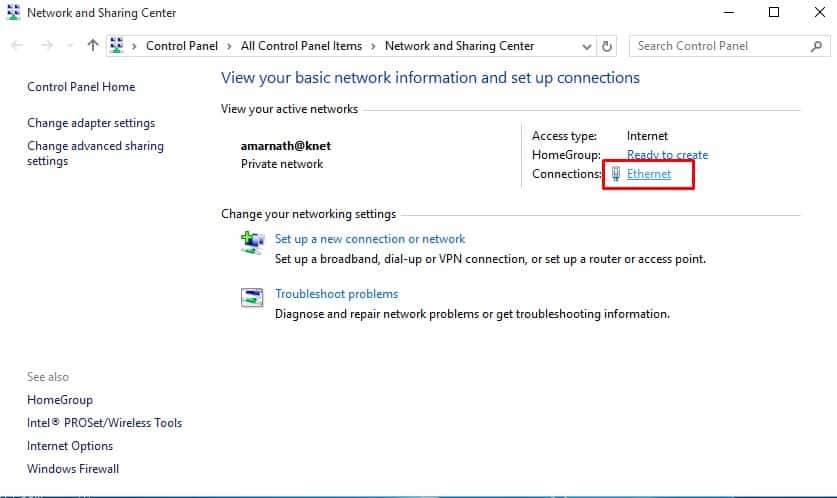
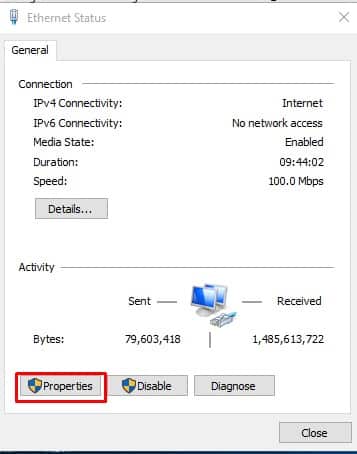
Step 3. Now click on the ‘Properties’
Step 4. In the next step, double click on the ‘Internet Protocol Version 4 (TCP/IPv4)’
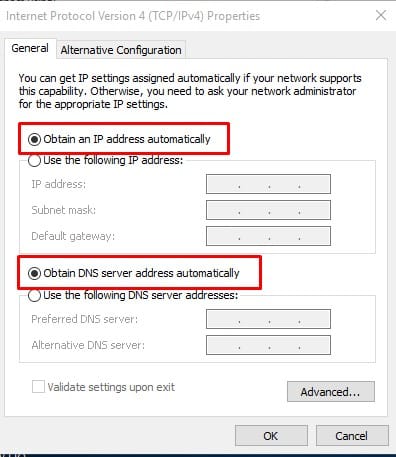
Step 5. Now under the Internet Protocol Version 4 Properties, select ‘Obtain an IP Address automatically’ and then ‘Obtain DNS server address automatically’.
That’s it, you are done! Now just restart your computer and router to resolve the ‘Windows has detected an IP Address conflict’ network error.
3. Release & Renew IP Configuration
If you are still getting the network error ‘Windows has detected an IP Address conflict’, then you need to reset your IP configuration via the Command Prompt. Follow some of the simple steps given below to release & renew the IP configuration.
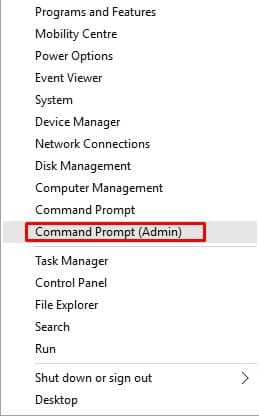
Step 1. First of all, right-click on the Windows button and then select ‘Command Prompt (Admin)’
Step 2. In the command prompt window, type in 'ipconfig /release' and then press Enter.
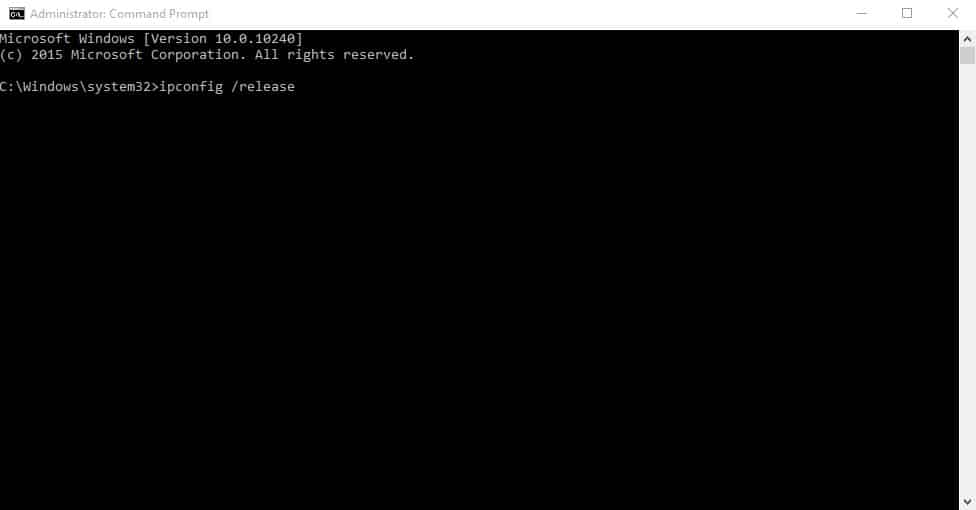
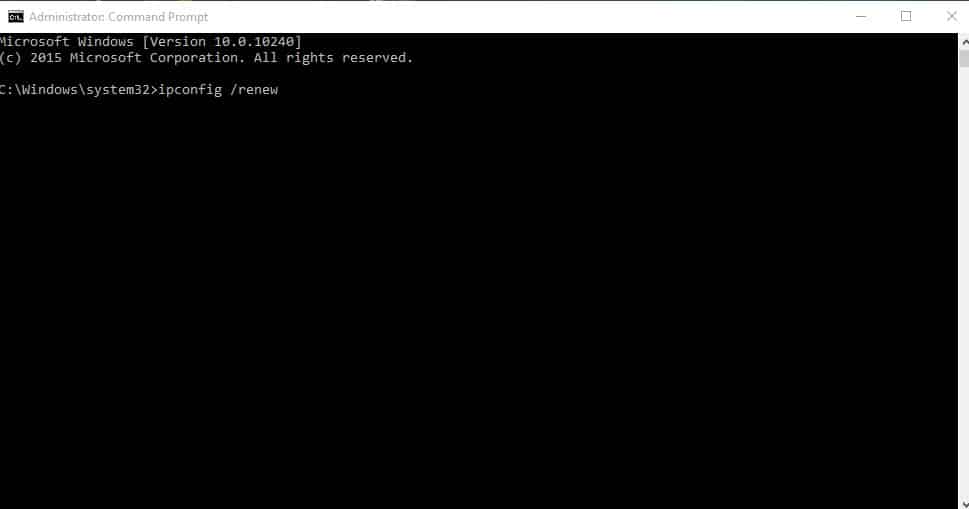
Step 3. Now enter the command 'ipconfig /renew' and hit Enter.
That’s it, you are done! This will release and renew the IP address to fix the ‘Windows has detected an IP Address conflict’.
So, these are the best methods to fix the ‘Windows has detected an IP Address conflict’ from Windows 10. If you know any other methods to fix the error, let us know in the comment box below. I hope this article helped you! Share it with your friends also.


")