We will share an important article on How To Install and Run Backtrack On Windows. With these, you can run Backtrack on any Windows operating system. Please go through the post to know about it.
I recently discussed How to Install and Run BackTrack on Android Devices. BackTrack is a Linux-based infiltration testing program that helps security professionals in the ability to perform evaluations in a completely native environment dedicated to hacking. I wanted to run Linux on Windows but never craved to install it directly. So I installed it in a Virtual Environment. This means you can use Windows and run another Operating System while using Windows. This can be achieved through Software like VMware or VirtualBox.
Also Read: How To Create Undeletable & Unrenamable Folder In Windows
Steps To Install and Run Backtrack On Windows 10
The subject of this thread consists of Backtrack. You can Download BackTrack Linux from their Official Website. Now in this post, I will show you how to Install Backtrack 5 using VirtualBox on Windows.
1. Install and Run Backtrack On Windows using Virtual Box:
Step 1. To create a virtual machine, let us start the VirtualBox and click the ‘New‘ virtual machine button in the toolbar.

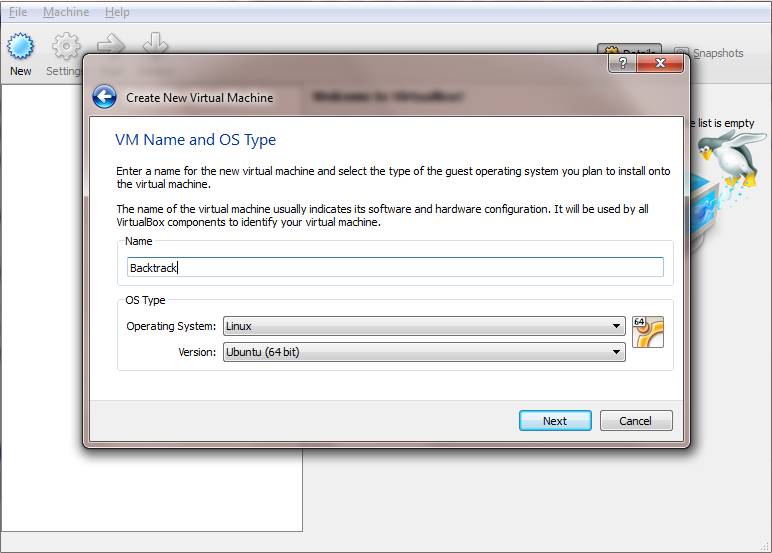
Step 2. After clicking on new, Enter any name for the Virtual Machine; for Example, “Backtrack” Then choose the type of OS as Linux and Version as Other Linux. Once you are done, click Next.
Note: My usual choice is in-between 512 MB to 800 MB. You can really change this to whatever you want, but I’ve run into a ram issue at 512MB, so I tend to up it.
Step 3. Just select ‘Create a new hard disk’ and Click Create. Then it asks you to choose a Hard drive file type. Select the default VDI (Virtual Disk Image) and hit Next.
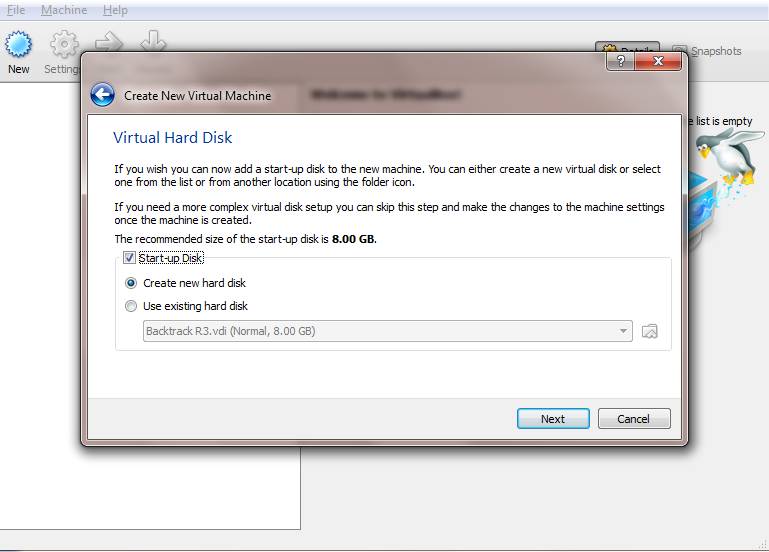
Step 4. Then, you have to select ‘Dynamically allocated‘ and hit Next. And now comes the important part. You have to select the size of the Virtual Drive. I have given about 2GB of disk space for the Virtual Machine. You can give more or less according to your wish. After you hit Next, the Virtual Machine will be created.

Step 5. Adding Backtrack Linux ISO to Virtual Machine, Now that you have created Virtual Machine, You need to add an ISO or Image file of an OS. To do that, Just hit the Settings button. You have to select Storage, then select Empty. And finally, select the disc icon on the rightmost side, which would open up a drop-down menu.
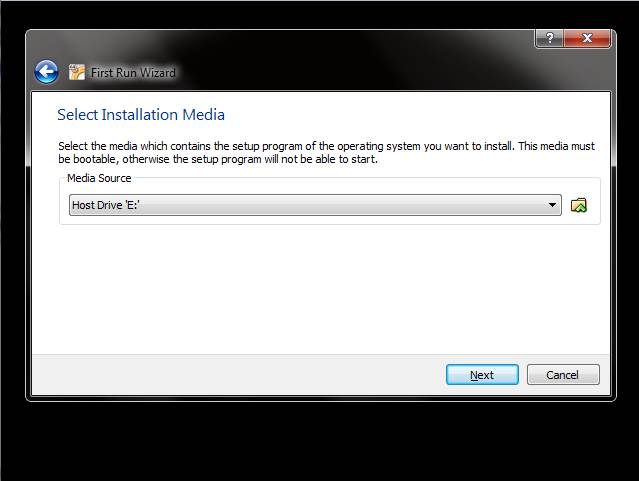
Step 6. Select ‘Choose a virtual CD/DVD file‘ and browse to the directory where your ISO or Image file is stored. In this case, I will browse and select BT5. ISO image from my hard drive. And click OK. Now everything is set up. All you need to do is click ‘Start.’
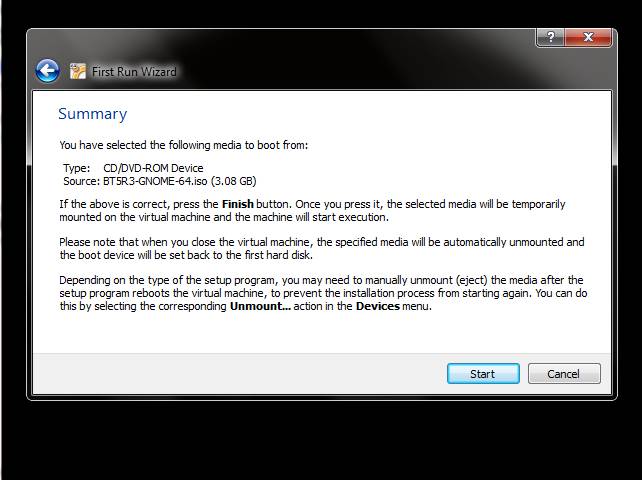
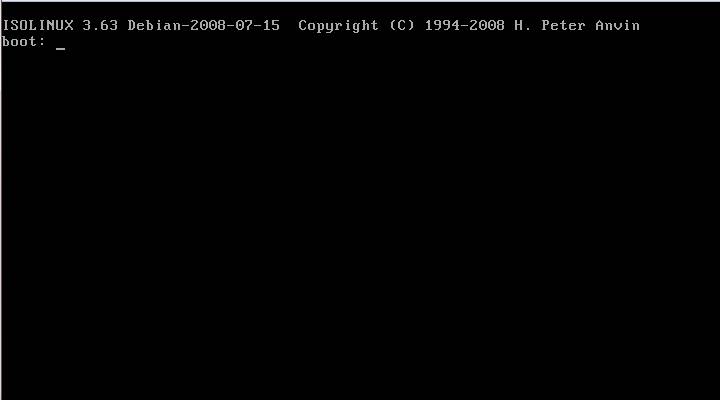
Step 7. After you hit Start, The Virtual Machine boots up, then it loads up the OS (in this case – BackTrack 5). You might need to hit Enter so BackTrack starts booting.
Step 8. That’s it now you able to install and run backtrack in windows. So in this way, you successfully install and run backtrack 5 on your Windows 7,8,10. If you face any problem feel free to discuss in the below comments,
2. Using VmWare
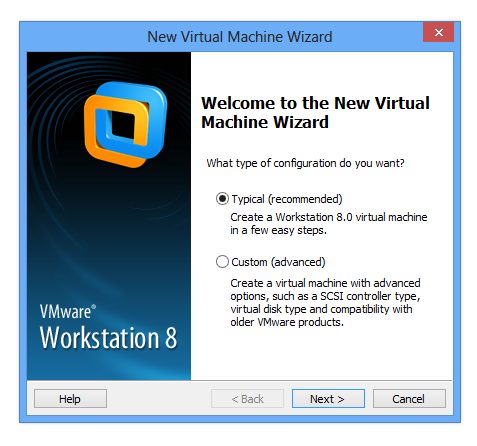
Step 1. First of all, you need to create a new virtual machine. You can select the “Typical,” which is recommended.
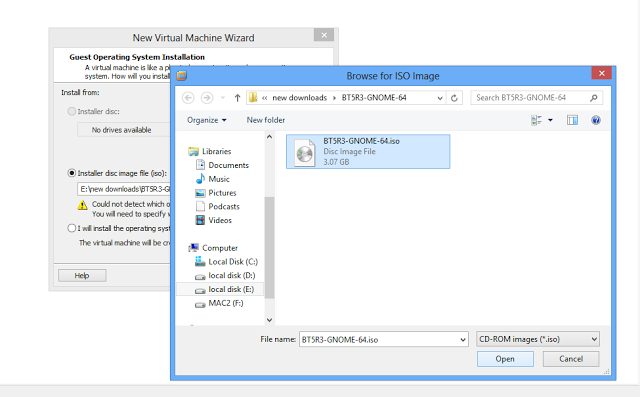
Step 2. Next, you have to choose installer ISO (where you have to browse to the ISO file of Backtrack)
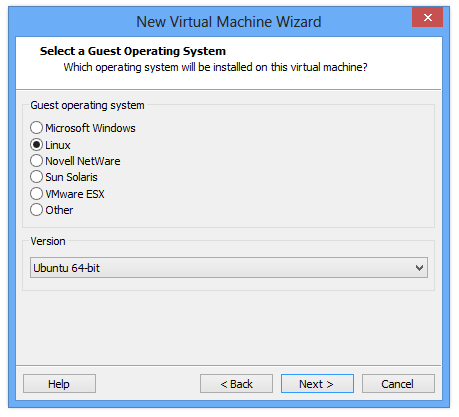
Step 3. Now you will be asked to select a Guest operating system. Select “Linux” and “Ubuntu” as version and click on next,
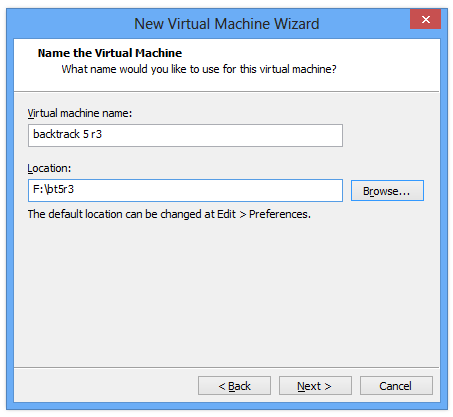
Step 4. In the very next window, you will be asked to Name the virtual machine & Location,
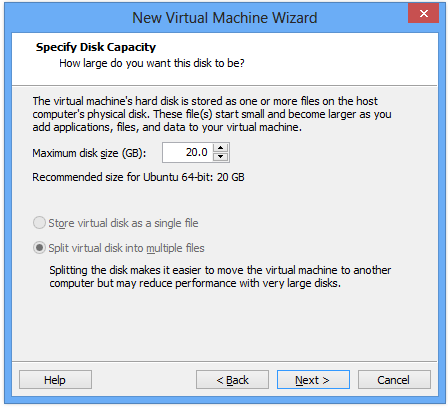
Step 5. Now you have to specify the disk capacity (Recommended is 20GB)
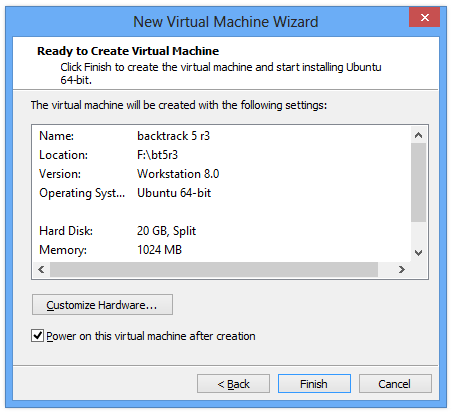
Step 6. After all that, in the very next window, you have to click “Finish.” Now you have to wait to enter the boot screen.
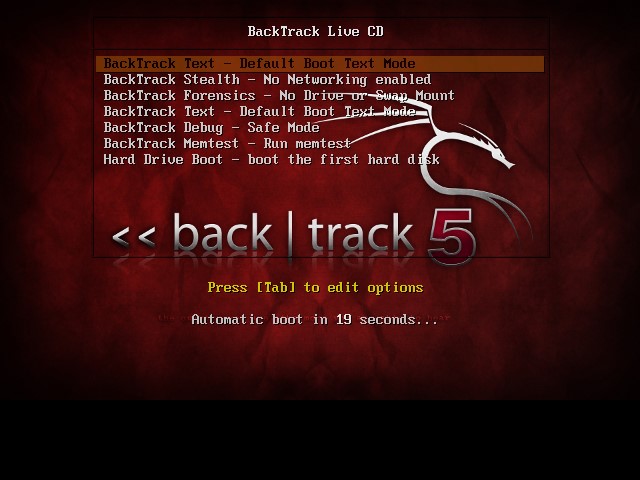
Step 7. Now you have to wait until the screen appears to select “Backtrack Text- Default Boot Text Mode.”
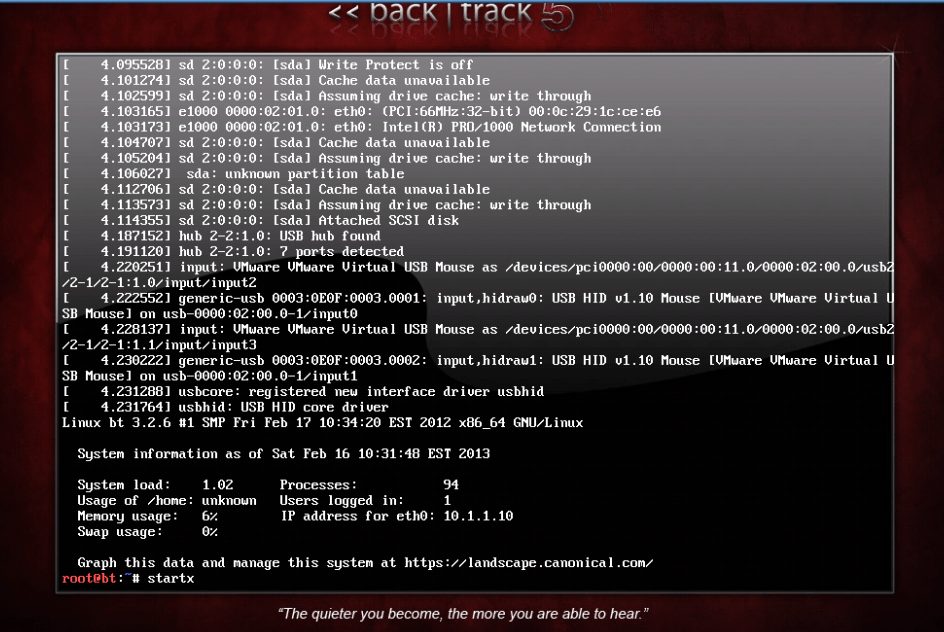
Step 8. The next window will look like this. You have to type starts to get GUI and hit Enter.
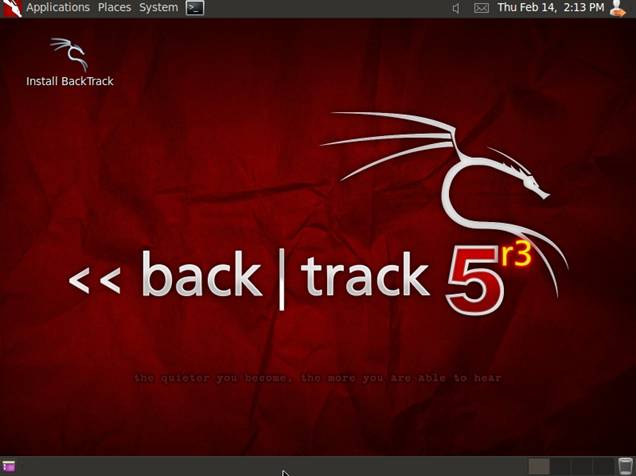
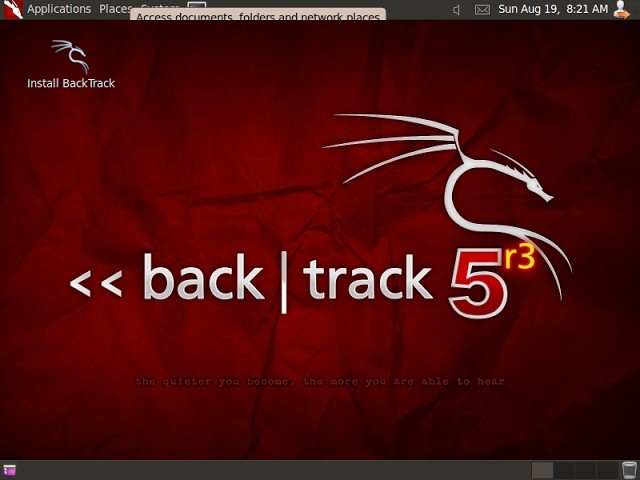
Step 9. You will see a Desktop area where you will find an icon “Install BackTrack” you need to run it.
Now you have to go through some easy processes like setting up the clock and location and language. The procedure to install BackTrack is easy. You have to follow the onscreen instructions.
Today, we had administered valuable tips on installing and running Backtrack in windows. You can make full use of this feature. Now you can use Windows and run another Operating System while using Windows. Share this post with your friends, too, if you liked it! If you are feeling any problem with any steps mentioned above, please ask us in the comments.


