Well, Microsoft has improved Windows 10’s taskbar a lot. The new taskbar of Windows 10 is customizable in many ways. For instance, you can pin apps, websites, folders, etc. to the taskbar. Not only that, but Windows 10 also lets you move the taskbar to the left, right, top, or bottom of the screen.
If you are amongst those who like to pin tens of programs to the taskbar, then you might like the idea of a secondary taskbar. Although Windows 10 doesn’t have a secondary taskbar, you can use a third-party tool to add an extra taskbar on the operating system.
There’s software available on the web known as ‘Switch’ that lets you add a secondary taskbar on Windows 10. Your second taskbar can be used to pink apps and folders, just like the primary taskbar. So, in this article, we have decided to share a working method to add the second taskbar on Windows 10.
Add Second Taskbar on Windows 10 Computer
Note: You might receive a warning message like ‘This program might harm your computer’ while installing Switch. You can ignore this warning as the program is safe to use.
Step 1. First of all, download & install Switch software on your Windows 10 computer.
Step 2. Once done, open the app and click on the ‘Next’ button.

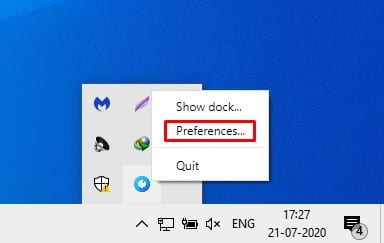
Step 3. From the app tray, you need to right-click on the ‘Switch’ and select ‘Preferences’

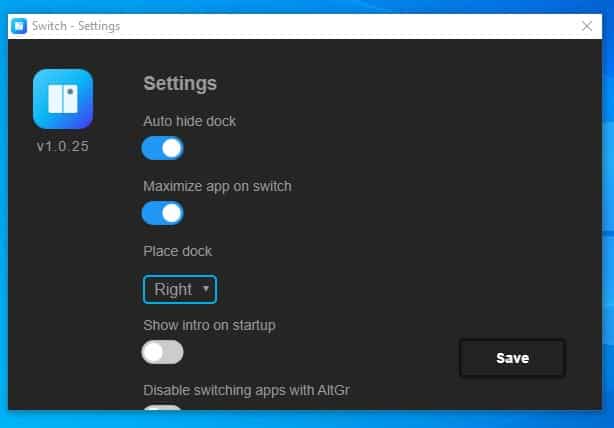
Step 4. Under the preference, you can configure the features of Switch. You can choose to auto-size, maximize app on switch, etc. You can even select the dock placement.

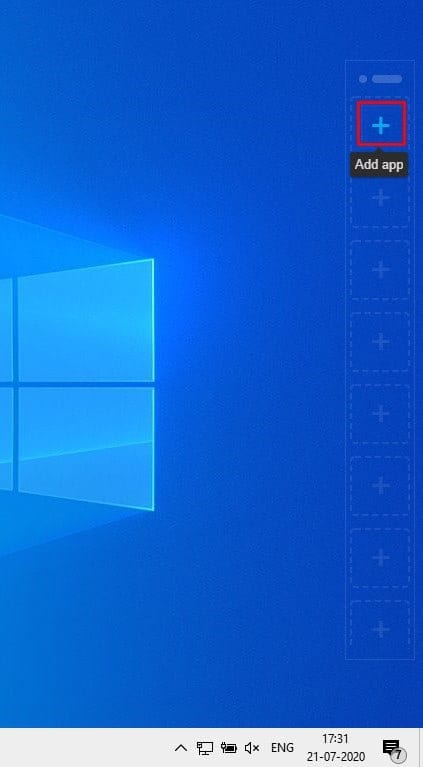
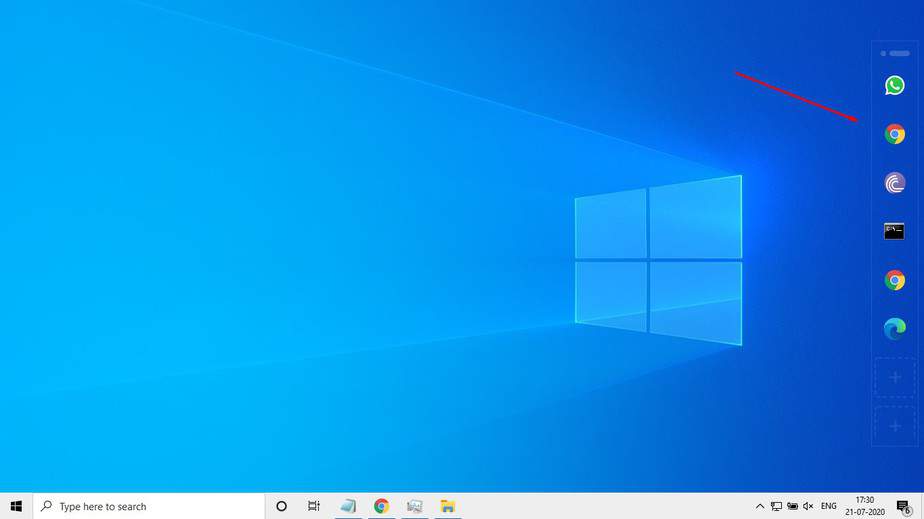
Step 5. Now you will see a secondary taskbar on your screen. You just need to tap on the (+) button to add your apps and files.

Step 6. You can add up to 9 apps on the secondary taskbar.

That’s it! You are done. This is how you can add a second taskbar on Windows 10.
So, this article is all about how to add a second taskbar on Windows 10. I hope this article helped you! Share it with your friends also.