We all have experienced situations where the sound coming from the left felt louder than the right, and vice versa. This imbalance of sound on the left and right is very common and can be fixed by following these steps.
1. Adjust Audio Balance via Settings
We will use the Windows 11 Settings app to adjust a sound device’s left and right audio balance.
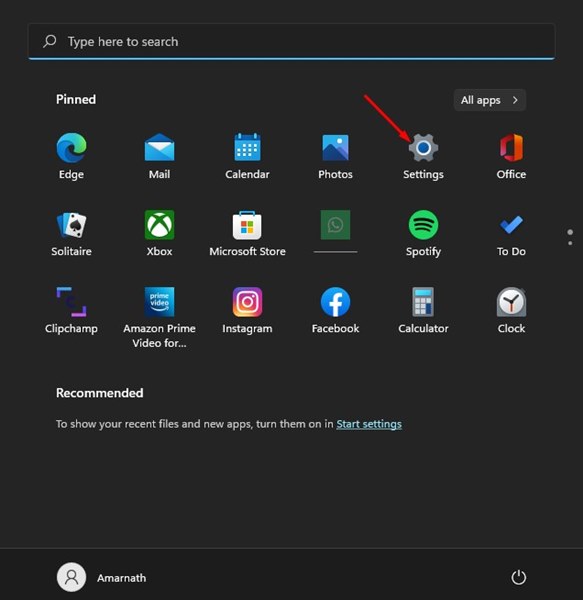
1. Click the Windows 11 Start button and select Settings.
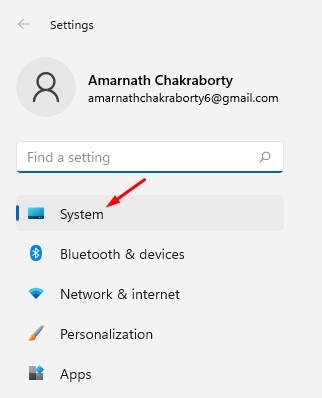
2. Switch to the System.
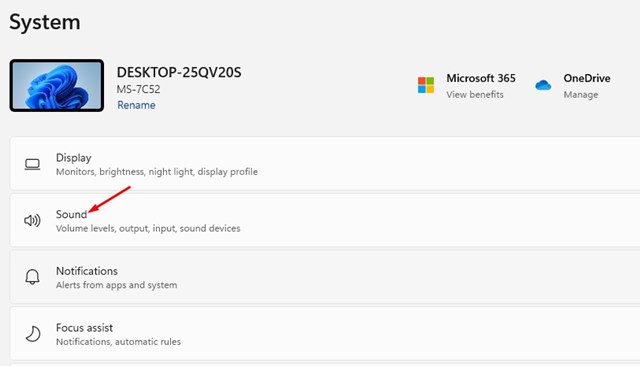
3. Click on Sound.
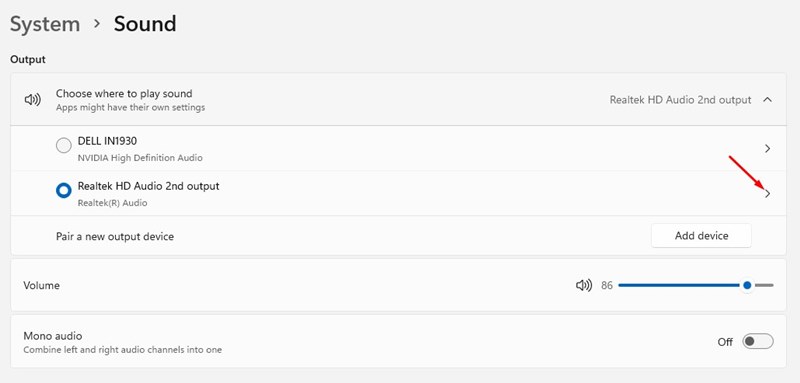
4. Choose the output device you would like to modify.
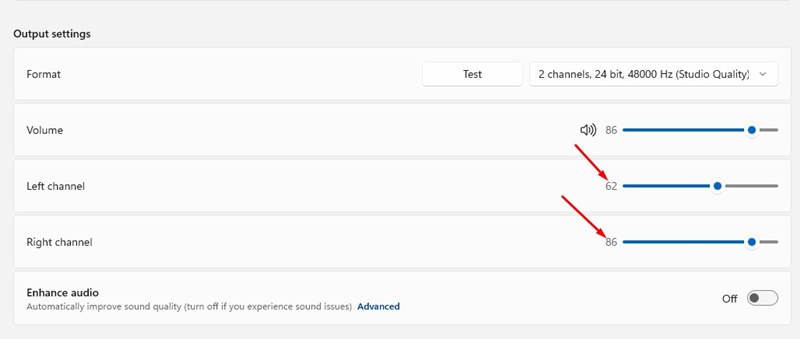
5. On the properties page for the sound output device, find the Left Channel and Right Channel options.
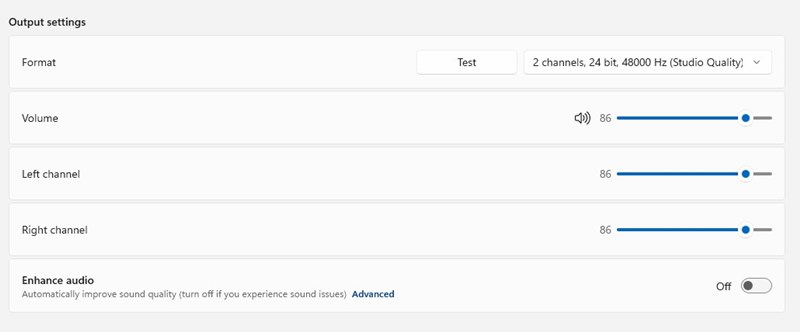
6. You need to drag the slider for both Left and Right channels to balance the audio output.
2. Adjust Audio Balance via Control Panel
You can even use the Classic Control Panel on Windows 11 to adjust the left and right audio.
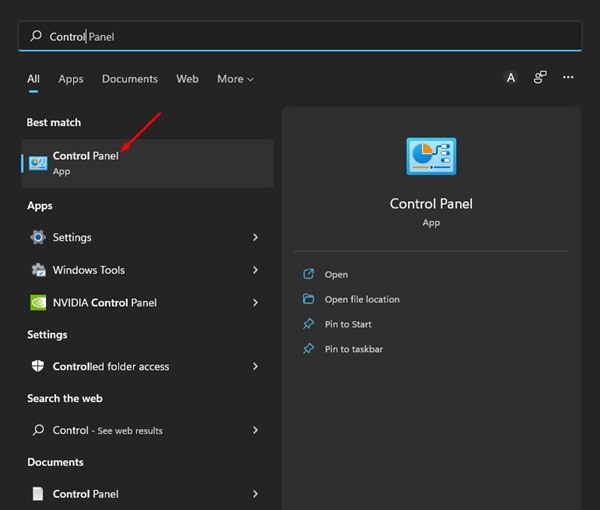
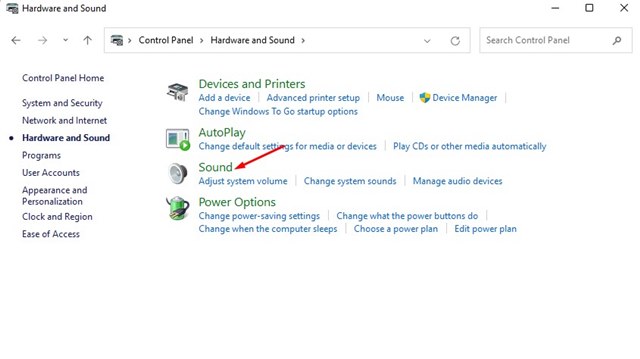
1. Open Control Panel from the Windows Search.
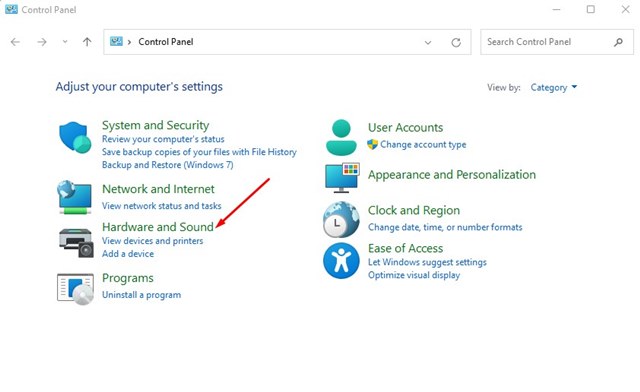
2. Click on Hardware and Sound.
3. Click on Sound.
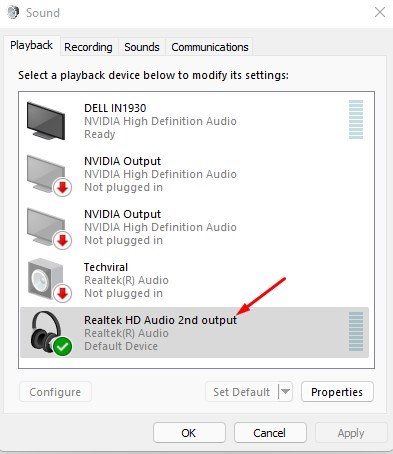
4. Double-click on the output device.
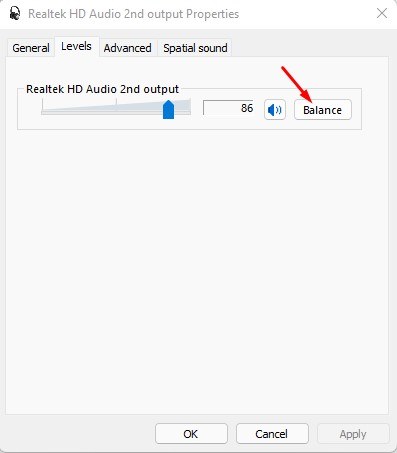
5. Switch to the Levels tab. Click on the Balance.
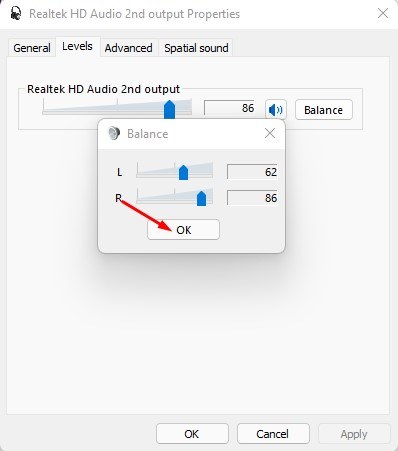
6. Adjust the audio balance levels for the Left and Right channels. Click Ok.
Frequently Asked Questions
Why does my audio sound unbalanced?
Incorrect audio settings are likely to cause unbalanced audio. You should also check whether your speakers are faulty.
How do I balance the audio left and right on Windows 11?
You can make some changes in the Audio Settings or Control Panel on Windows 11 to balance the audio left and right.
Why does my speaker have no sound on my PC?
You need to update the audio driver and enable the speaker in Windows 11’s audio settings. Also, check whether the speakers are properly connected to the PC.
This guide explains how to adjust the left and right audio balance in Windows 11. If you have any doubts, let us know in the comment box below.


