The BitLocker To Go program encrypts USB and removable drives and restricts access through a password. This excellent security feature prevents unauthorized access to your files and documents on your drive. Here’s how you can enable & use BitLocker to Go.
How to Encrypt a USB Drive with BitLocker
Encrypting a USB drive with BitLocker to Go on Windows 11 is pretty easy; follow these steps.
1. Click on the Windows 11 Start button and select Settings.
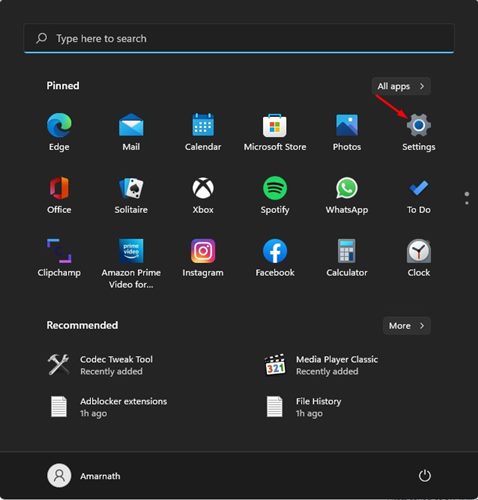
2. Switch to System.
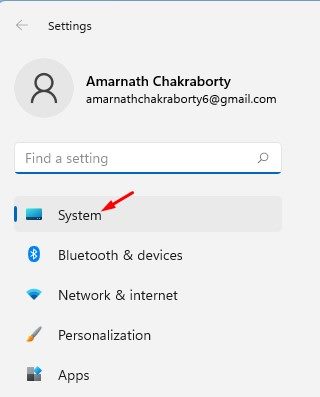
3. Click on Storage.
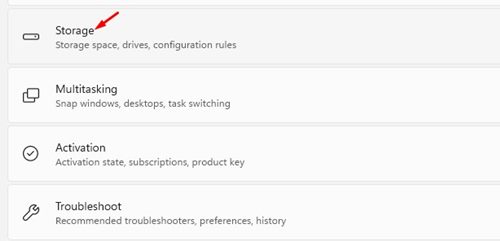
4. Click on Advanced storage. Then, on the next menu, click on Disks & volumes.
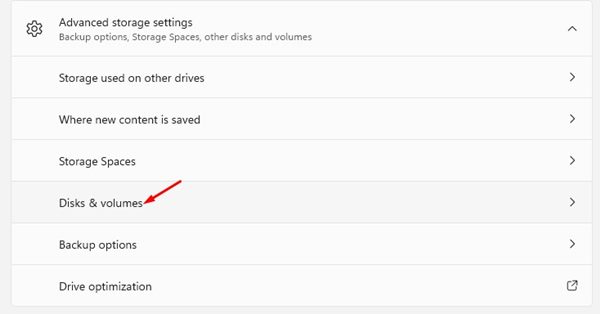
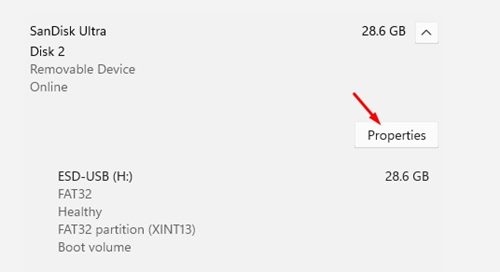
5. Select the USB drive and click Properties.
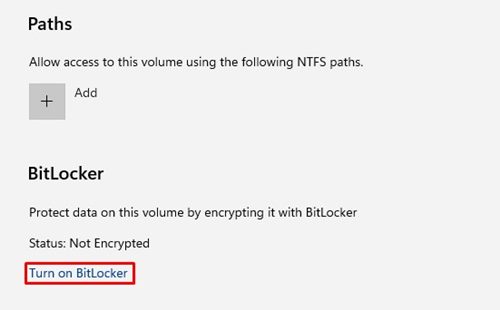
6. Click the Turn on BitLocker link.
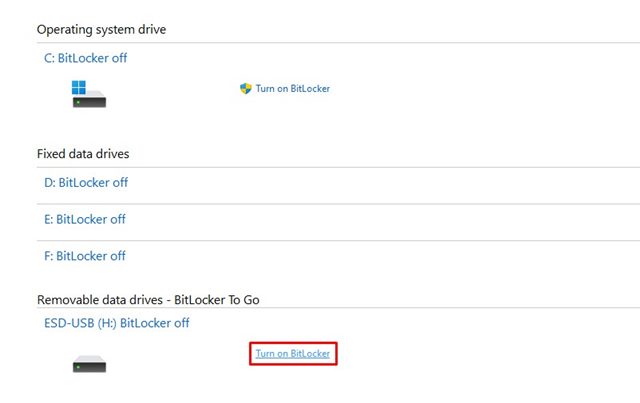
7. Click the Turn on BitLocker link behind the drive.
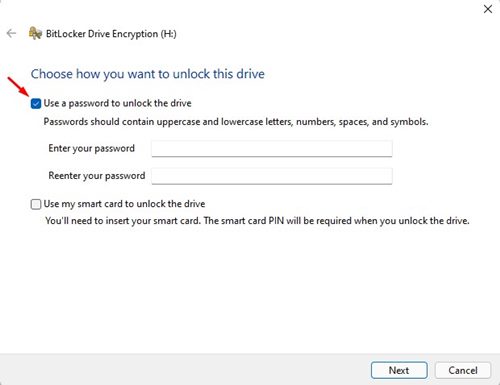
8. Select the Use a password to unlock a drive option and type in the password. Once you’ve done this, click Next.
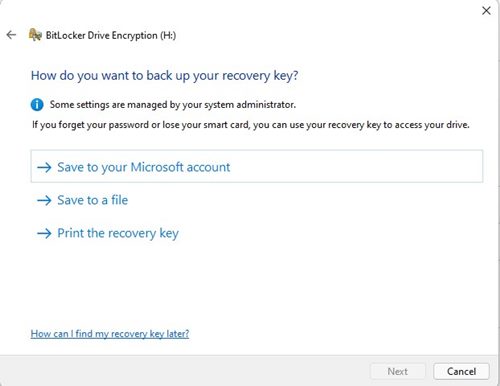
9. You will be asked to save the recovery key. You can choose to Save to your Microsoft account, Save to a file, or Print the Recovery key.
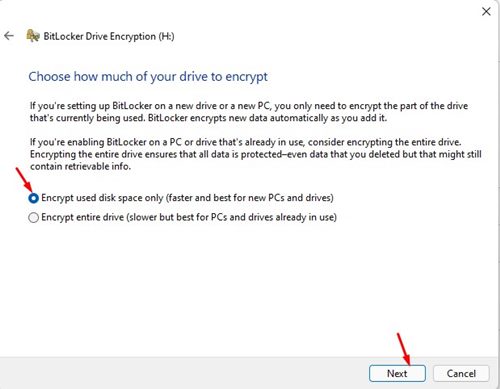
10. Select Encrypt used disk space only, and click Next.
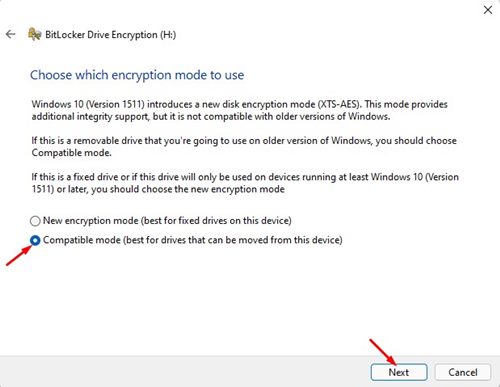
11. Select Compatible mode and click Next.
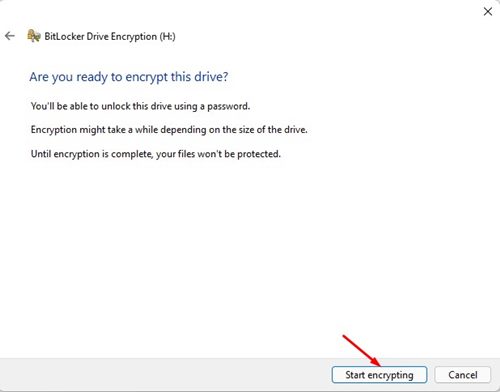
12. Click the Start encryption button to begin the encryption process.
How to Access an Encrypted USB Drive?
Once the drive is encrypted, you will find a yellow lock icon next to the encrypted drive.

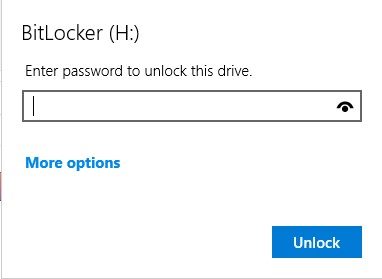
When you try to access the data stored on the encrypted drive, you will be asked to enter the password. Enter the password to unlock the drive.
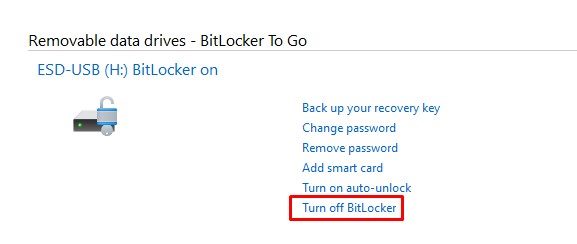
How to Disable BitLocker?
Disabling BitLocker on Windows 11 is pretty easy; follow the steps shared below.
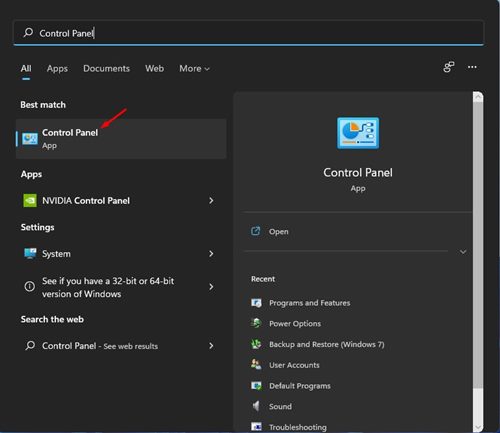
1. Click on the Start button and select Control Panel.
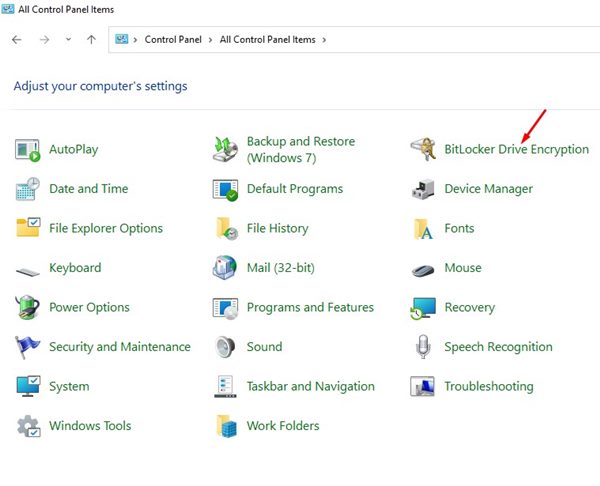
2. Select BitLocker Drive Encryption.
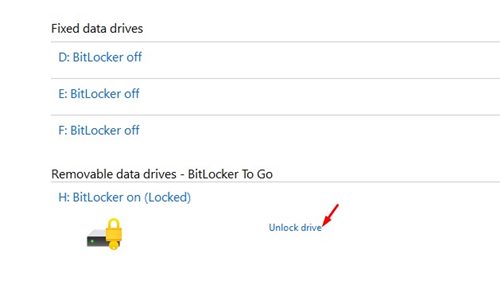
3. Find your encrypted drive, and click Unlock drive.
4. Click Turn off BitLocker.
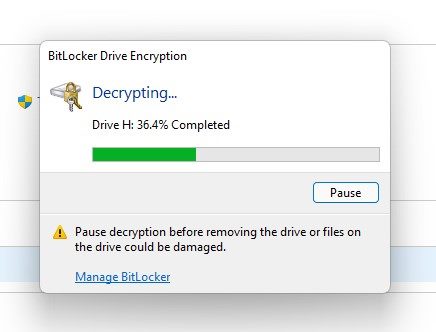
5. The BitLocker Drive Encryption process will start and decrypt the drive.
BitLocker To Go is a great security feature that everyone should use. If you have any doubts related to this, let us know in the comment box below.


