The black screen may appear at boot for several reasons, such as faulty Windows updates, outdated device drivers, system file corruptions, third-party app interface with boot, malware attacks, etc. If you’ve recently encountered a black screen at boot on Windows 11, here’s what you should do.
1. Make sure Windows is Responsive
If you’re addressing the black screen, it’s essential to ensure that Windows is responsive.
Press the Windows Key + CTRL + SHIFT + B button to restart your graphics driver. If your PC has a speaker, you will hear a beep, confirming that your PC is responsive.
If your PC isn’t responsive, you need to force shut down and check if it’s responsive.
2. Check the Connection with the Monitor
Windows 11 may be responsive, but you see a black screen because of a faulty connection with the monitor.
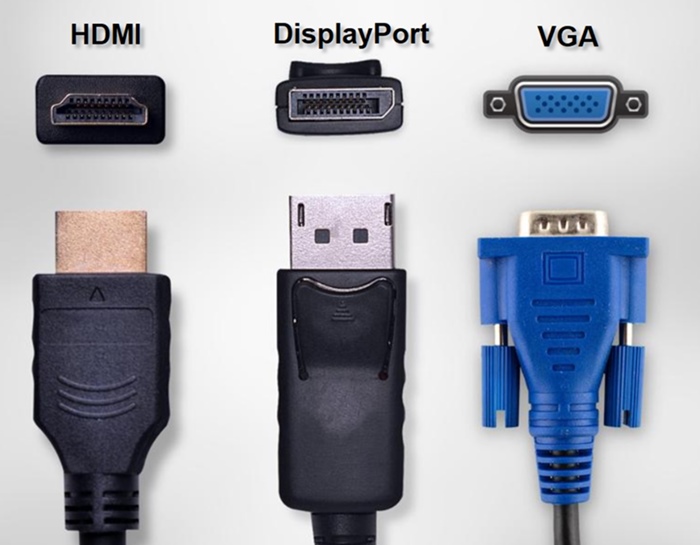
The Black screen at boot also occurs due to an interrupted connection between your PC and its display monitor. You need to check the wires that connect the monitor to your PC.
If there are no wire problems, you should check the monitor itself. If you suspect your monitor has a fault, you can have it checked by a local technician.
3. Check the Projection Settings
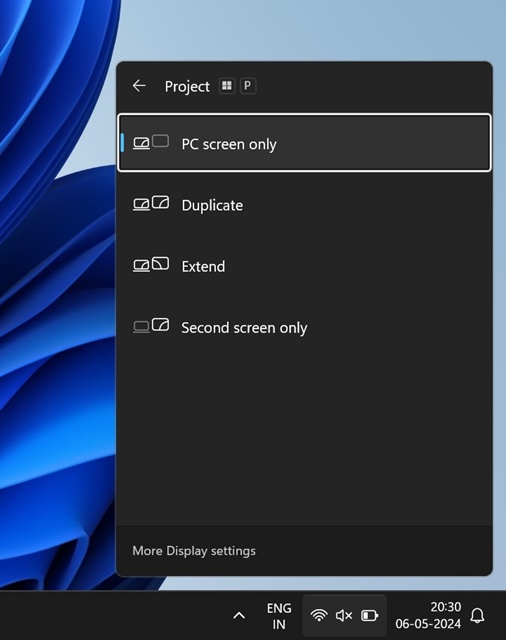
Wrong projection settings can also cause Windows 11 to show a black screen. Your display may be set to project on a second screen that doesn’t exist.
When this happens, your monitor will display a black screen. You can check the Windows projection settings by pressing the Windows Key + P button. When the Projection settings open, select the PC screen only. This will turn off all other display projection settings.
4. Remove All other External Devices
If you use external devices like a portable HDD, Keyboard, Mouse, or any other device, you must unplug them and try booting your PC.
After removing all external devices, restart your computer and check whether you still have the black screen issue.
If you don’t get the black screen at boot after unplugging your external devices, you need to plug each device in once until you find the one triggering the problem.
5. Reinstall the Display Drivers
Outdated or corrupted display drivers are one of the prominent reasons for the black screen at boot on Windows 11. You can rule out this problem by reinstalling the display drivers on your PC.
If you can see the login screen
If you can see the login screen on Windows 11, follow these simple steps to reinstall the Display Drivers.
- Restart your Windows 11 PC.
- At the login screen, hold the Shift and then select Power > Restart.
- After the restart, navigate to Troubleshoot > Advanced Options > Startup Settings > Restart.
- Press F5 or F3 and select Safe Mode with Networking.
If you only see a Black screen but have a Recovery drive
If you can’t see anything but have a recovery drive, follow these simple steps to boot into safe mode.
- Shut down your Windows 11 and connect a recovery drive.
- Navigate to the Troubleshoot > Advanced Options > Start-up Settings > Restart.
- After the restart, press F5 or F3 and select Safe Mode with Networking.
If you see a Black screen and don’t have a Recovery Drive
If you don’t see anything on your PC screen or have a recovery drive, follow these steps to boot into safe mode.
- Create a Windows 10/11 installation media.
- Set your PC to boot from the connected USB drive.
- When the Windows installation wizard opens, select Repair your computer.
- Navigate to the Troubleshoot > Advanced options > Start Up settings > Restart.
- Press F5 and select Safe Mode with networking.
Reinstall your Display Driver
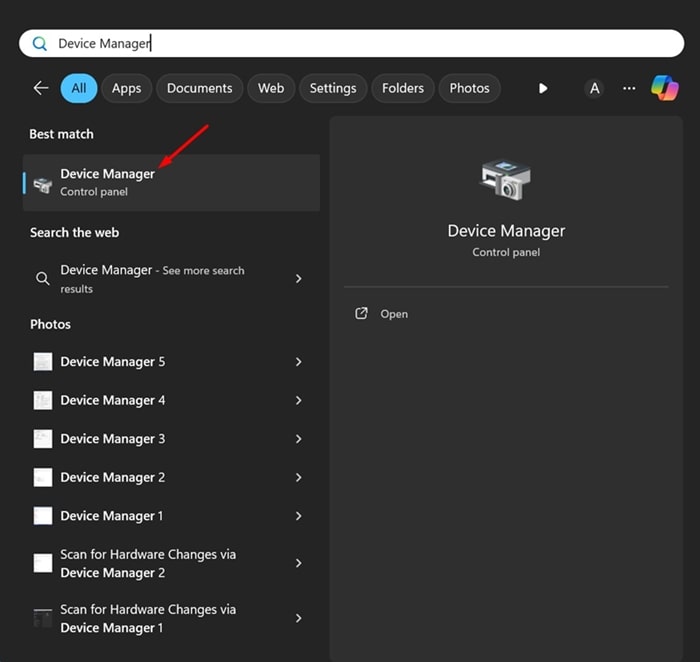
Once you boot into Safe mode on Windows 11, you can access the Device Manager to reinstall the Display drivers.
1. Open Device Manager from the Windows Search.
2. Expand the Display adapters.
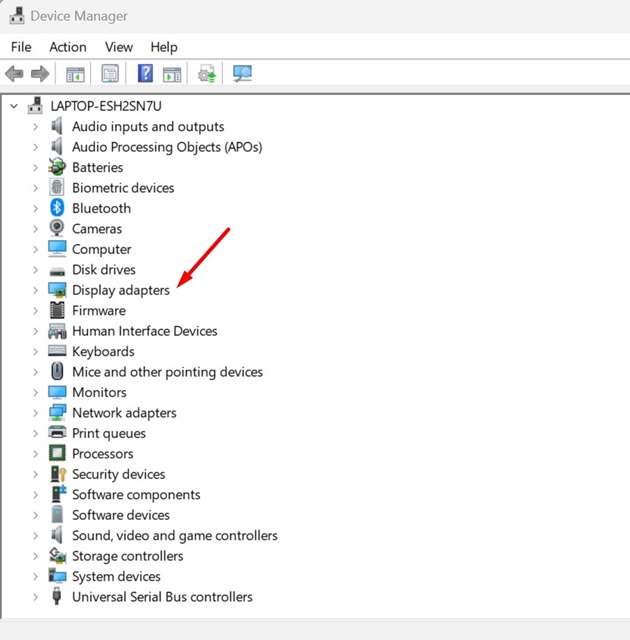
3. Right-click on your connected display adapter and select Uninstall.
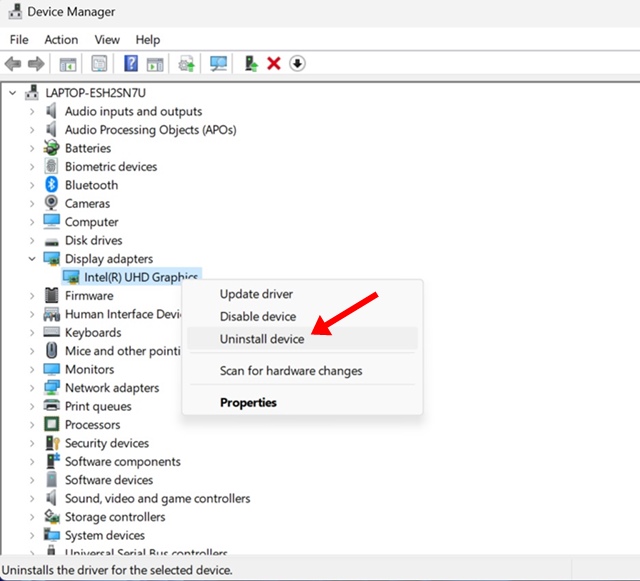
4. Reinstall the latest device drivers from your GPU manufacturer’s website.
6. Try cleaning inside your computer case
PC overheating could be another reason why you’re getting a black screen problem. To reduce the overheating problem, you should clean inside your computer case.
Regular cleaning is essential to keep your PC cool and extend the lifespan of its components. So, shut down your PC, unplug all wires, and open the computer case.
After opening a computer case, you can remove the dust with a soft air blower and use a microfiber cloth to remove the dust residue.
7. Check the internal hardware components
You need to double-check the hardware components you’ve recently connected. It may be a GPU, RAM, WiFi card, etc. Whatever it is, check whether the hardware component is fitted correctly and is in the correct slot.
Also, you need to pay proper attention to the PSU or Power Supply Unit. When the PSU fails to deliver enough power to the hardware components, the black screen problem is triggered.
8. Take your PC to the local service center
If nothing worked in your favor, the ultimate solution is to seek professional help. You can take your PC to the local authorized service center and ask them to resolve the issue.
You won’t be charged anything if your device is within warranty; however, if you have an assembled PC, you must take it to the unauthorized service center to find the problem.
These are a few simple methods to fix the black screen at boot issue on Windows 11. In the comments, let us know if you need more help on this topic.


