The default display orientation is set to the Landscape mode (Horizontal) on every Windows device. The reason behind it is that users were used to the landscape mode, and it helps to utilize the space from left to right better.
However, at times, you might want to change the display orientation in Windows 11. There may be various reasons you may want to change the display orientation; maybe you want to project your PC screen to an external device with a different orientation, or perhaps you wish to change it for watching a specific video or reading something.
Whatever the reasons, you can rotate the system screen in Windows 11 in easy steps. You don’t even need to use third-party apps or edit the Group Policy or Registry file. You have to make a few changes to the Display Settings on Windows 11 to change the display orientation.
Steps to Change the Display Orientation on Windows 11
Hence, if you are looking for ways to change the display orientation on Windows 11, you read the right guide. In this article, we will share a step-by-step guide on how to change the display orientation on Windows 11. The process will be straightforward; follow them as we have mentioned below.
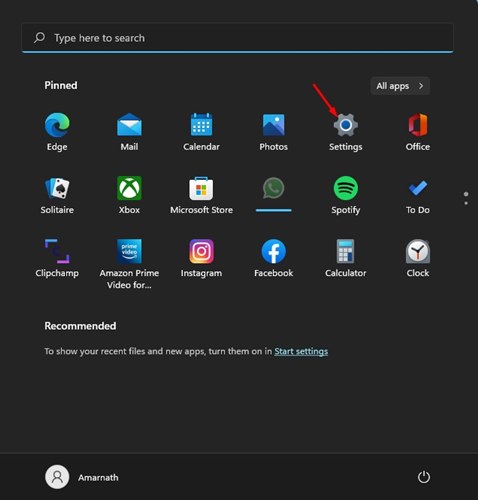
1. First, click on the Windows 11 Start menu and select the Settings app.
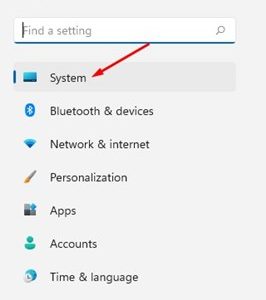
2. On the Settings app, click on the System tab on the left pane.
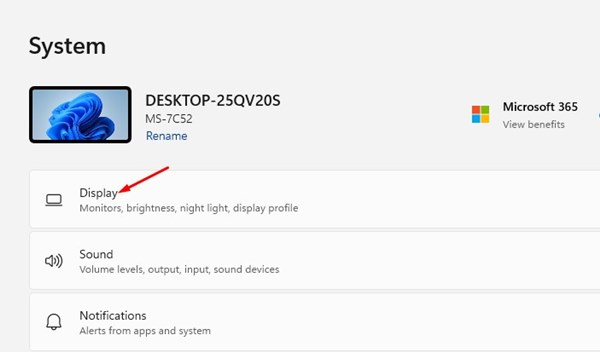
3. On the right pane, click on the Display option shown in the screenshot below.
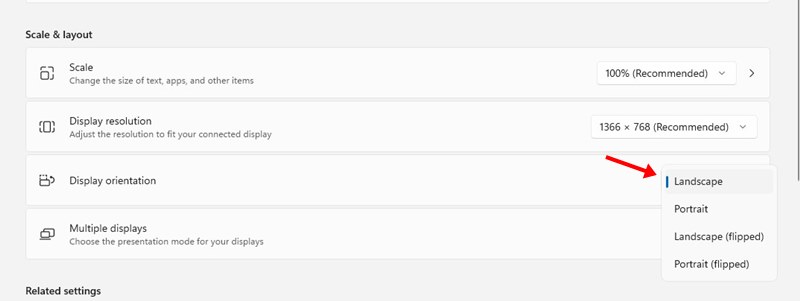
4. Now, on the Scale & layout, scroll down to the Display orientation.
5. Now click on the drop-down menu for Display Orientation and select the one that best suits you. Here are the four options that you will get:
Landscape – This is the default option. It rotates the screen by 180 degrees.
Portrait – This is the second display orientation option that rotates the screen by 90 degrees.
Landscape (flipped) – This one is a little bit different. It changes the display orientation from vertically to horizontally and flips the view.
Portrait (flipped) – This one changes the display orientation from horizontally to vertically and also flips the view.
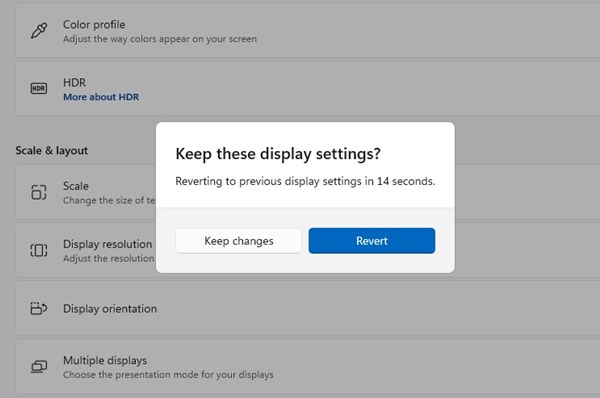
6. If you are unsatisfied with the new display orientation, click on the Revert button before the timer ends, as shown below.
Necessary: Changing the display orientation also changes the functionality of your mouse cursor. You may face a hard time using the device after changing the display orientation.
So, this guide is all about changing the display orientation on Windows 11. I hope this article helped you! Please share it with your friends also. If you have any doubts about this, let us know in the comment box below.
