We are pretty sure that once in your life, you have come across a situation where the text on your Android device seems too big. Well, on a Windows computer, we can change the screen resolution to adjust the text that appears on the screen. But, we can’t do the same thing on Android.
On the Android operating system, we need to alter the DPI on our Android smartphone. DPI means dots per inch and it represents the ratio of the device’s resolution to the display size. So, the higher the DPI, the more text content you can see on display.
What is Android DPI?
Well, if we look nearby, we will find tons of different Android devices. Each of them having different hardware components. That’s why developers publish apps and games based on sets of devices. Usually, there are multiple variants of apps and games available on the Play Store. When we download apps from the Play Store, the platform recognizes our devices and serves the compatible version.
Apk files are usually categorized by the DPI size, processor size, RAM, etc. DPI here means the display density. The DPI Value helps the app to know how much visible content can fit on the screen. So, if the app that you are trying to install finds that the DPI value of your device doesn’t match with the app, then you will face incompatibility issues while installing apps from the Play Store.
Steps To Change DPI Density On Android
On new smartphones, users are getting a feature to control the screen resolution. However, the ability to control the DPI is not available on smartphones running on Android 6.0 and lower. Therefore, in this article, we are going to share with you a working method to change DPI on Android Nougat or Above.
Using Easy DPI Changer
Easy DPI Changer is one of the best root app available on the Google Play Store that allows users to change and reset DPI. So, by changing the DPI, you can change and reset screen resolution, reset padding, etc. Here’s how to use the app.
Note: The tutorial which we are going to discuss below can brick your device or may not work properly. You need to ensure the correct value before proceeding to the steps listed below.
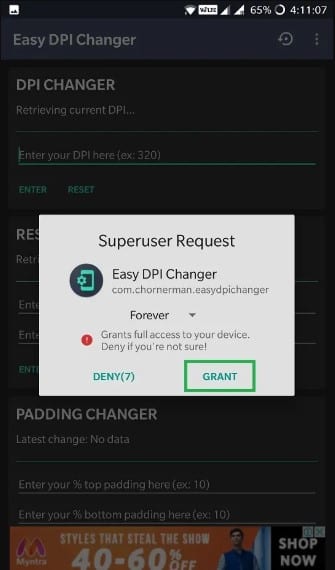
Step 1. First of all, install & run Easy DPI Changer on your Android smartphone from the Google Play Store.
Step 2. The app only runs on rooted Android smartphones. So, it will ask you to grant the Superuser Request. Make sure to tap on ‘Grant’ when it asks for superuser permission.
Step 3. Now, you will see the main interface of the app. On the very first option select ‘DPI Changer’ and then you need to enter the desired value. Make sure to enter the correct value.
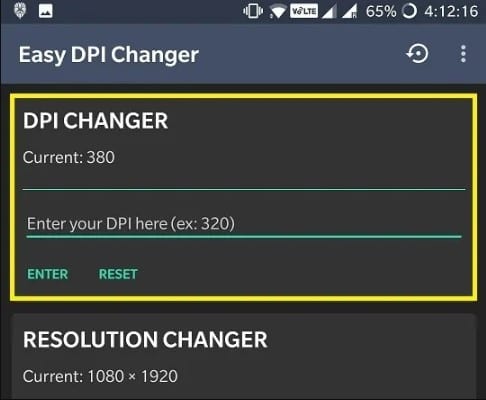
That’s it, you are done! Now just restart your Android smartphone for the changes to take effect.
Using Build Prop Editor
By editing Build prop files, you can easily change DPI Density on Android. To edit the Build Prop file, you need to have a rooted device. So, if you have a rooted Android smartphone, then follow some simple steps listed below.
Step 1. First of all, download & install BuildProp Editor on your Android smartphone from the Google Play Store. You can get the download link from here.
Step 2. In the next step, open the app and grant the ‘Root Permission’
Step 3. Next, head to the ‘Build Info’ section and you need to find the file ro.sf.lcd_density. Open the file with any text or HTML viewer app.
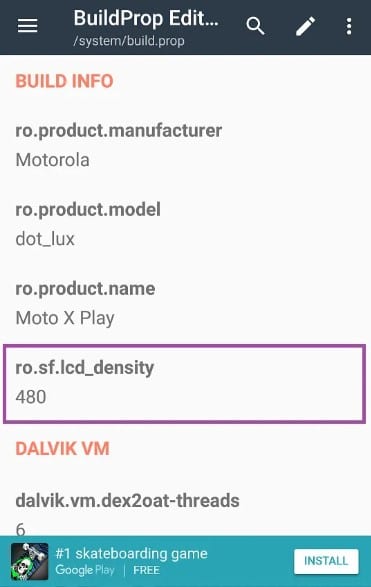
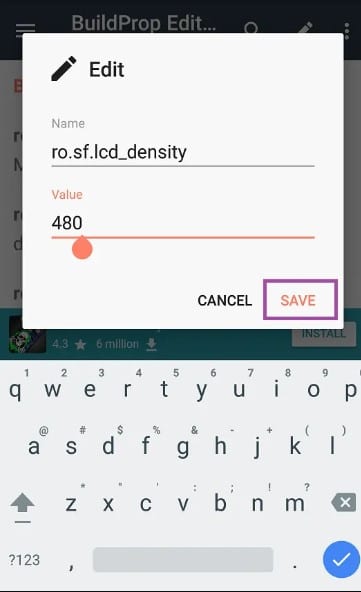
Step 4. Under the Value field, enter the value and then tap on the ‘Save’ button.
That’s it, you are done! Now just restart your computer, and the DPI density of your Android will be changed after the reboot.
Using Developer Option
If you don’t have a rooted device, then you need to follow this method to change the Android resolution. Follow some of the steps given below to change DPI density on Android via the Developer option.
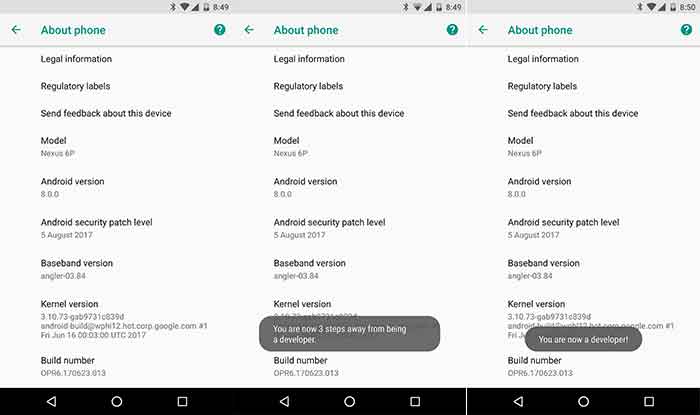
Step 1. First of all, head to the Settings > About Phone. Now scroll down and find ‘Build Number’. You need to tap on the ‘Build Number’ 5 to 6 times continuously until you see the ‘You’re a developer now’ notification.
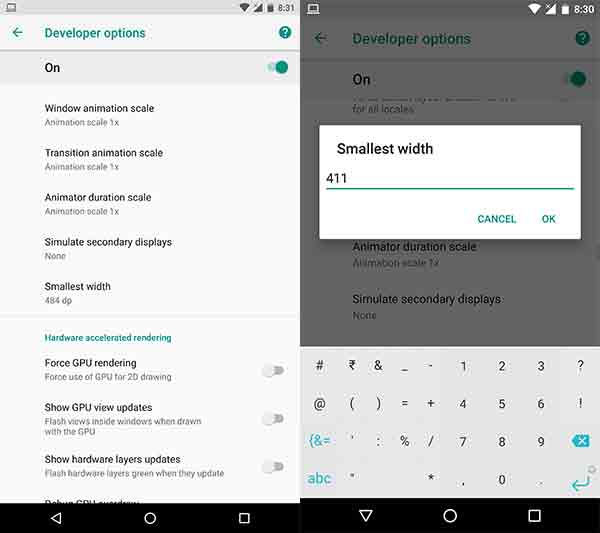
Step 2. Now open Settings > System > Developer Options. Under the Developer Option, you need to find the option ‘Smallest Width’
Step 3. Under the ‘Smallest Width’ you will find the default DPI value of your device. Make sure to note down the default value so that you can restore it back.
Step 4. Tap on the ‘Smallest Width’ and you will be asked to enter the new value.
That’s it, you are done! You just need to enter the dpi value of your choice to make changes. If you don’t like the changes and want to revert back to the default, enter the default DPI value which you have noted in Step 3.
Conclusion
So, this article is all about how to change the DPI density on Android. If you have any doubts related to this, let us know in the comment box below. I hope this article helped you! Please share it with your friends also.


Changing the dpi in developer mode made everything on the phone unreadable these instructions are NOT useful for correcting photo sharing issues