Recently, Microsoft introduced its new desktop operating system – Windows 11. Compared to the older version of Windows, Windows 11 has more features and customization options.
Also, the new operating system from Microsoft has a more refined look. By default, Windows 11 changes the wallpaper automatically on the Lock Screen. So, every time you enter the lock screen, you are presented with new wallpaper.
Also Read: Download Windows 11 ISO File
How to Change Windows 11 Lock Screen Wallpaper
However, you can change the lock screen Wallpaper on Windows 11 manually. Hence, in this article, we will share a detailed guide on how to change the Windows 11 Lock Screen Wallpaper. Let’s check out.
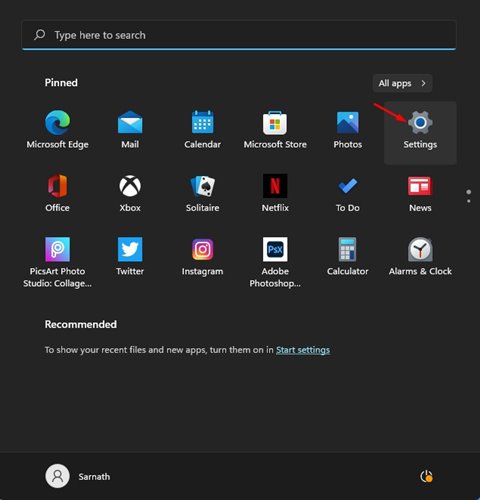
1. First of all, click on the Start button and click on the Settings icon. Alternatively, you can press the Windows Key + I button to open the Settings directly.
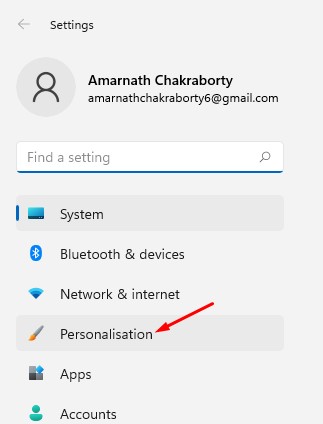
2. On the left pane, click on the Personalization option.
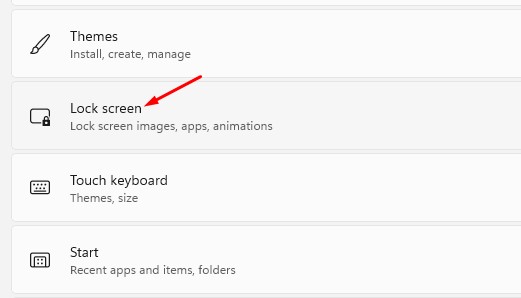
3. Click on the Lock Screen option on the right pane, as shown in the screenshot below.
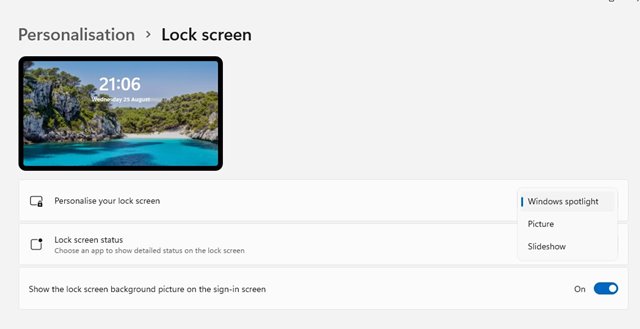
4. Now under the Personalize your lock screen, you will find three different options.
Windows Spotlight: Images were set Automatically by Windows 11.
Picture: This option allows you to choose an image from Microsoft or a Photo from your collection.
Slideshow: This option lets you select a folder containing photos. This option also automatically changes the wallpapers at regular intervals.
5. If you want to use your photo as lock screen wallpaper, select Picture and browse the image.
6. You can even pick apps that can show notifications on the Lock Screen. For that, select the apps on the Lock Screen Status.
That’s it! You are done. This is how you can change the Windows 11 Lock Screen Wallpaper.
So, this guide is all about how to change the Windows 11 Lock Screen Wallpaper. I hope this article helped you! Please share it with your friends also. If you have any doubts related to this, let us know in the comment box below.


