One of the most exciting features of Windows 10 is it provides users with an experience that adjusts smoothly to different device types. Let me tell you; Windows 10 is the most data-hungry version of Windows now.
However, specific tools are available for Windows 10 to control the volume or usage of data exchanged within the network. Even if you don’t want to use any third-party tools, you can make some changes to the Network settings on Windows 10 to save the data usage.
Best Ways to Control The Data Usage In Windows 10
Hence, if you are looking for ways to control or save data usage on Windows 10, you have landed on the right page. Below, we have shared a step-by-step guide on managing data usage in Windows 10. Let’s get started.
1. Check how much data you are using
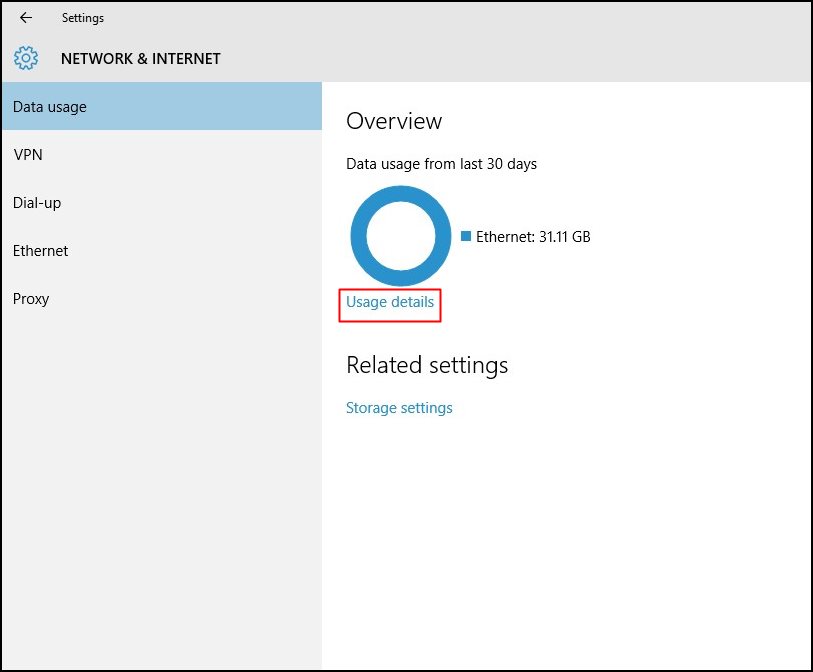
Follow the instructions to control how much traffic you have made on your device. Open the settings menu (the simplified, not the Control Panel), select Network and Internet, then Data Usage/Network Usage, and click on Usage Details.
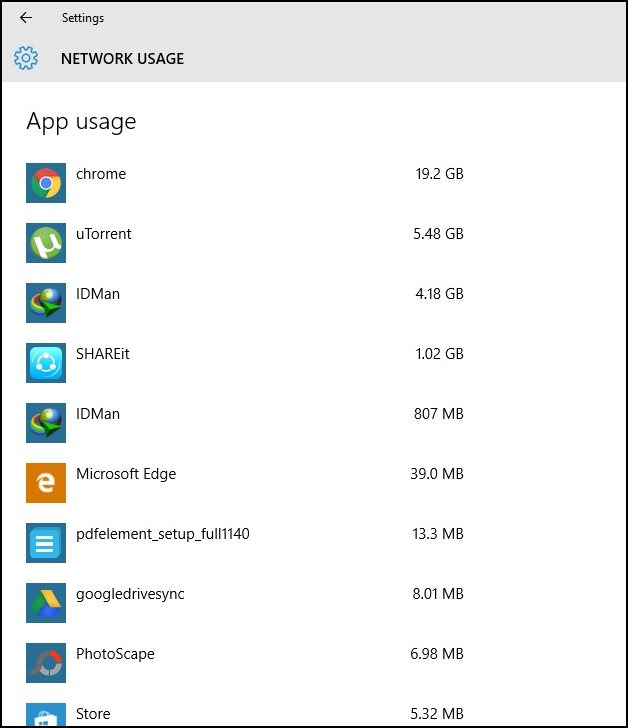
The above image will show a clear chart with which you can know how much data you have consumed with your connected networks, such as Wi-Fi and Ethernet.
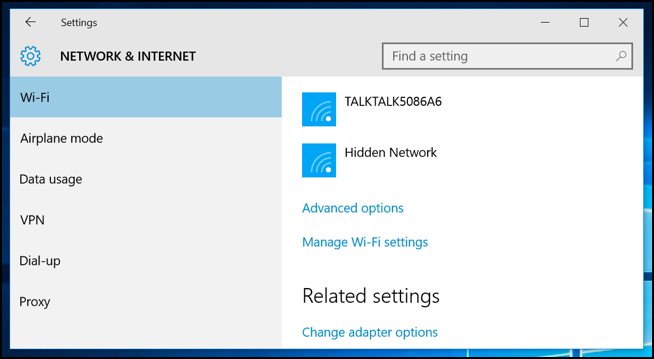
2. Set Up a Metered Connection
This feature, already present in previous versions of Windows, can set bandwidth usage limits for Wi-Fi or wired internet networks. This feature prevents the system from downloading and uploading large files, such as updates.
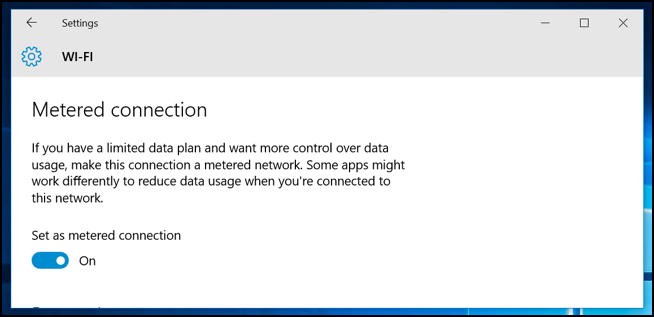
To set up a wireless network, you need to visit the Network and Internet Settings menu section and select Wi-Fi connection in the Advanced Options to select Metered connections are the best solution to Windows 10’s bandwidth-hungry nature. People with limited Internet connections could find it very useful.
3. Limit Data Usage of Background Apps
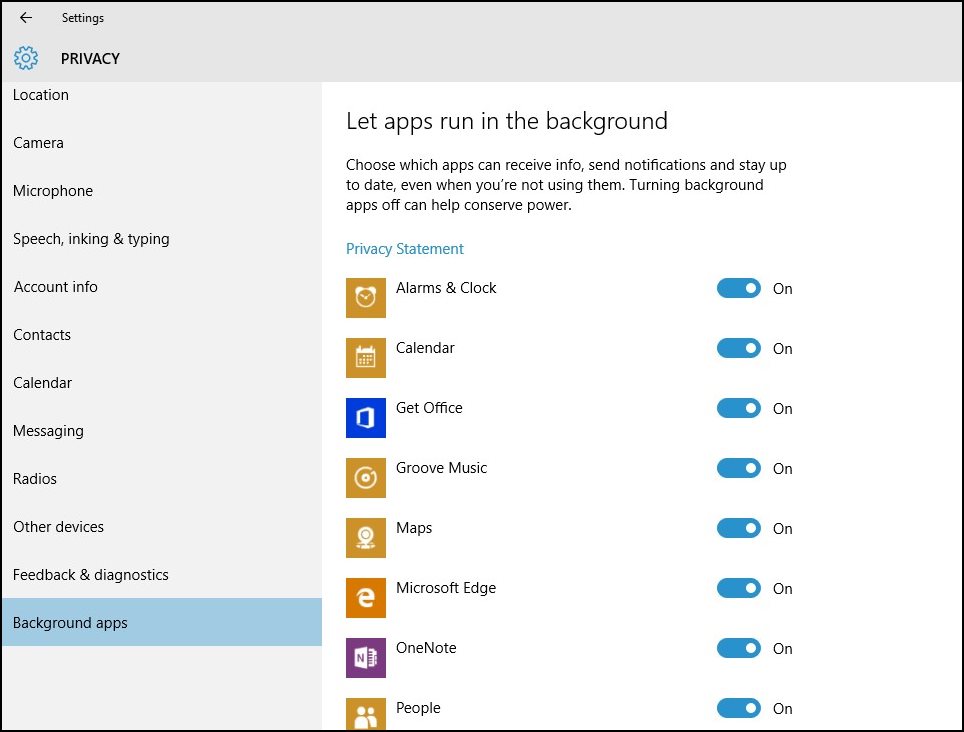
The new settings will help you optimize the process with low data consumption from heavy usage, ensuring you don’t download any third-party app that can exploit your network to stay synchronized.
To disable synchronization for a particular app, open Settings > Privacy and select the Background Apps tab on the left. A list of items accompanied by a selection will allow you to choose which apps can access the network to receive updates and notifications.
4. Configure Data Usage Limit On Windows 10
For those who don’t know, Windows 10 allows users to configure the data usage limit. You can set a specific data limit for a WiFi or Ethernet network adapter. So, if you have a limited internet connection, you can configure the data usage limit by following some of the simple steps listed below.
1. First of all, open Settings on your Windows 10.
2. Next, you need to click on Network & Internet.
3. In the next step, click on Data Usage.
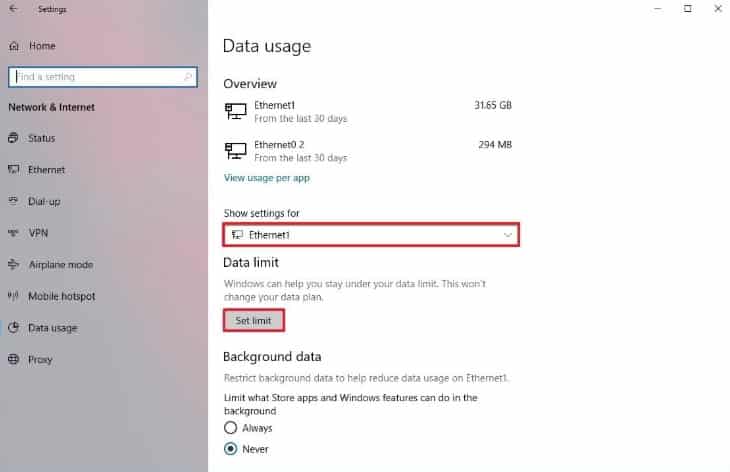
4. Under the Show Settings For the drop-down list, select the connected network adapter.
5. Now, under the Data Limit, click on Set Limit.
6. Now, you can set the data limit for the current network adapter.
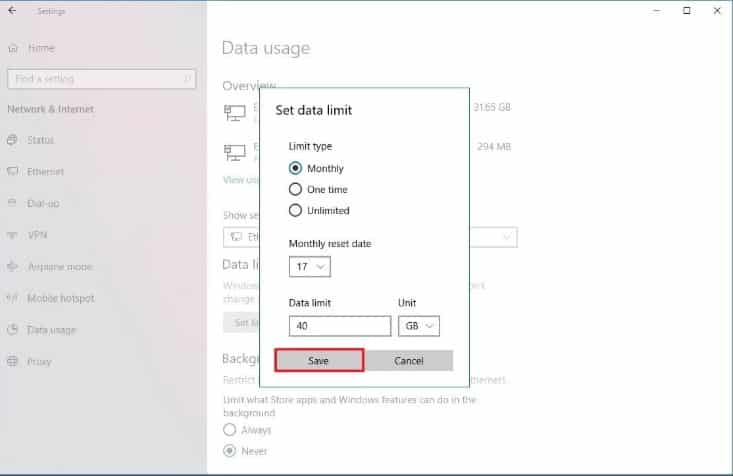
That’s it! This is how you can configure data usage on your Windows 10 computer.
So above is all about how to control data usage in Windows 10. You can follow every step very easily. Leave a comment below if you are facing any trouble with any of the methods discussed above. Share this post with your friends too!


Hi, I’m Sfundo. I have a problem with my Zoom app, it’s takes 500 MB in 10 minutes. I’ve tried the above instruction, I hope it will help