There could be various reasons behind creating a ZIP file on Windows. Maybe you want to save your storage space or create a ZIP file to password-protect the files. On Windows, you have multiple ways to create a ZIP file, but if you are going to create a ZIP file to reduce the file size, you may need to use some special apps.
Creating a highly compressed ZIP file is easy, especially on Windows 10 or 11 computers, but you need to use several third-party apps. Creating a highly compressed ZIP file also has drawbacks and is more prone to corruption.
Steps to Create a Well-Compressed Zip File
Hence, if you are looking for ways to create a highly compressed ZIP file on Windows operating system, you are reading the right guide. Below, we have shared some of the best ways to create well-compressed ZIP files on Windows. Let’s get started.
1. First, you must place all the files you want to compress in a single folder.
2. Now press CTRL+A to select all files. Once done, right-click and choose Send To > Compressed (zipped) folder.
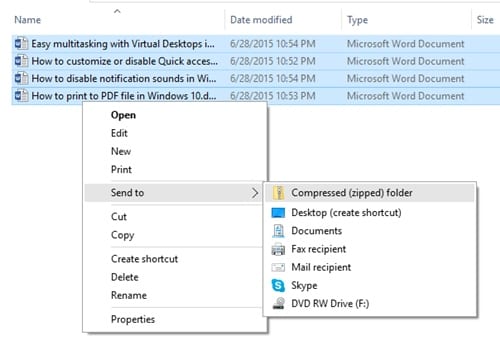
That’s it! This will immediately compress your files into a ZIP format. You can use this for regular file compression.
Using WinRar
Well, Winrar is one of the leading file compression tools available on the internet. It’s also one of the oldest file compression tools available for the Windows operating system. The good thing is that you can use WinRAR to compress files, and it can transform 1GB files into 100 – 200MB. So, let’s check out how to create a well-compressed zip file using Winrar.
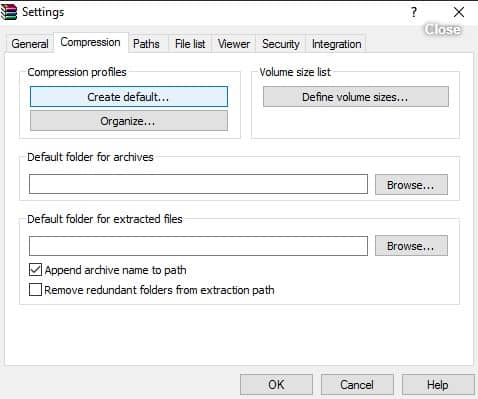
1. First, open Winrar software on your Windows 10 computer and head to Options > Settings.
2. In the Settings panel, head to the ‘Compression‘ tab and then click on ‘Create Default‘
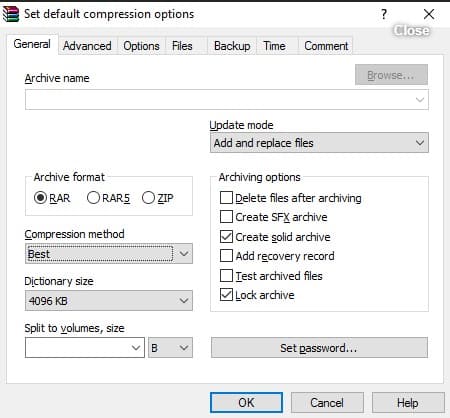
3. Now set the default compression method to the ‘Best‘. Now move to the General Option, and under the ‘Archiving options’ check the ‘Create Solid archive‘ and ‘Lock archive‘
4. Now move to the ‘Advanced’ tab and click on ‘Compression‘
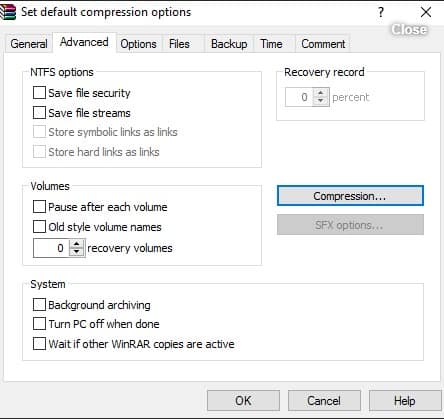
5. Under the Text compression, select ‘Auto‘. Under the Prediction order, select ’63’ and then on Memory to use, MB option, select ‘128’
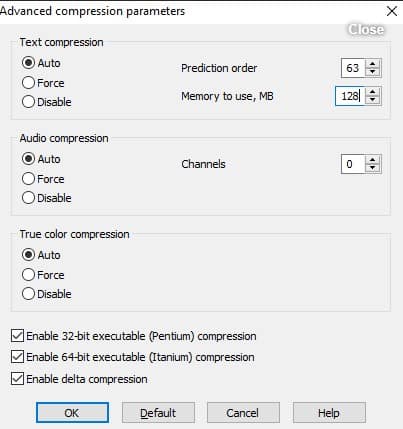
That’s it! This is the best setting for Winrar to create a highly compressed zip file.
Using KGB Archiver
Well, KGB Archiver is a free file compression tool for personal computers. The KGB Archiver allows users to compress files into more manageable formats. Guess what? KGB Archiver is so powerful that it can compress your 1GB file into 100MB.
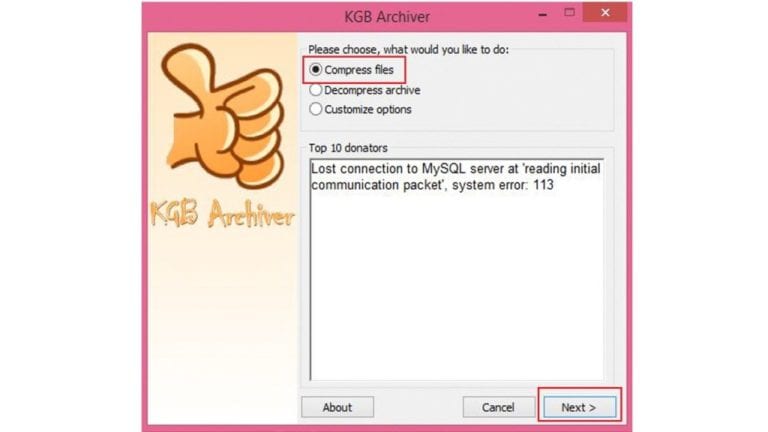
1. First, you must download and install KGB Archiver on your Windows 10 computer and then run the tool.
2. Once installed, you will see the screen like below. You must click on ‘Compress Files’ and then click Next.
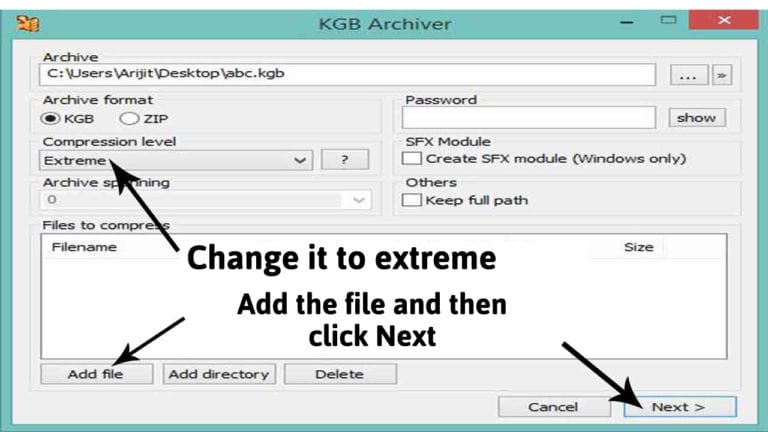
3. Now you will see the screen like below; here, you need to click on the three dots as shown in the image and then browse the file location where you want to save the compressed file.

4. Under the compression level, select ‘Extreme‘, add the file you want to compress and click on Next.
5. Now, the tool will start compressing your file. Wait for a few minutes for the process to complete.
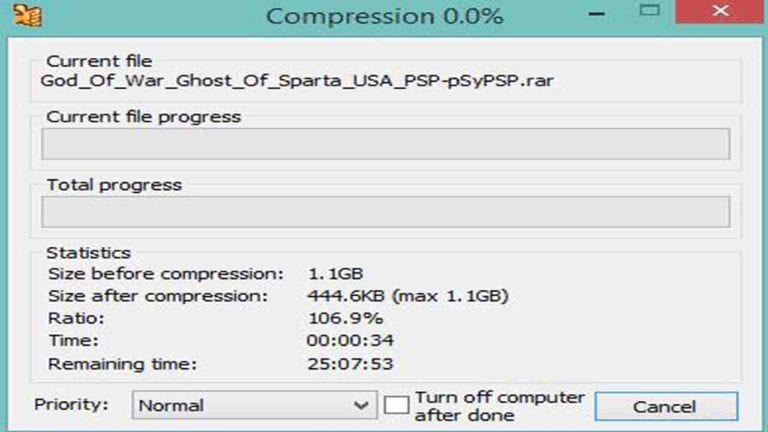
That’s it! This is how you can compress files at extreme compression levels using KGB Archiver.
So, these are some of the best methods to create a well-compressed ZIP file in Windows 10. Let us know in the comments below if you know other ways to create a highly compressed ZIP file.


