Password-protecting the entire drive prevents unauthorized access and adds an extra layer of security. The Windows operating system has a built-in tool for this: Bitlocker, encryption software that password-protects Windows drives.
However, if you use a pirated Windows operating system, you can’t use Bitlocker. In this article, we will share some of the best methods that would help you create a password-protected drive on a computer.
1. Using Hidden Disk
Hidden Disk is an encryption tool that creates a password-protected virtual disk. The virtual disks can be used to save files and folders. To unlock the virtual disk, you must enter the password.
1. First of all, download and install Hidden Disk on your computer
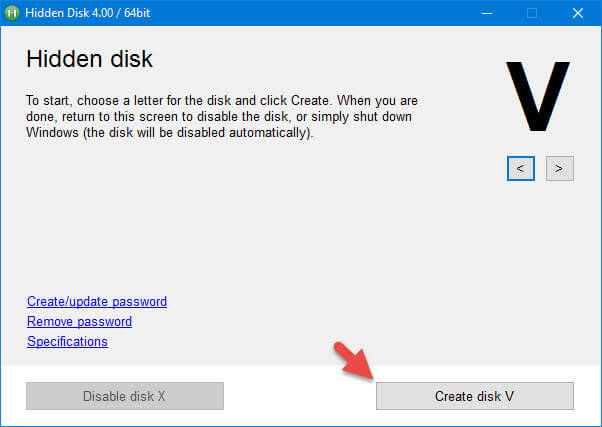
2. When the installation is finished, launch it using the desktop shortcut. Using the arrow buttons at the top right corner, select the drive letter of your choice and click the Create Disk button to create a hidden disk.
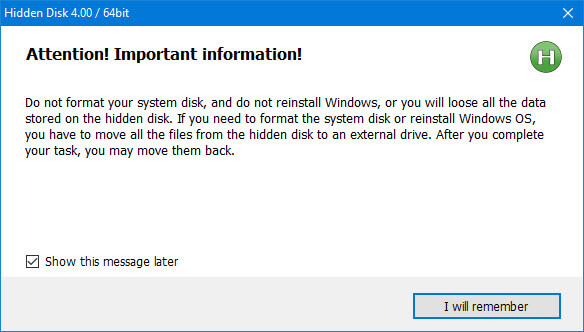
3. When you click the Create Disk button, a hidden disk will appear. This will display a warning dialog box instructing you not to format or reinstall Windows because data stored on the hidden disk will be lost. The software will create space in your Windows Installation Drive, i.e., the hidden container. When you reinstall or format, it will back up all your files and folders. To continue your process, click on the I Will Remember button.
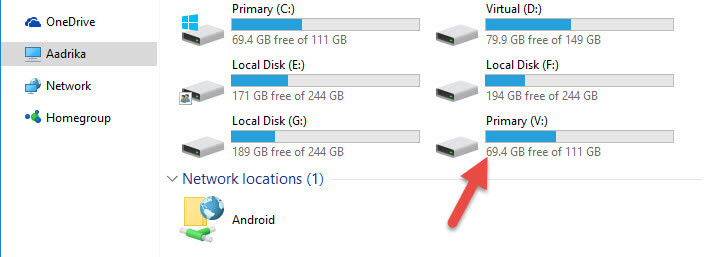
4. Your hidden disk will be created and appear as a separate division in the File Explorer. Depending on the disk size, You can open and add multiple files and folders.
5. Once you have added records and folders, click the Disable Disk button to remove the hidden drive from the File Explorer.
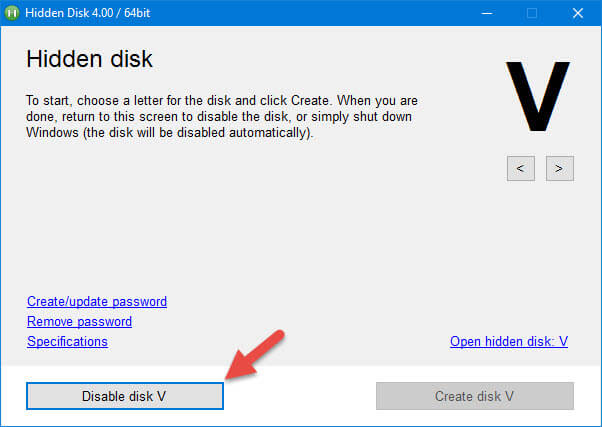
6. In the future, if you want to access your hidden container, launch the application, select the drive letter, and click the Create Disk button. This will open your hidden disk, and you can now easily access your files and folders.
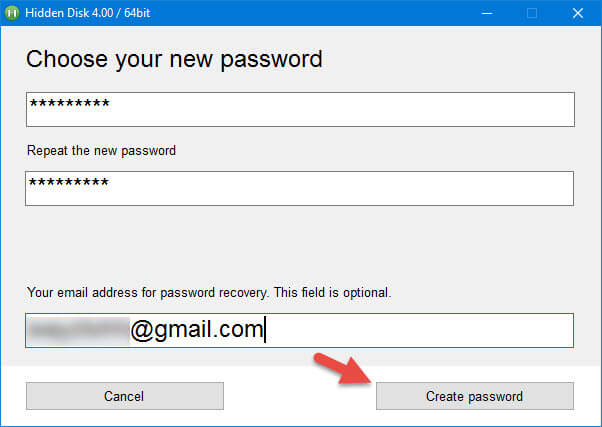
7. You can apply a password to your hidden disk so no one can see or mess with your details. To do this, go to the main window and click on the link Create or Update Password. Enter your new password and email address, then click the Create Password button.
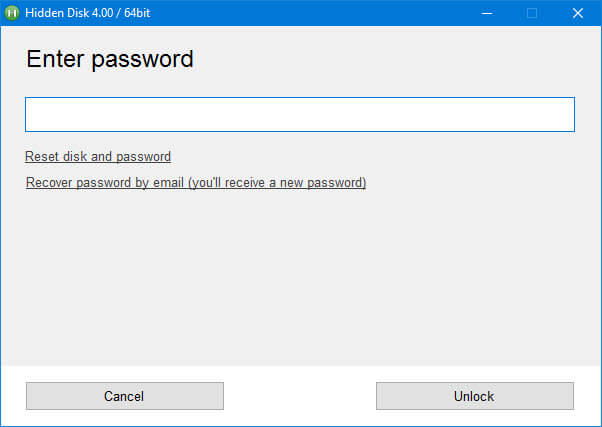
From now onwards, when you want to open the Hidden Disk application, it will ask you for the password. If, in any case, you forget your password, click on the link Recover Password by Email to receive a new password through email.
2. Using BitLocker
If you have been using Windows for a while, you might be well aware of BitLocker. It’s a free tool that comes with the Windows OS. It encrypts the entire hard drive for enhanced security. Here’s how to use BitLocker to create a password-protected drive on Windows.
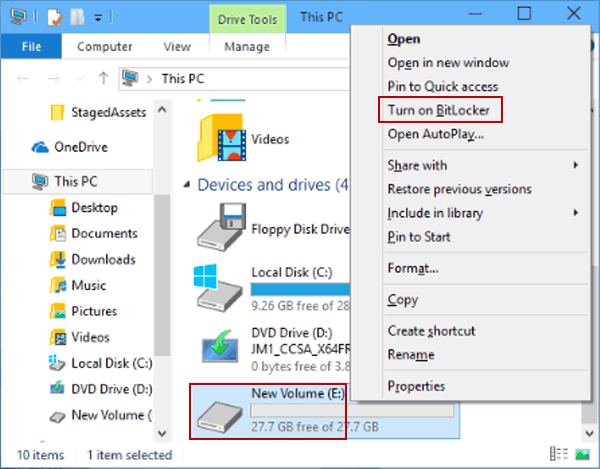
1. First, right-click on the hard drive you want to password-protect. From the right-click menu, select Turn On BitLocker.
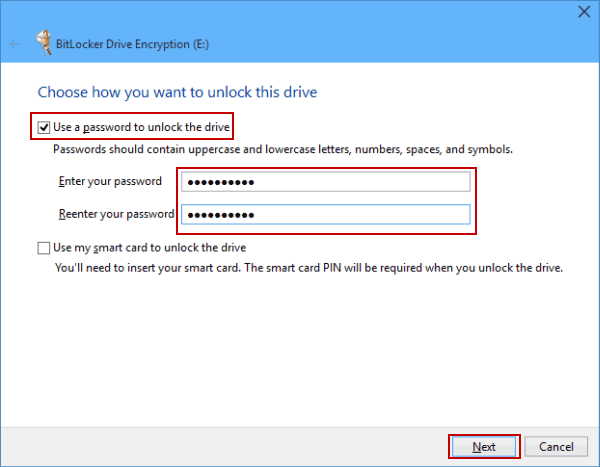
2. In the next window, select Use Password to unlock the drive, enter your password, and confirm it. Then click Next to continue.
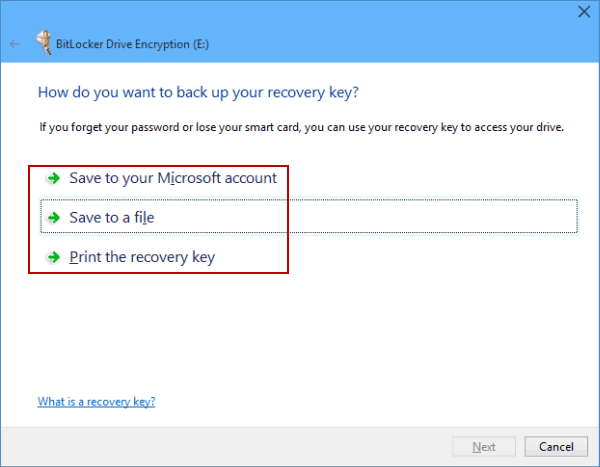
3. In the next window, you will be asked to choose how you want to back up your recovery key. There are three options.
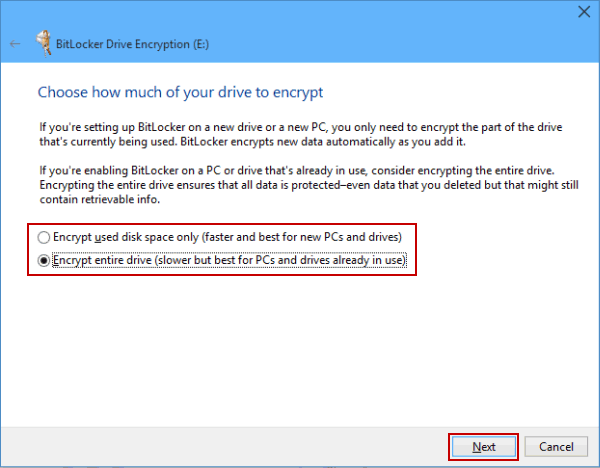
4. Now, you will be asked to select how much of your drive you want to encrypt. Select Encrypt Entire Drive and click Next.
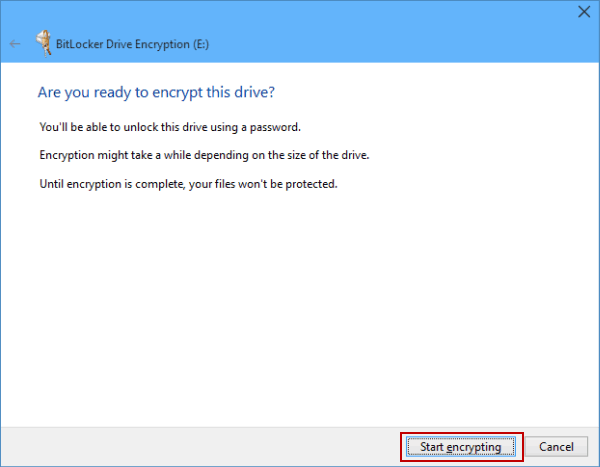
5. Now, you will see a confirmation message. There, you need to click on Start.
3. File Secure Free
File Secure Free is another free tool to safeguard your most important data. With File Secure free, you can easily create password-protected files, folders, or drives. The tool first creates a backup, encrypts selected files, and then password-protects an external drive.
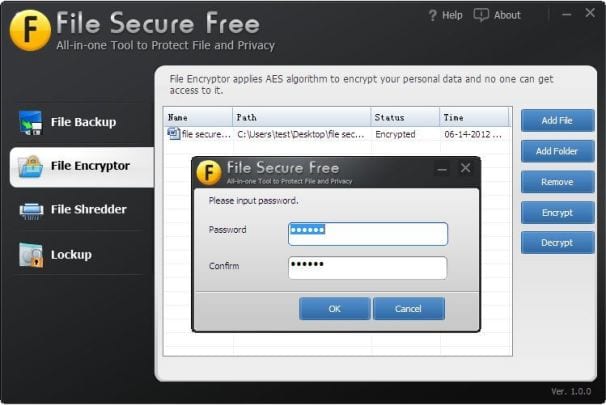
The best thing about File Secure Free is that you can also password-protect any Windows drive. The tool’s interface is pretty clean. On the left, you will see four functions in tabbed selectors. Choose the one you want and then perform the designated activity.
Suppose you want to password-protect a folder or drive; click ‘File Encrypter’ and then browse the folder or drive you want to password-protect. Once done, you need to enter the password every time to access the locked drive or folder.
So, it’s an excellent tool for all Windows users who want a solid and easy way to protect their data. Users don’t need to invest money to password-protect files, folders, or drives.
This was all about How to Create a Password-Protected Drive in Windows. I hope this article helped you! Share it with your friends also.


How to hack my husband phone? Please help me. I felt insecure.