If you are using Windows 11, you might know the operating system doesn’t display a delete confirmation dialog message when you delete a file. When you delete a file on Windows 11, the file is immediately sent to the Recycle Bin.
Although you can quickly restore the deleted data from the recycle bin, what if you want to double-check the files before deleting them? In this way, you will avoid accidental deletions of your important files.
Fortunately, Windows 11 allows you to enable the delete confirmation dialog message in a few easy steps. If you enable the delete confirmation dialog, Windows 11 will ask you to confirm the action.
So, enabling the option will add another step to the deletion process and reduce the chances of accidental deletions of files. So, if you are interested in enabling the delete confirmation prompt in Windows 11, you need to follow some of the simple steps.
Also Read: How to Find Your Windows 11 Product Key (3 Methods)
Steps to Enable the Delete Confirmation Message in Windows 11
Below, we have shared a step-by-step guide on enabling a delete confirmation dialog message in Windows 11. The process is going to be very easy; just follow some of the simple steps given below.
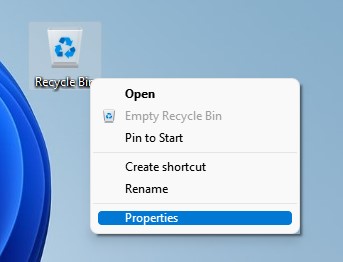
1. First of all, right-click on the Recycle bin icon on the desktop. Then, from the right-click menu, click on the Properties.
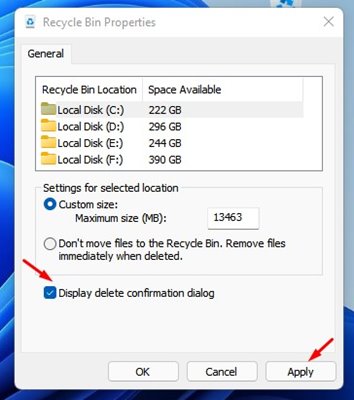
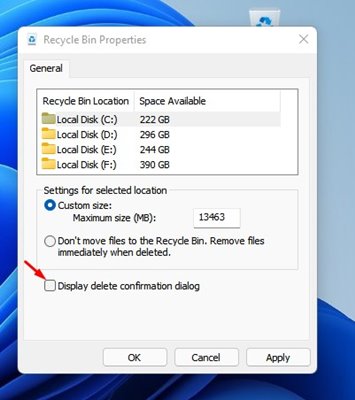
2. On the Recycle Bin Properties, enable the Display delete confirmation dialog check box. Once done, click on the Apply button then on Ok.
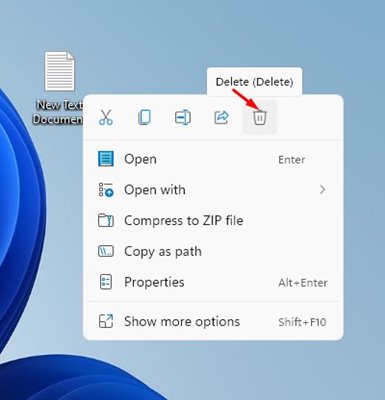
3. This will enable the delete confirmation dialog box. Now right-click on the file that you want to delete and click on the delete icon.
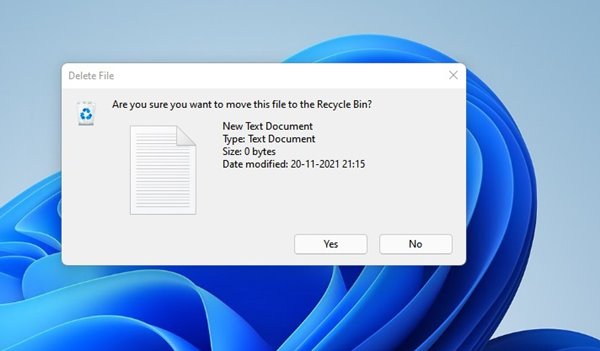
4. You will now see a Delete Confirmation dialog box. To confirm the file deletions, click on the Yes button.
5. If you wish to disable the feature, open Recycle Bin Properties and uncheck the Display delete confirmation dialog box.
That’s it! You are done. This is how you can enable the delete confirmation dialog box on Windows 11.
So, this guide is all about how to enable the delete confirmation dialog box in Windows 11. I hope this article helped you! Please share it with your friends also. If you have any doubts related to this, let us know in the comment box below.


Excellent advice – short and to the point 🙂