DirectX Shader Cache files were meant to reduce application loading times and improve overall graphics performance. Although it is considered important, it’s safe to delete those files to free up storage space. Windows will automatically create the cache when required, so deleting them won’t cause system file corruption or performance issues. Here’s how you can delete it.
1. Delete DirectX Shader Cache via Settings
This method will use Windows 11’s Settings app to delete the DirectX Shader Cache files.
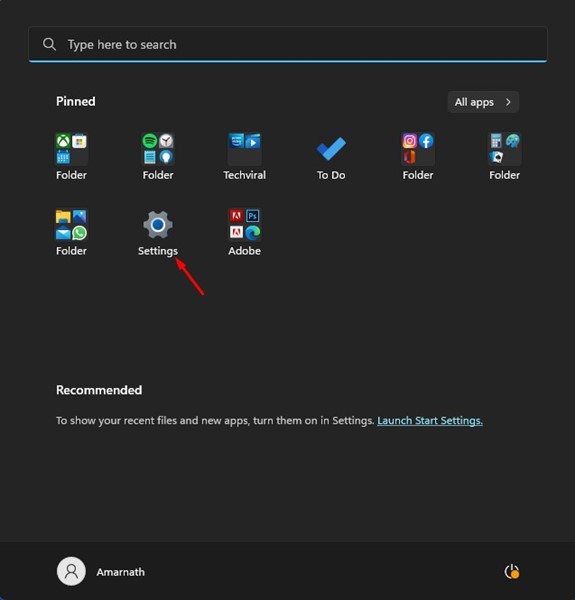
1. Click the Windows 11 Start button and select Settings.
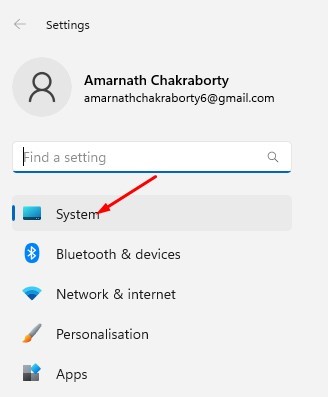
2. Switch to System.
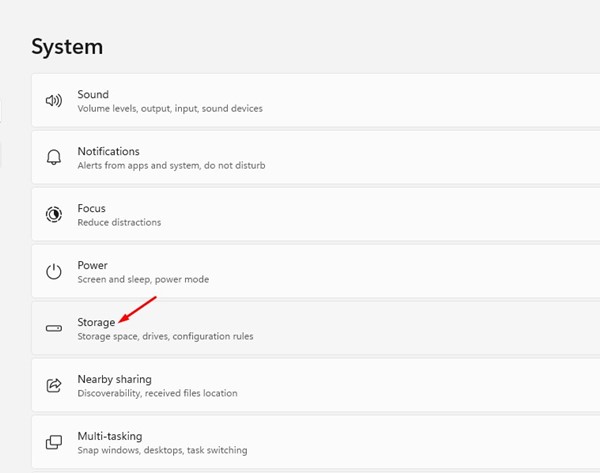
3. Click Storage.
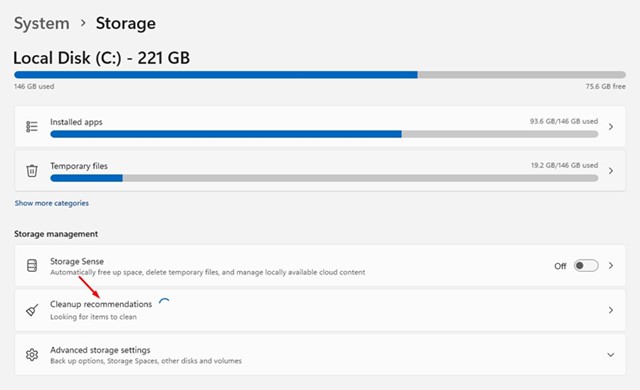
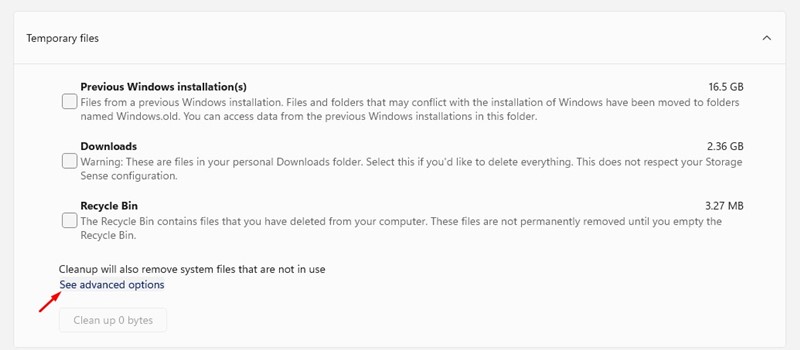
4. Scroll down to the Storage Management section and click on Cleanup recommendations.
5. Click on the See advanced options link on Cleanup recommendations.
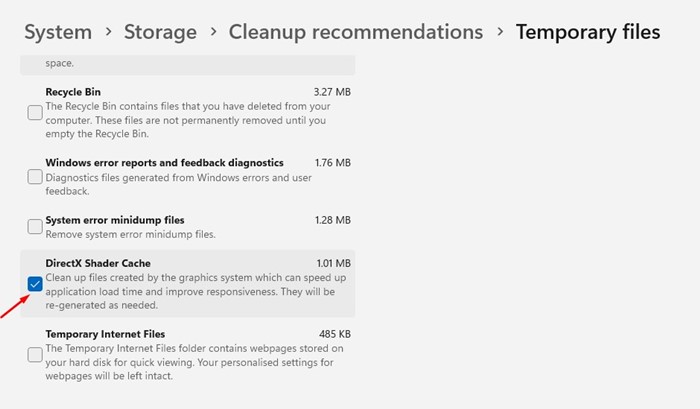
6. Uncheck all options and select the DirectX Shader Cache.
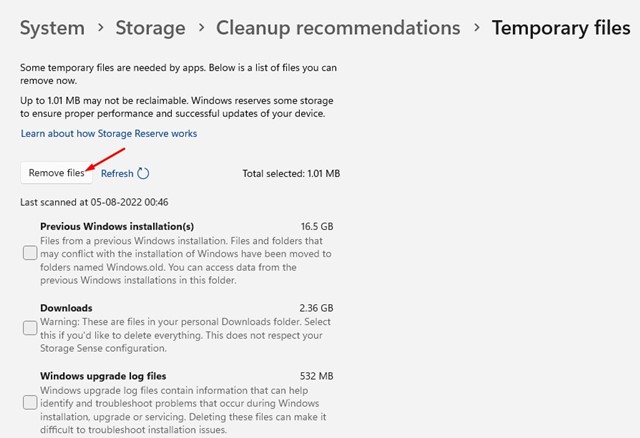
7. Scroll up and click Remove Files.
2. Delete DirectX Shader Cache via Disk Cleanup Utility
You can use the Disk Cleanup utility to clear the DirectX Shader Cache on Windows 11.
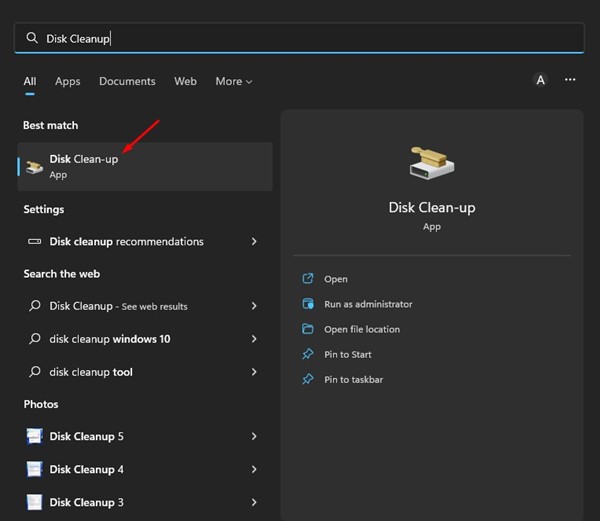
1. Open the Disk Cleanup utility from the Windows Search.
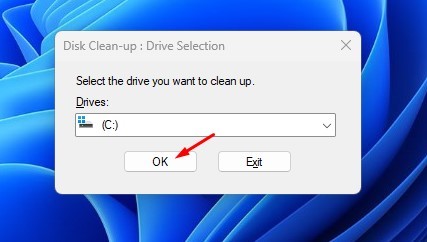
2. Select your system installation drive and click OK.
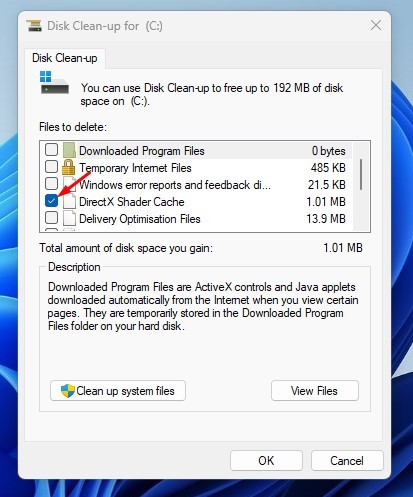
3. Check the DirectX shader Cache and click OK.
3. Delete DirectX Shader Cache via Storage Sense
You can also use Storage Sense, the built-in storage management tool of Windows, to delete the DirectX Shader Cache file.
1. Click the Windows 11 Start button and select Settings.
2. Switch to System.
3. Scroll down and click Storage.
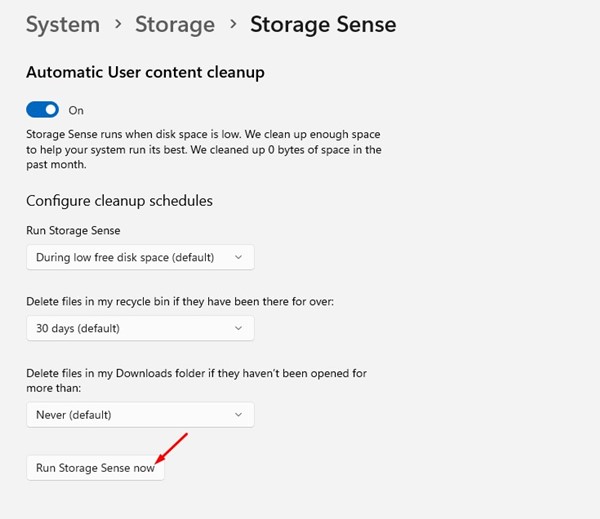
4. Enable the Storage Sense option. Enabling Storage Sense will automatically clean the DirectX Shader Cache.

5. Click the Storage Sense option and select Run Storage Sense now.
Will deleting the DirectX Shader Cache do any harm?
Not exactly, but deleting the DirectX Shader Cache can somewhat improve the performance of your game. There’s no harm in deleting the DirectX Shader Cache in Windows.
Another thing you should keep in mind is that deleting the Shader cache doesn’t always lead to better gaming performance, as several things depend on it, such as the hardware specs, the game’s compatibility with your OS, etc.
Also read: Download & Install the Latest Version of DirectX on Windows 11
These are the best ways to delete the DirectX Shader Cache in Windows 11. If you are experiencing problems while running games and apps on your device, you can try deleting the DirectX Shader Cache.


