Most modern web browsers like Google Chrome, Firefox, Edge, etc., offer an Autofill feature. If we talk about Google Chrome, the autofill form option is pretty helpful as it automatically fills online forms for you.
However, if you are someone who cares about privacy, you should disable the Chrome Autofill feature. You should also disable Autofill in your browser if you use a shared mobile or computer.
The auto-fill data includes your usernames, passwords, payment methods, addresses, and more. So, if your PC or smartphone is shared, others can access all of this saved information. So, it’s best to disable the Autofill feature in the Google Chrome browser.
Steps to Disable Autofill in Google Chrome
So, in this article, we will share a detailed guide on how to disable autofill in Google Chrome for desktop and Android. The process will be very easy, you need to implement some of the simple steps given below.
1. Disable Autofill On Desktop
In this method, we are going to disable the Autofill feature in Chrome for desktop. Although we are using Chrome on Windows for the purpose of this demo, the process remains almost the same for Mac and Linux.
Step 1. First of all, open Google Chrome on your desktop.
Step 2. Next, click on the three dots and select ‘Settings’

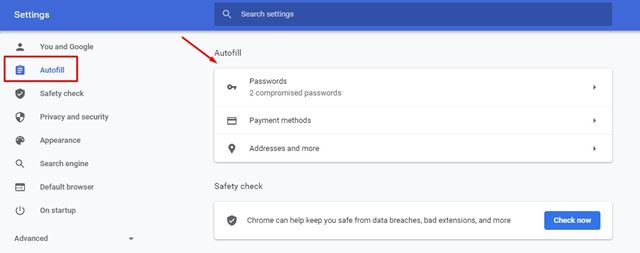
Step 3. On the Settings page, find the option ‘Auto-fill’. Under the Auto-fill, you will find three sections – Passwords, Payment methods, Addresses, and more.
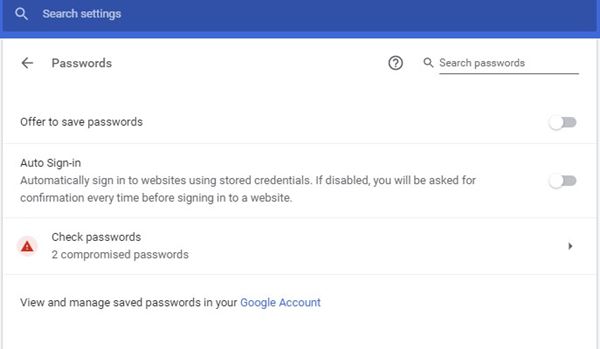
Step 4. Click on the Passwords, and disable the ‘Offer to save passwords’ and ‘Auto Sign-in’ options.
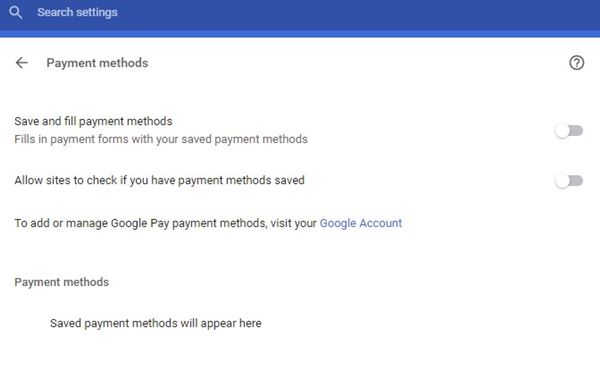
Step 5. Next, go back and click on the ‘Payment Methods’. On the Payment methods, disable the two options as shown in the screenshot below.
Step 6. Next, select the ‘Addresses and more’ option. Then, on the next page, disable the ‘Save and fill addresses’ option.

That’s it! You are done. Now restart your Google Chrome browser. After the restart, Chrome will no longer fill any information in any forms on your PC.
2. Disable Autofill in Google Chrome for Mobile
In this method, we are going to disable the Autofill feature in Chrome for mobile. Although we are using Chrome on Android for this demo, the process remains almost the same for iOS.
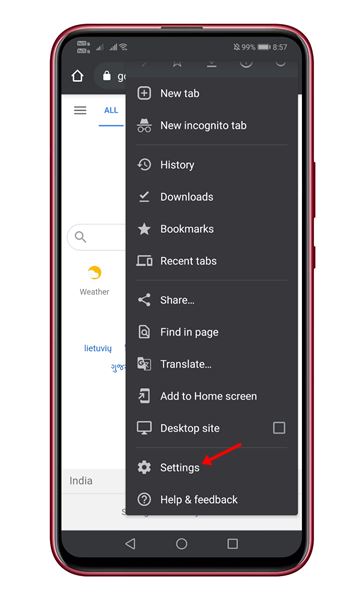
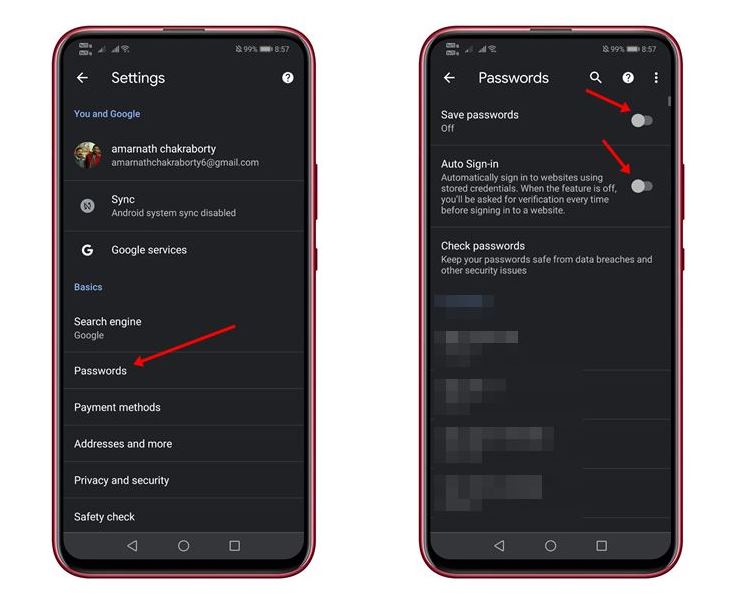
Step 1. First of all, launch Google Chrome. Next, tap on the three dots and tap on the ‘Settings’
Step 2. Under the basic section, tap on the ‘Passwords‘ option. On the next page, disable the ‘Save Passwords‘ and ‘Auto Sign-in’ options.
Step 3. Now go back to the previous page and tap on the ‘Payments methods’. Then, on the next page, disable the ‘Save and fill payment methods’ option.

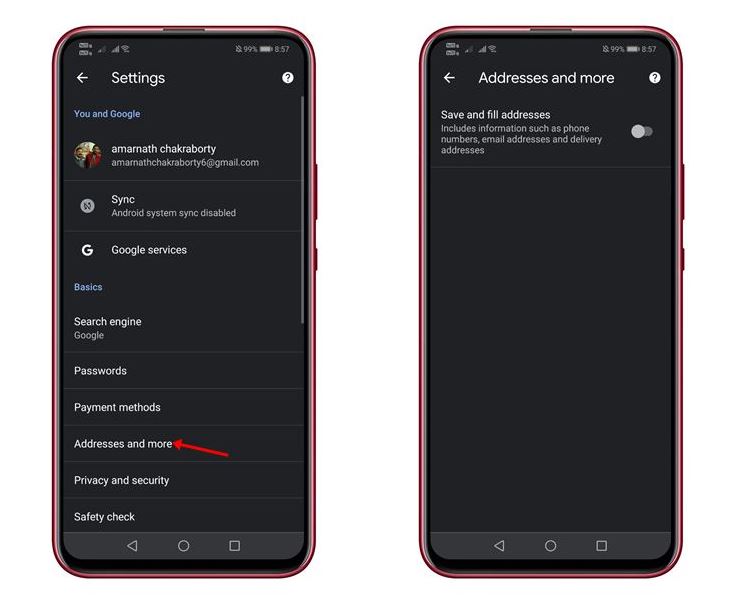
Step 4. Now again, go back to the previous page and tap on the ‘Addresses and more’. Then, on the next page, disable the ‘Save and fill addresses’ option.
That’s it! You are done. This is how you can disable Autofill in Google Chrome.
How to Delete Auto-fill data?
Well, after implementing the above steps, you need to delete the already saved auto-fill data. For that, you need to press the (Ctrl+Shift+Delete) button on Windows. This will take you to the Clear Browsing page. Then, select the ‘Advanced’ tab and check the option ‘Autofill form data’.
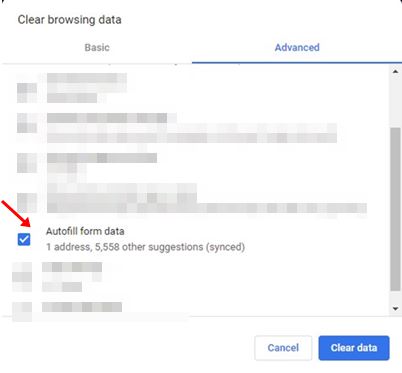
Once done, click on the ‘Clear data’ option. This will delete all your saved auto-fill data on the Google Chrome web browser.
So, this article is all about how to disable Autofill in Google Chrome. I hope this article helped you! Please share it with your friends also. If you have any doubts related to this, let us know in the comment box below.


