If you have been using Windows operating system for a while, you might know that it has something known as ‘CMD’ or Command Prompt. Command Prompt is a command-line interpreter that interacts with the users through a command-line interface.
Command Prompt can do a wide range of tasks for you. You need to enter the associated commands on the command line interface. On techviral, we have already shared an article where we have listed 200+ essential CMD commands for Windows 10.
Although Command Prompt is a useful utility, it could be dangerous if it lands in inexperienced hands. So, if others use your computer or laptop, it’s best to disable the Command Prompt.
Also Read: How to Disable Command Prompt in Windows 10 Computer
Steps to Disable Command Prompt in Windows 10 Computer
Windows 10 allows users to disable the command prompt in easy steps. Once disabled, whenever users try to execute any command, they will get the message, “The command prompt has been disabled by your administrator.’
In this article, we will share a detailed guide on how to disable the command prompt in Windows 10 computers. Let’s check out.
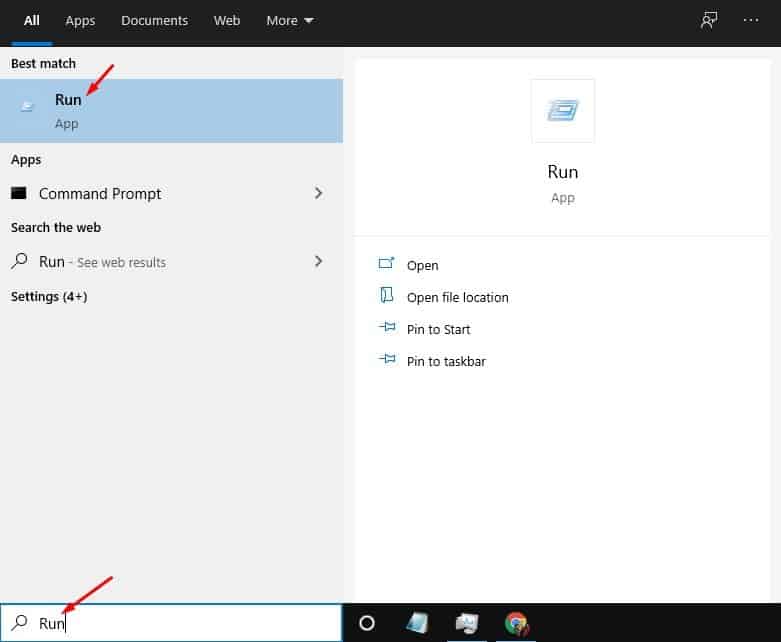
Step 1. First of all, press the Start button and search for ‘Run.’ Open the Run program from the list.
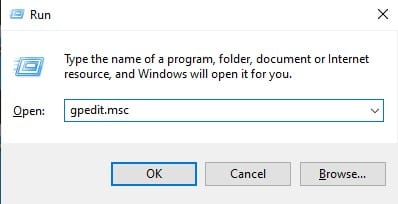
Step 2. On the RUN dialog box, enter ‘gpedit.msc‘ and click on ‘Ok.’
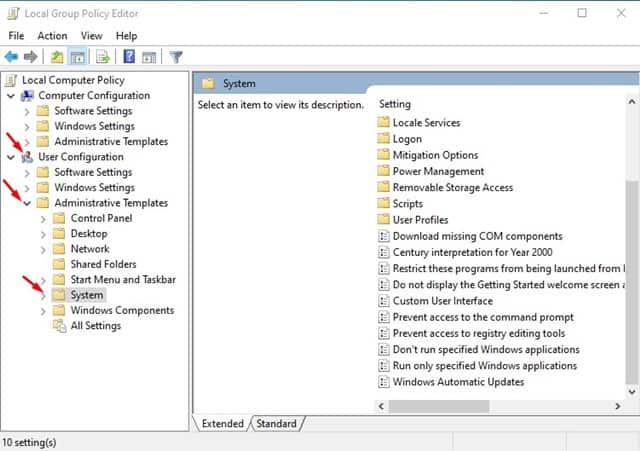
Step 3. This will open the Local Group Policy Editor. Now head to the following path –
User Configuration > Administrative Templates > System
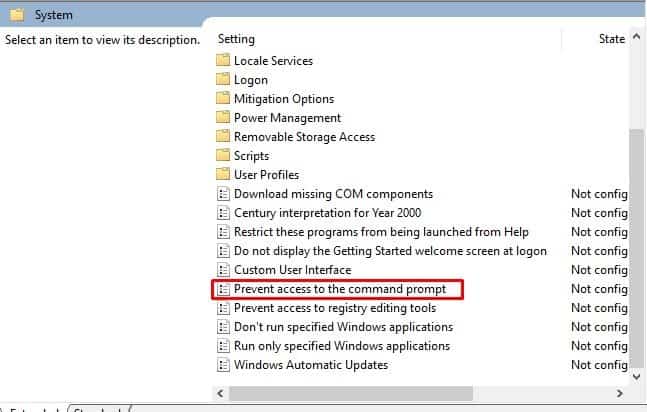
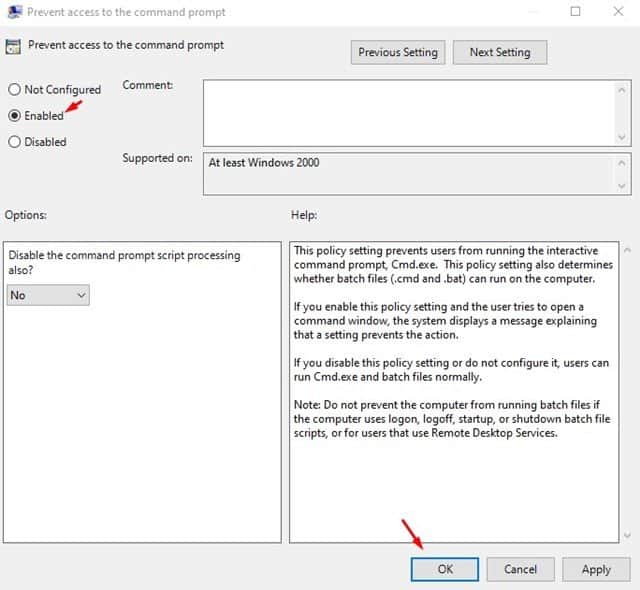
Step 4. On the right pane, scroll down and double click on the ‘Prevent Access to the Command Prompt.’
Step 5. On the next Window, select ‘Enabled’ and click on the ‘Ok’ button.
That’s it! You are done. Now, whenever you try to open the Command prompt, you will get the message, “The command prompt has been disabled by your administrator.”
So, this article is all about how to disable Command Prompt on Windows 10 computer. I hope this article helped you! Please share it with your friends also. If you have any doubts related to this, let us know in the comment box below.
