If you have been reading tech news regularly, then you might know that Google Chrome has now started to block ads. It does so via the inbuilt ad-blocking tool. Although the built-in ad blocker of Chrome doesn’t eliminate every advertisement from a webpage, it does block the most annoying ones.
The good thing is that you don’t need to do anything to force Chrome to block ads. It does that automatically, without any user interaction. However, while blocking ads, it sometimes interferes with the natural loading of the site. Sometimes, it might remove an entire block from a webpage, which might lead to degraded user experience.
So, it’s always best to know how to enable and Disable the Adblocker of Google Chrome. In this article, we are going to share a working method to enable or disable Google Chrome ad-blocker.
How To Disable & Enable Chrome’s Default Ad Blocker
It’s worth to note that you can’t disable the ad blocker entirely as you do on Ad-block extensions. To disable or enable ads, you need to access the Chrome ad blocker settings individually for every website. So, let’s check out how to enable/disable Google Chrome Adblocker.
Step 1. First of all, open the webpage whose ads you want to disable/enable.
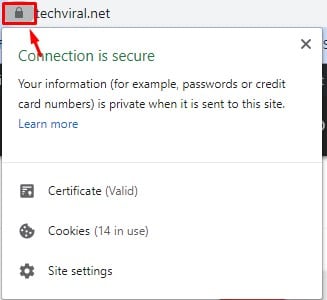
Step 2. Now you need to tap on the green padlock near the address bar.

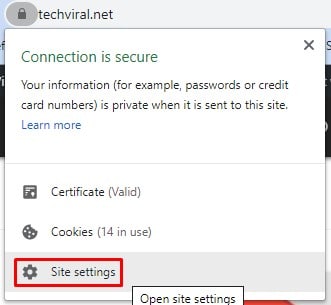
Step 3. There you need to click on the ‘Site Settings’ option.

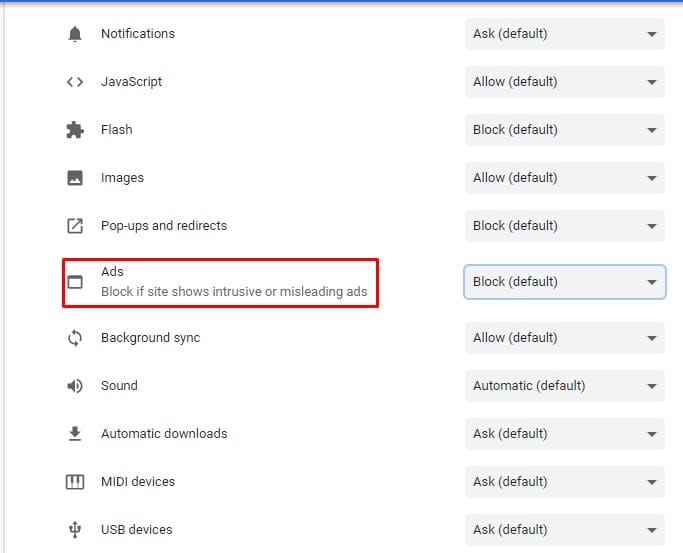
Step 4. This will open the Site Settings page. Scroll down and find ‘Ads’

Step 5. If you want to enable ads, select ‘Allow’

Step 6. To disable ads from the webpage, select ‘Block’

That’s it! You are done. This is how you can disable or enable Chrome’s default adblocker.
So, this article is all about how to disable or enable Google Chrome’s Default Adblocker. I hope this article helped you! Share it with your friends also.