When the Internet Connection Sharing is enabled, any other local Area Network (LAN) computer can access your PC’s internet without permission or any dedicated software. If you don’t want any other computer on your network to access your internet, you should disable the Internet Connection Sharing.
1. Disable Internet Connection Sharing via Control Panel
You can use the Control Panel of Windows 11 to disable Internet connection sharing.
1. Press the Windows Key + R button on your keyboard. This will open the RUN dialog box. On the RUN dialog box, enter ‘ncpa.cpl‘ and press Enter.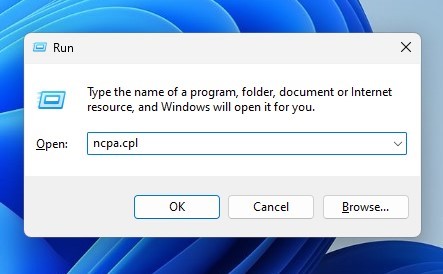
2. This will open the Network adapter page of your Windows 11. Right-click on the connected network adapter and select Properties.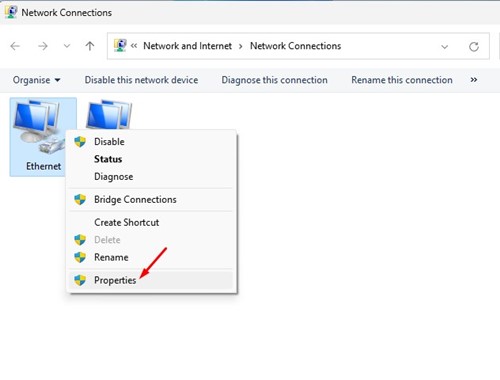
3. Switch to the Sharing tab.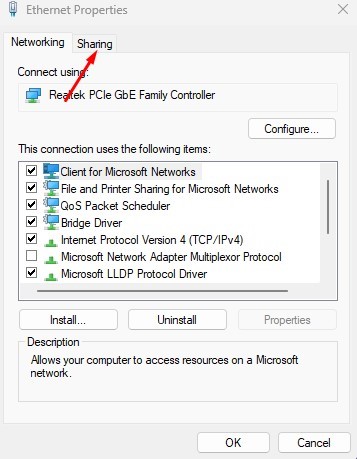
4. On the Internet Connection Sharing section, uncheck the option Allow other network users to connect through the computer’s internet connection.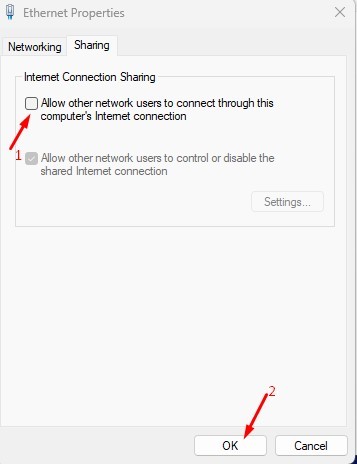
Once done, click Ok.
2. Disable Internet Connection Sharing using Windows Services
You can also use the Windows Services app to disable Internet Connection Sharing.
1. Open the Services app from the Windows Search.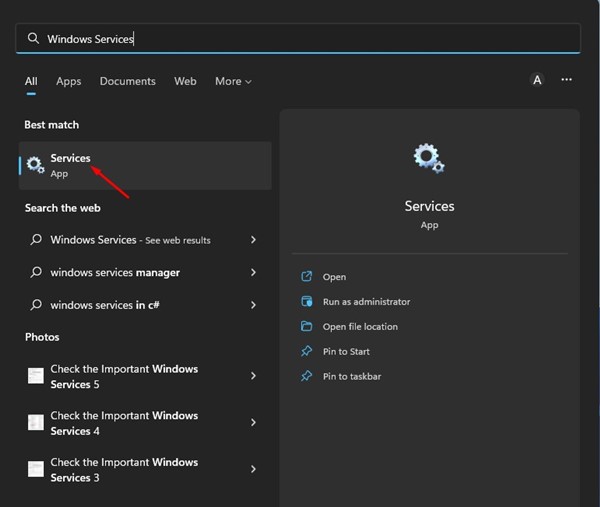
2. Scroll down and find Internet Connection Sharing (ICS).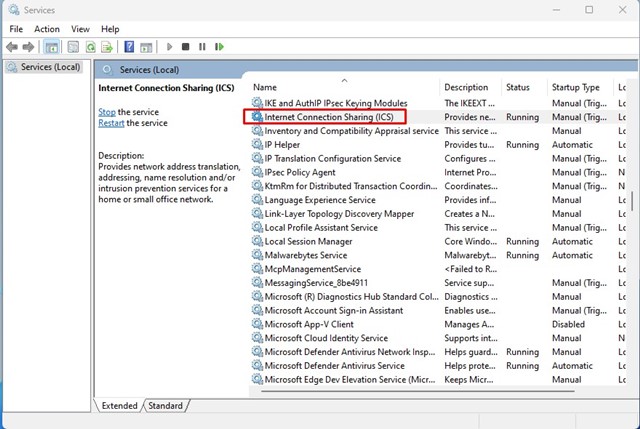
3. Right-click on the Internet Connection Sharing policy and select Stop.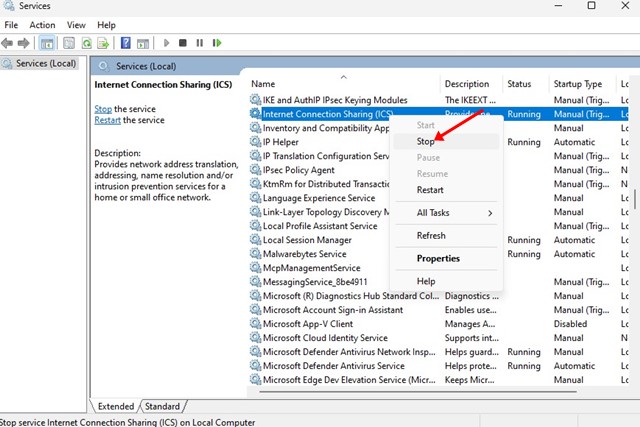
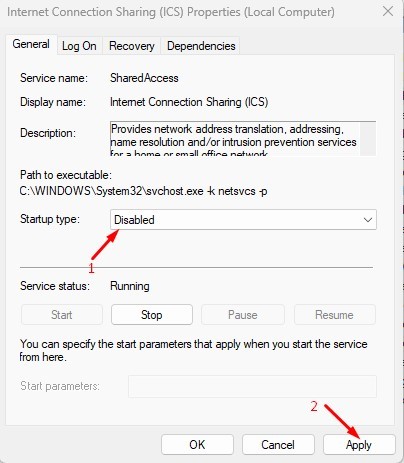
4. Double-click the Internet Connection Sharing Policy and select Disabled on the Startup type. Once done, click Ok.
This will disable the Internet Connection Sharing on your Windows 11 computer.
3. Disable Internet Connection Sharing using Local Group Policy Editor
You can even use the Local Group Policy Editor to disable Internet connection sharing in Windows 11.
1. Open the Local Group Policy Editor from the Windows Search.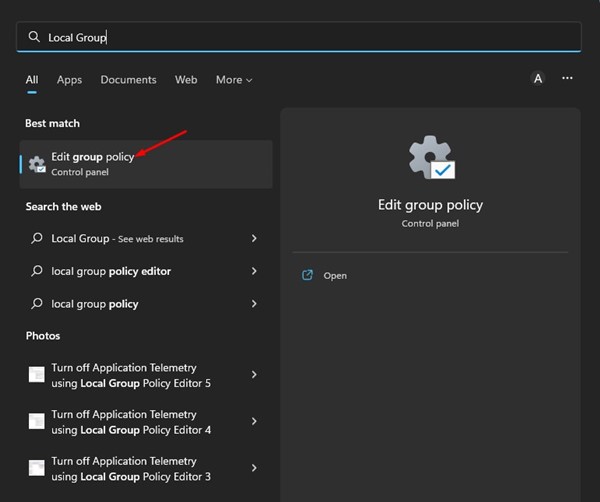
2. Navigate the path: Computer Configuration > Administrative Templates > Network > Network Connections.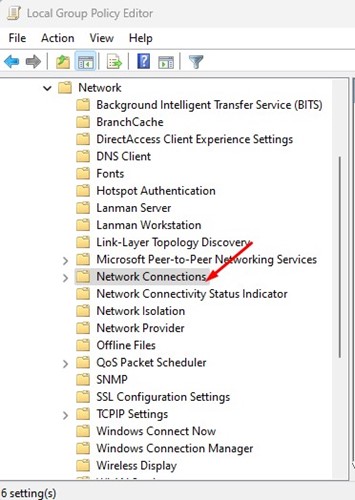
3. Double-click on the Prohibit use of internet connection sharing on your DNS domain network.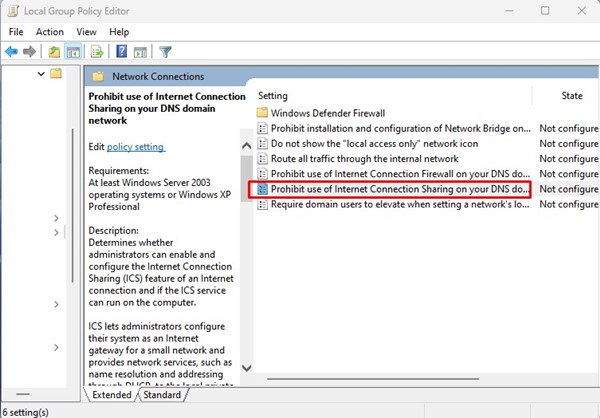
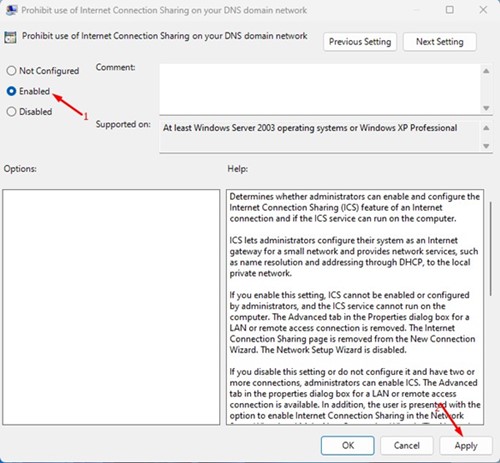
4. Select Enabled and click Apply.
This will disable Internet Connection Sharing instantly on your Windows 11 computer.
Also read: How to Reinstall Windows 11 Without Losing Data and Apps
If you don’t want to share your internet connection with other PCs on your LAN, it’s best to disable Internet Connection Sharing. If you need more help disabling ICS in Windows 11, let us know in the comments below.

