Last year, Microsoft launched the Verified Apps feature that warned users who tried to install apps from sources other than the Microsoft Store.
The feature prevents users from installing apps from unknown sources, forcing them to stick with the Microsoft Store only.
Microsoft Verified Apps – What is it?
Actually, Microsoft has a verification process for apps to determine their safety. It allows users to download and install apps that pass the company’s safety parameters.
In short, Microsoft Verified apps are those that pass the company’s safety parameters. They are usually stable, secure, and compatible with the version of Windows you’re using.
Why Should You Disable the Microsoft Verified Apps?
While the feature is great for security and stability, it does prevent app installation from unknown sources.
Sometimes, you may want to download apps outside the company’s safety filters. Maybe non-verified apps are required for the proper function of third-party hardware installed on your device.
Or you may just want to install your favorite app from a third-party app store. Whatever the reason, this verified app filter can prevent installation from most third-party sources.
How to Turn Off Microsoft Verified Apps?
If you aren’t a fan of Microsoft’s Verified apps and are willing to take all risks in your hands, you can turn off the feature by following these methods.
1. Make Changes to the Advanced App Settings
One of the easiest ways to avoid getting the Microsoft Verified Apps warning is to make changes to the Advanced App Settings. Here’s what you need to do.
1. Launch the Settings app on your Windows 11 PC.
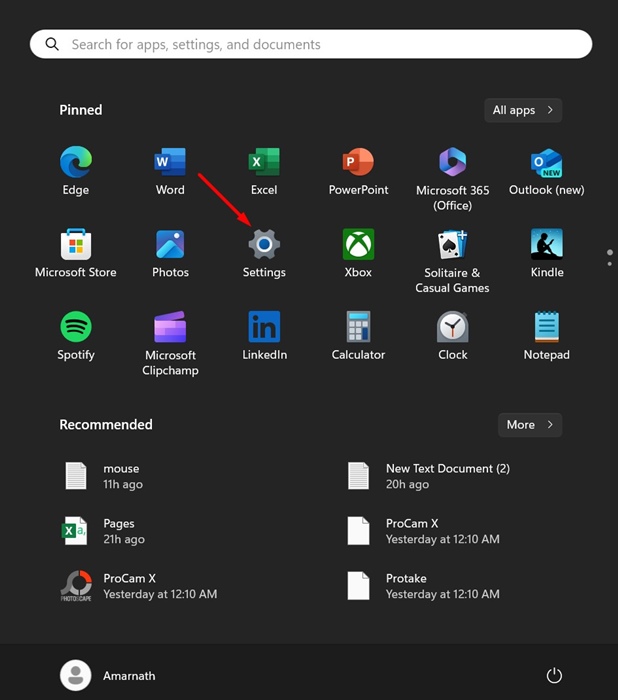
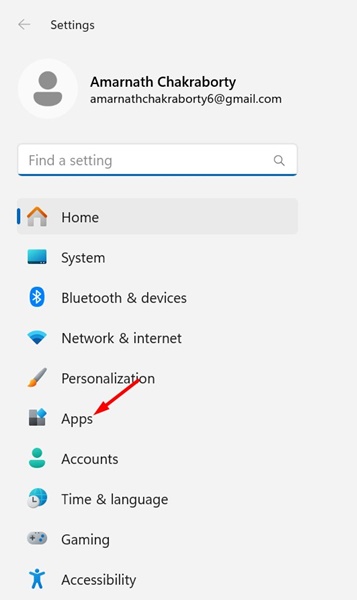
2. When the Settings app opens, switch to the Apps tab.
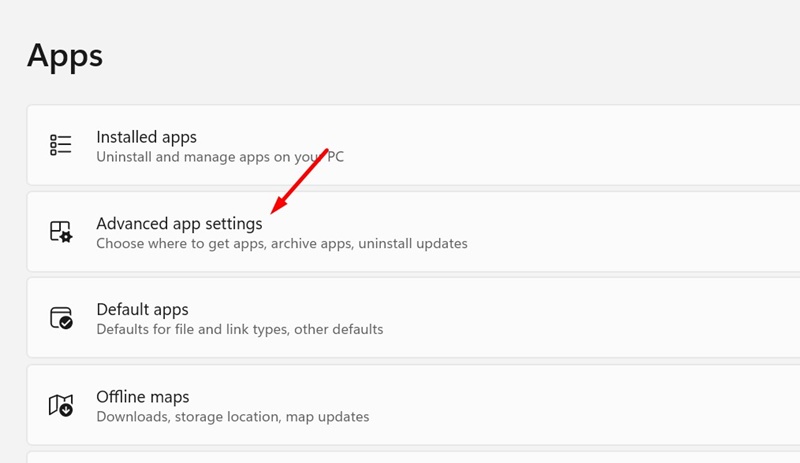
3. On the right side, click on Advanced App Settings.
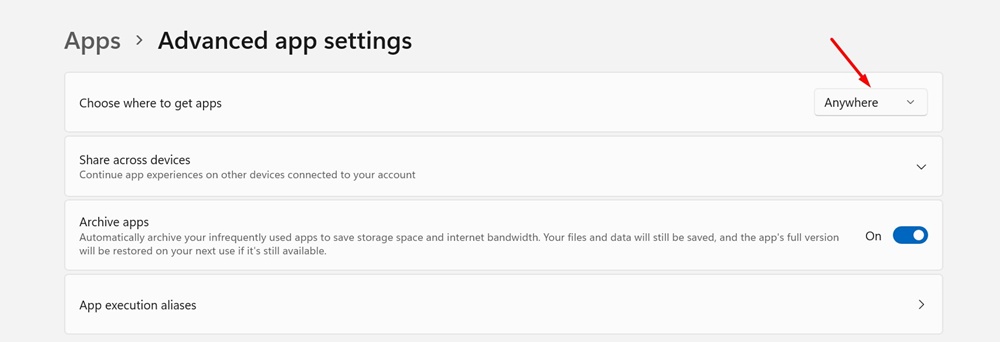
4. Next, click on the drop-down next to Choose where to get apps and select Anywhere.
2. Disable Microsoft Verified Apps By Modifying Registry
You can also make a few changes to the Registry Editor to disable the Microsoft Verified Apps feature. Here’s what you need to do.
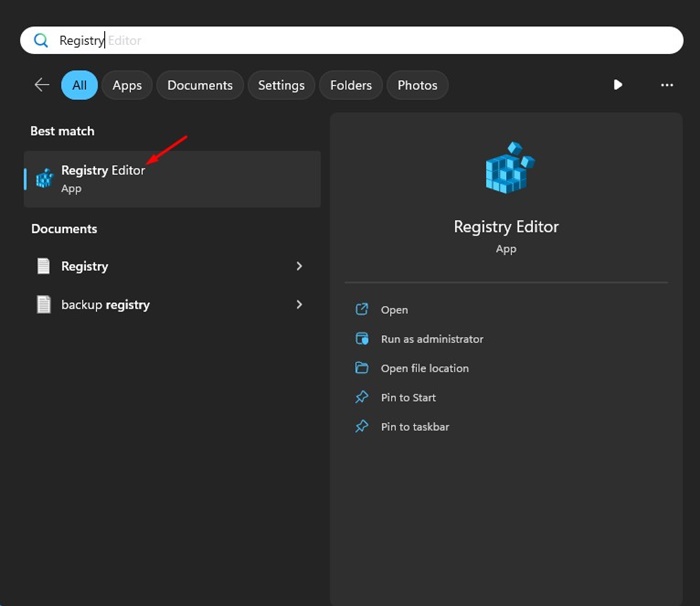
1. Type Registry on the Windows 11 Search. Next, open the Registry Editor from the list of best match results.
2. When the Registry Editor opens, navigate to this path:
Computer\HKEY_LOCAL_MACHINE\SOFTWARE\Microsoft\Windows\CurrentVersion\Explorer
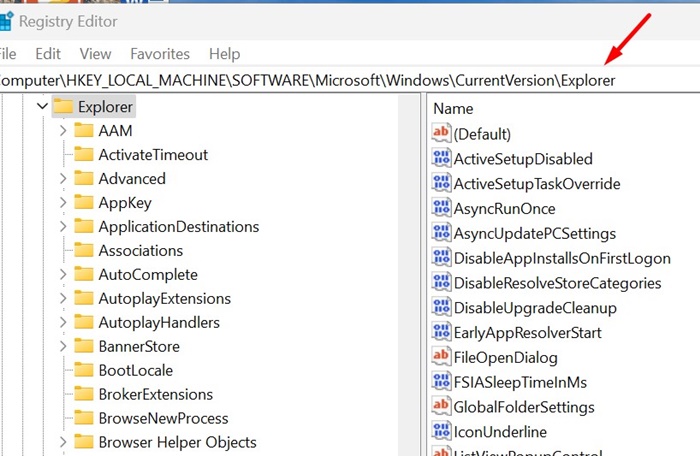
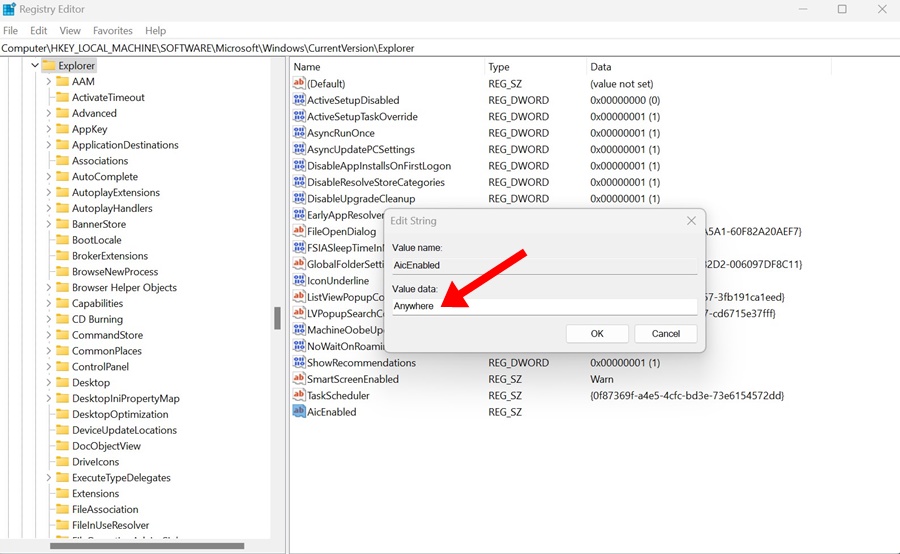
3. On the right side, find and double click on AicEnabled.
4. On the Value data field, type Anywhere and click OK.
5. After making the changes, close the Registry Editor and restart your PC.
3. Turn Off Microsoft Verified Apps from Group Policy Editor
On the Group Policy Editor, you can make a few changes to turn off the Microsoft Verified apps. Here’s what you need to do.
- Press the Windows Key + R button to open the RUN dialog box.
- Next, type gpedit.msc and press Enter.
- On the Local Group Policy editor, navigate to this path:
Computer Configuration > Administrative Templates > Windows Components > Windows Defender SmartScreen > Explorer
- On the right side, double click on Configure App Install Control.
- On the Configure App Install Control Prompt, select Disable and click OK.
After making the change, make sure to restart your Windows 11 PC. This should turn off every Microsoft Verified Apps warning you get.
4. Turn Off Microsoft Verified Apps using Command Prompt
On the Command Prompt utility, you can execute a few commands to allow non-verified apps on Windows 11. Here’s what you need to do.
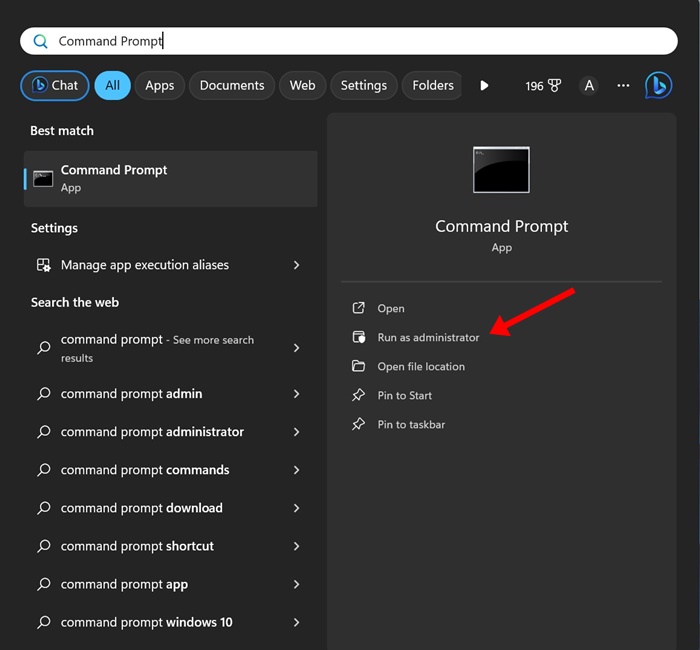
1. Type Command Prompt in the Windows 11 Search. Next, right-click on the Command Prompt and select Run as administrator.
2. On the Command Prompt, copy & paste the command shared below and press Enter.
reg add HKEY_LOCAL_MACHINE\SOFTWARE\Microsoft\Windows\CurrentVersion\Explorer /v AicEnabled /t REG_SZ /d Anywhere
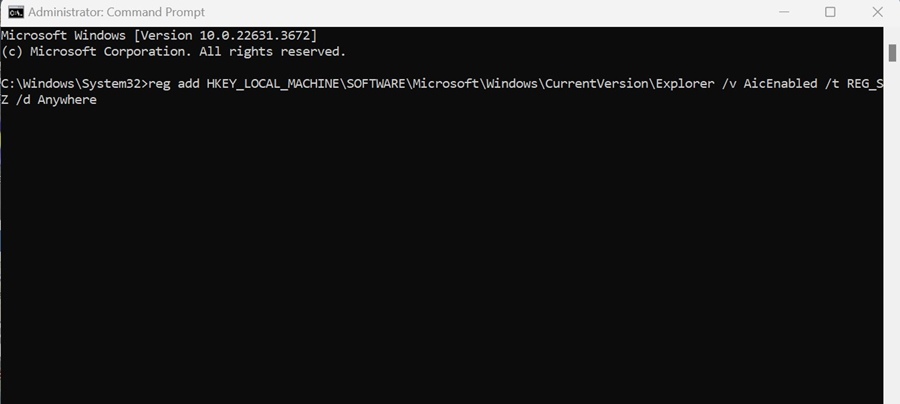
3. After executing the command, close the command prompt and restart your PC.
These are a few simple methods that should help you avoid the Microsoft Verified Apps warning. If you need more help with this topic, let us know in the comments. Also, if you find this guide helpful, don’t forget to share it with others.