Windows 10 introduced a Notification feature that helped us keep track of major changes within the operating system. The same feature is also seen on the latest Windows 11.
Although the Windows 11 notifications were necessary, it can be annoying if they keep popping up now and then. Unnecessary notifications can even interrupt your work.
There are times when we all have wanted to turn off Notifications in Windows 11 altogether. Fortunately, Windows 11 lets you disable all system and app notifications in just a single click.
Also read: How To Get Android Notifications Directly On Your PC
Steps to Disable Notifications On Windows 11
Hence, in this article, we will share a detailed guide on how to disable notifications on Windows 11 operating system.
The process is going to be very easy. Just follow some of the simple steps given below.
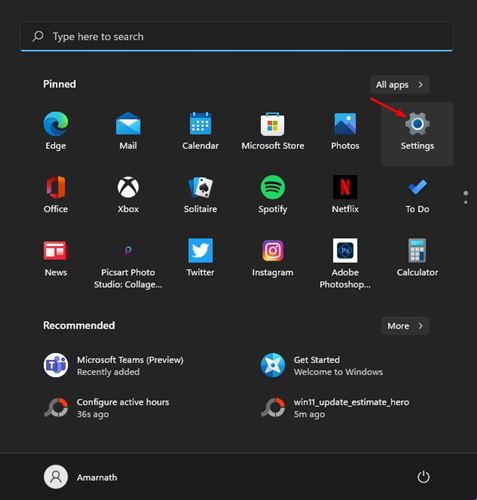
1. First of all, click on the Windows 10 Start button and select Settings. Alternatively, you can click on the Windows Key + I button to open the Settings.
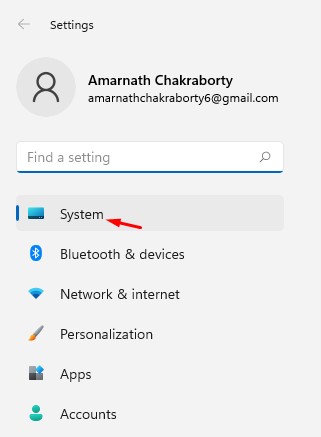
2. On the Settings page, click on the System option, as shown in the screenshot below.
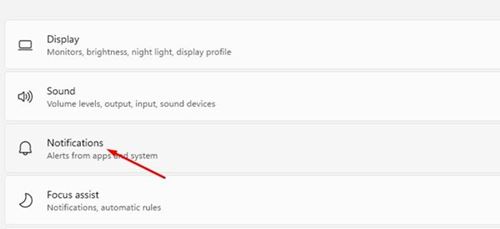
3. On the left pane, click on the Notifications option.
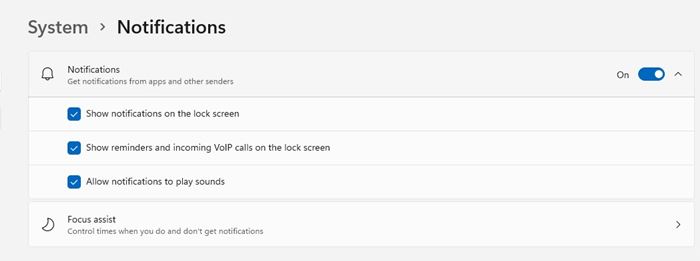
4. If you want to disable notifications altogether, turn off the Notifications option.
5. Click on the expand menu behind the Notifications and choose the other options if you wish to enable the Notifications.
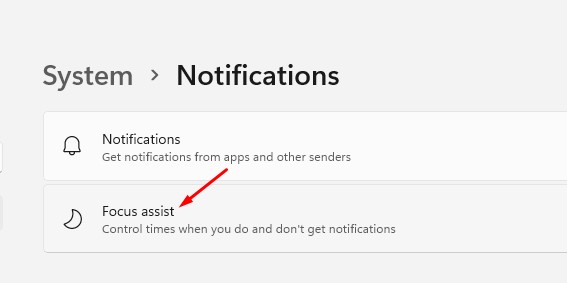
6. If you wish to enable notification for certain apps, you need to configure the Focus Assist option.
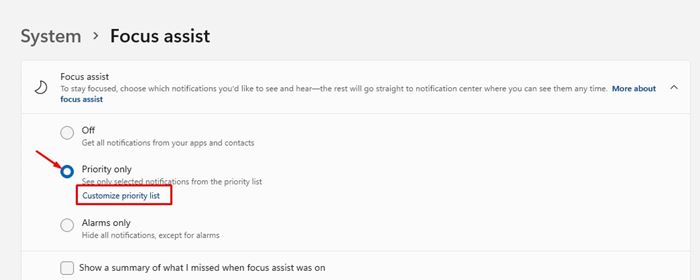
7. If you want to see only selected app notifications, select the Priority only option and click on the Customize priority list link.
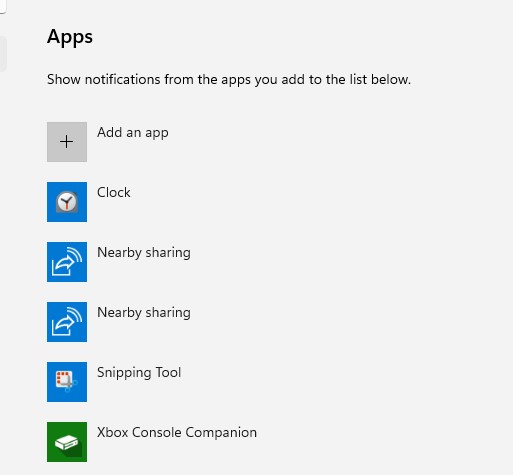
8. On the next page, add the app whose notifications you want to receive.
That’s it! You are done. This is how you can disable notifications on Windows 11 PC.
So, this guide is all about how to disable notifications on Windows 11. I hope this article helped you! Please share it with your friends also. If you have any doubts related to this, let us know in the comment box below.
