Microsoft introduced a more powerful command-line shell than Command Prompt in Windows 7. The more powerful variant of Command Prompt is PowerShell, and it’s meant to perform advanced stuff. Since Powershell was introduced, it has become more prominent, and not it comes built-in with Windows 10 operating system.
Lots of people think that Command Prompt and Powershell are both the same. However, they are different, and the Powershell is more complicated than the traditional CMD. Also, Powershell is more powerful than CMD and could be dangerous if it lands in inexperienced hands.
So, if you have a shared computer or other family members or friends use your PC, it’s best to disable the PowerShell altogether. In this article, we will share a detailed guide on how to disable Powershell in Windows 10. Let’s check out.
Also Read: 5 Best Anti-Exploit Tools For Windows 10
Steps to Disable PowerShell in Windows 10 computer
Please note that there’s no direct option to disable Powershell. So, we need to access the Local Group Policy Editor to disable the Powershell. Playing with Local Group Policy could be risky, so follow the steps carefully.
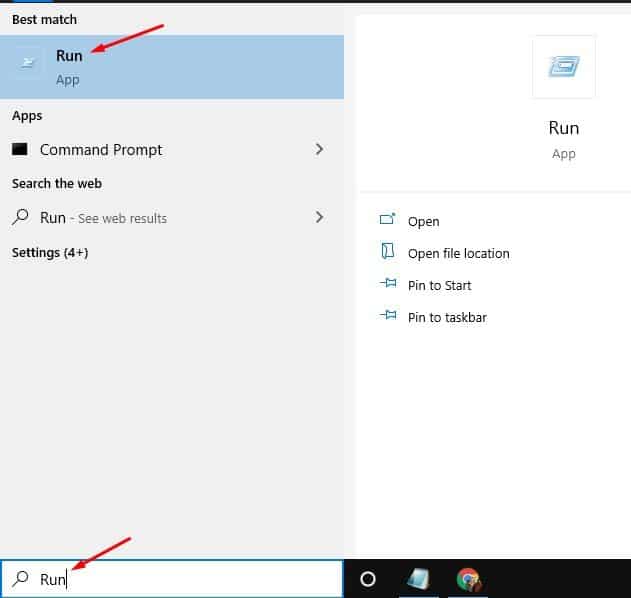
Step 1. First of all, press the Start button and search for ‘Run.’ Open the Run program from the list.
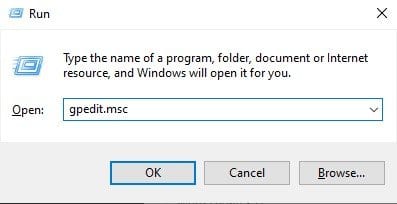
Step 2. On the Run Dialog box, enter ‘gpedit.msc’ and hit enter button.
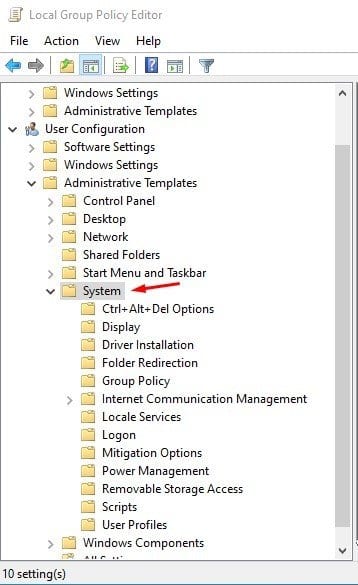
Step 3. This will open the Local Group Policy editor. You need to navigate to the following path – User Configuration > Administrative Templates > System.
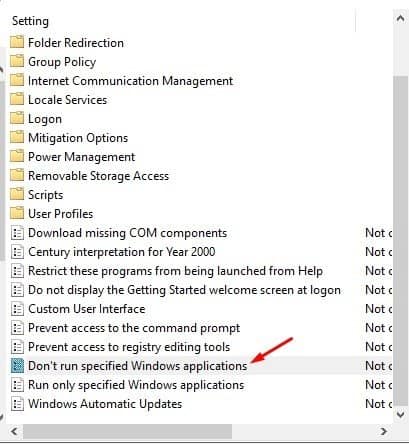
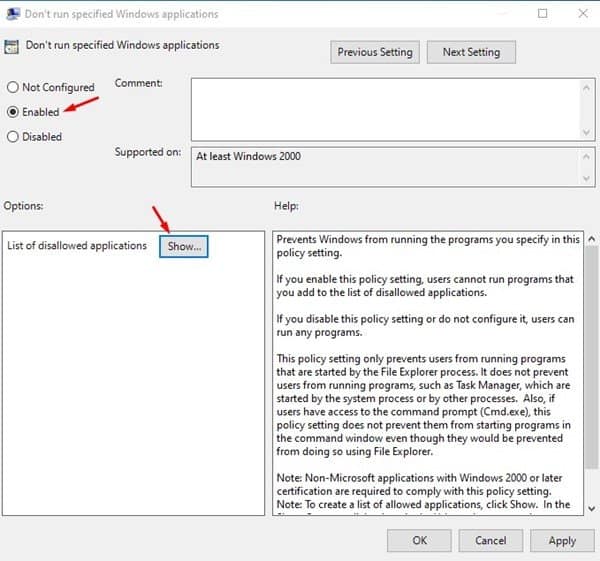
Step 4. On the right side pane, double click on the ‘Don’t run specified Windows application’ policy.
Step 5. On the next Window, select ‘Enabled’ and then under the option, click on the ‘Show’ button.
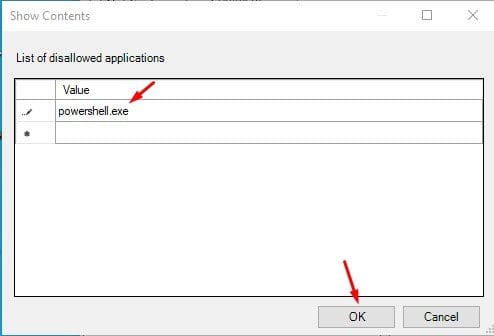
Step 6. Under the value, type ‘powershell.exe’ and then click on the ‘Ok’ button.
That’s it! You are done. Now restart your Windows 10 computer to apply the changes. After the restart, you won’t be able to run Powershell. To run Powershell, just revert the changes you have made in Step no. 5 and Step no. 6.
So, this article is all about how to disable PowerShell on Windows 10 computer. I hope this article helped you! Please share it with your friends also. If you have any doubts related to this, let us know in the comment box below.


