After performing a Bing search, you will see the relevant results on the Start Menu. Unfortunately, despite its usefulness, Bing’s implementation of the Start Menu Search isn’t quite there. As a result, the suggestions are rarely relevant or match what we are looking for.
In addition, the Start Menu clutters with the results of web searches alongside local files and folders. Fortunately, Windows 11 lets you quickly disable Search the Web in the Windows search.
1. Disable Web Search Results via Registry
We will use the Windows 11 registry editor to disable the Search the Web feature in this method. Here’s what you need to do.
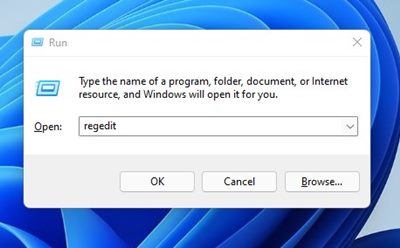
1. Press the Windows Key + R to open the RUN dialog box. In the RUN dialog box, enter Regedit and hit the Enter key.
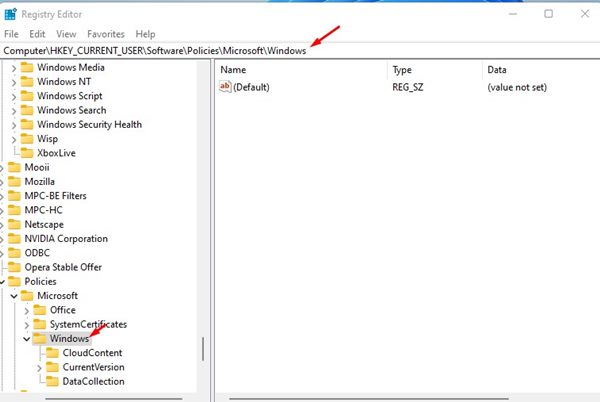
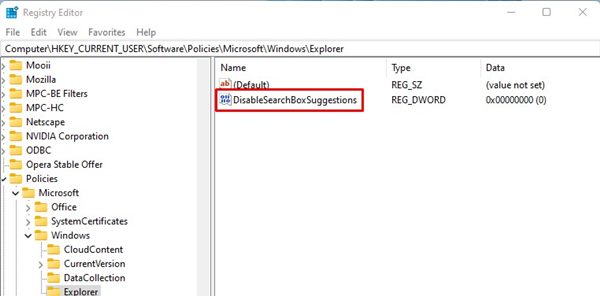
2. On the Registry Editor, navigate to the following path:
Computer\HKEY_CURRENT_USER\Software\Policies\Microsoft\Windows
3. Right-click on the Windows Folder and select New > Key.
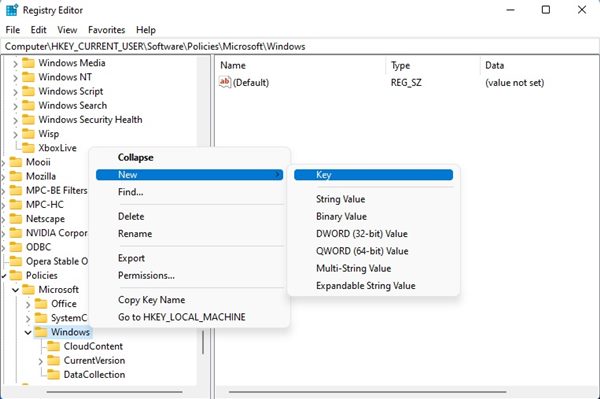
4. Name the new key Explorer and press the Enter button to save it.

5. Right-click on the Explorer key and select New > DWORD (32-bit) Value.
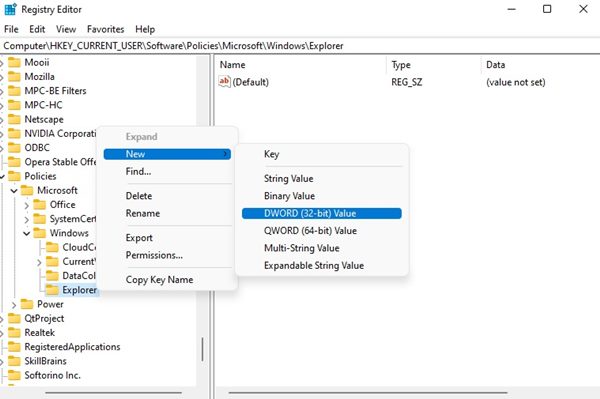
6. Rename the new DWORD value to DisableSearchBoxSuggestions and hit the Enter button.
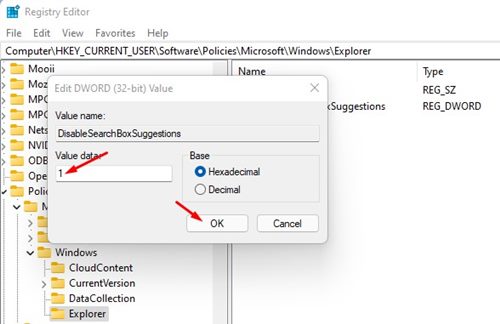
7. Now double click on the ‘DisableSearchBoxSuggestions’. Then, on the Value data field, type 1 and click the OK button.
After making the above changes, restart your computer to hide web search results on the Windows 11 Start menu.
2. Disable Web Search Results via Group Policy Editor
We will use the Group Policy Editor to disable the web search results in this method. Here are some of the simple steps that you need to follow.
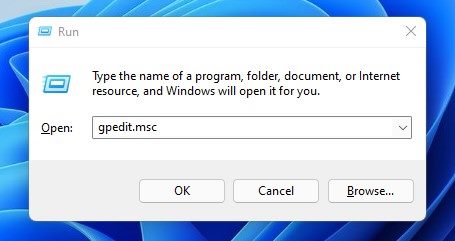
1. Press the Windows Key + R button to open the RUN dialog box. Then, enter gpedit.msc on the RUN dialog box and hit the Enter button.
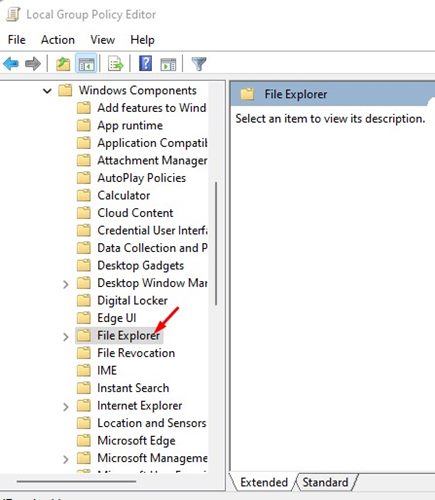
2. On the Group Policy Editor, navigate to the path:
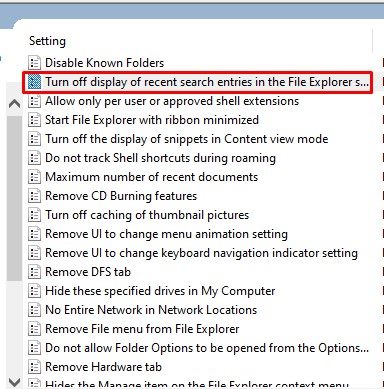
User Configuration > Administrative templates > Windows Components > File Explorer
3. On the right pane, find and double click on the Turn off display of recent search entries in the File Explorer.. policy.
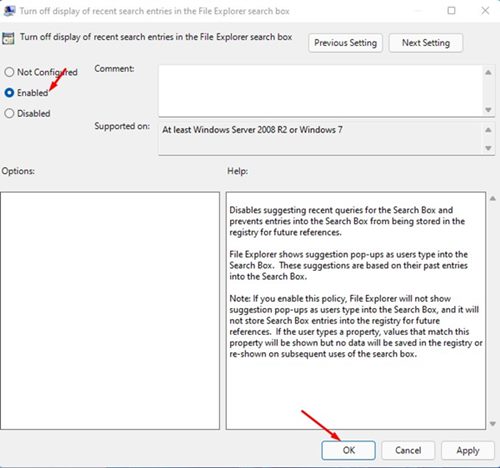
4. On the next window, select Enabled and click the OK button.
3. Disable Web Search Windows 11 – Winaero Tweaker
Winaero Tweaker is a customization tool for Windows 11 that allows you to modify various visual elements. You can use it to disable the web search. Here’s how.
1. Download & install the Winaero Tweaker on your computer.
2. Once downloaded, run the installer file and click on Next.

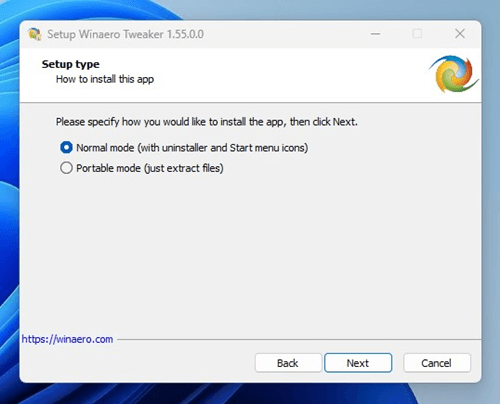
3. On the Setup type screen, select Normal mode & click Next.
4. Now accept the agreement and click on Next.
5. On the next screen, select the Destination location and click Next.

6. On the Select Additional Tasks screen, check the Create a Desktop icon and click on Next.

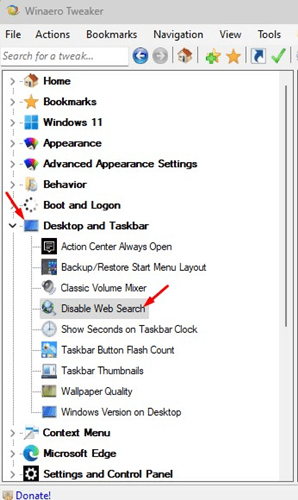
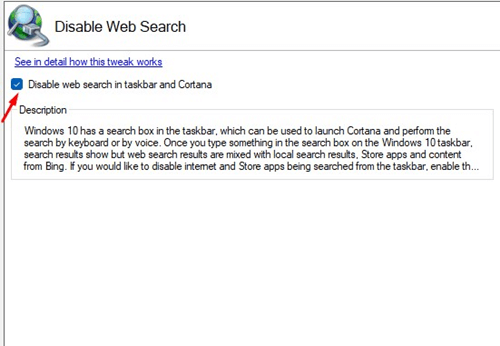
7. Run Winaero Tweaker, expand the Desktop & Taskbar and select Disable Web Search.
8. On the right side, enable the Disable web search in taskbar and cortana option.
Disabling web search results in the Windows 11 start menu is pretty easy. You can use any two methods to hide the web search results. I hope this article helped you! Please share it with your friends also. If you have any doubts, let us know in the comment box below.


