Disney Plus may not be as popular as Netflix, but it still has many amazing video content. It’s a video streaming service that lets you stream movies and TV Shows. However, there’s no free plan available for the video service.
The good thing about Disney+ is that it has its app available for Android and iPhone, allowing mobile users to stream movies & TV shows on the go. Besides that, the premium version of Disney Plus also unlocks the downloading feature for offline playback.
If you have just installed the latest Windows 11 on your computer, you may want to run Disney Plus on your PC. While PC users can use the Disney+ website to watch videos, having an app is still the best choice.
Download & Install Disney+ Hotstar on Windows 11
Hence, in this article, we will share a few best methods to download & install Disney Plus on Windows 11. The methods will be very easy; follow them as mentioned.
1. Download & Install Disney+ from Microsoft Store
Well, Disney+ has a standalone app available for the Windows operating system. If you are using Windows 10 or Windows 11, you can download it to enjoy Disney+ without any web browser. Here’s how to download & install Disney+ on Windows 11.
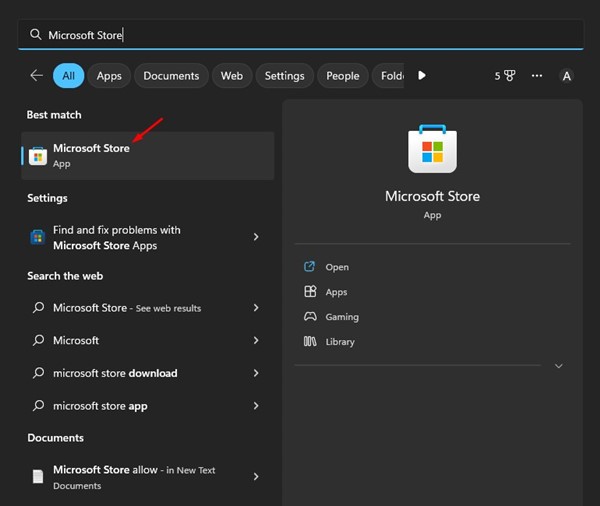
1. Click on the Windows 11 search and type Microsoft Store. Next, open the Microsoft Store app from the list of matching results.
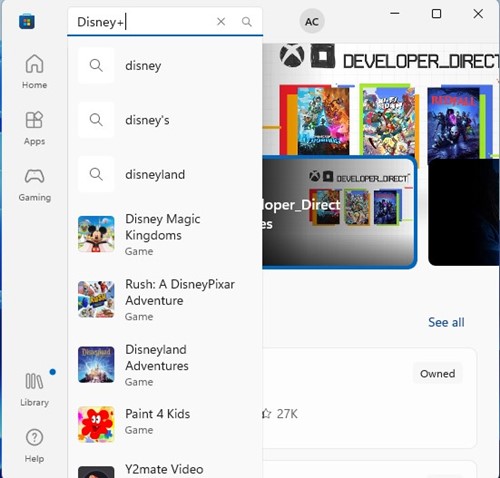
2. On the Microsoft Store, search for ‘Disney+‘ and open the matching result from the search.
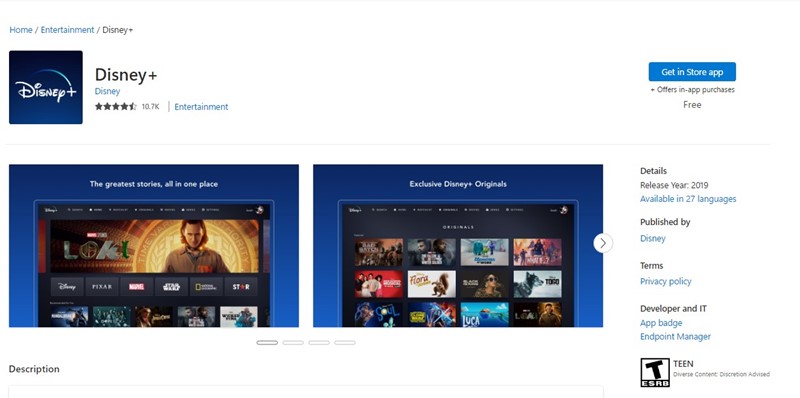
3. Alternatively, you can click on this link to open the Disney+ app store page directly.
4. Next, click the Get button to download and install Disney+ on Windows 11.
That’s it! This is how you can download & install Disney+ on Windows 11 from the Microsoft Store.
Important: Disney+ is only available in selected regions. If you live in India, you won’t find Disney+ on the Microsoft Store. This is because Disney+ in India is known as Hotstar, and there’s no app available.
Even if you click on the link we have provided, you won’t get the option to download & install Disney+ in India.
2. Install Disney+ Hotstar as Progressive Web App
If Disney+ is unavailable in your region, the next best app is to install Disney+ Hotstar as a progressive web app on Windows 11. To do that, follow some of the simple steps we have shared below.
1. Open any web browser (Edge & Chrome is recommended).
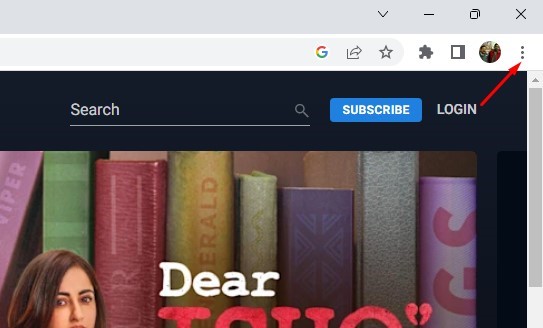
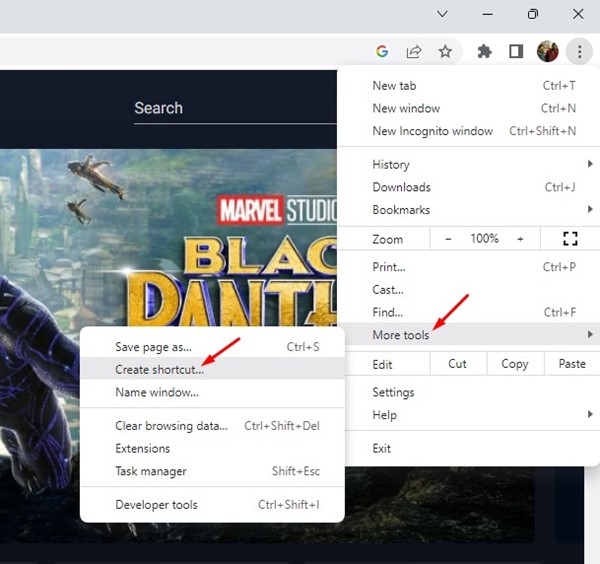
2. Next, visit the Disney+ website. On the top-right corner, click on the three dots.
3. From the list of options that appears, select More Tools > Create Shortcut.
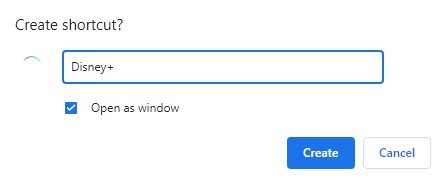
4. Now, you will see a create shortcut prompt. Enter the name as Disney+ and check the ‘Open as window‘ option. Once done, click on the Create button.
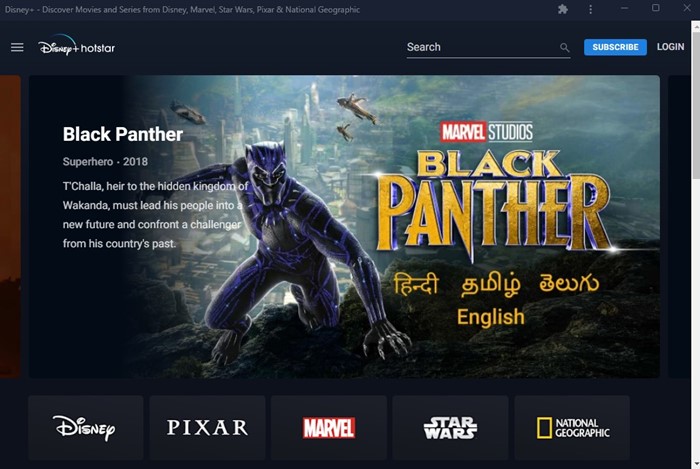
5. Now minimize the web browser. On your desktop, you will see the Disney+ shortcut. Double-clicking on the shortcut will open Disney+ as a progressive web app.
That’s it! This is how you can install Disney+ on Windows 11 as a progressive web app.
3. Download & Install Disney+ on Windows using BlueStacks
If you don’t know, BlueStacks is one of the leading Android emulators available for Windows. The emulator is available free of cost and provides endless features and customization options.
You can use BlueStacks to emulate almost every Android app and game on your Windows 11. In the case of Disney+, you need to follow the steps shared below.
- Download & install the latest version of BlueStacks on your Windows 11.
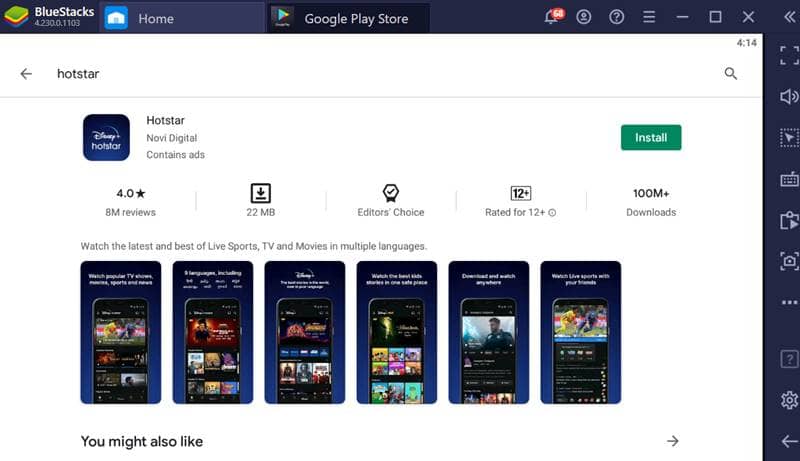
- Once installed, open Google Play Store on the emulator and sign in with your Google Account.
- Next, search for Disney+ on the Google Play Store.
- Open the Disney+ app store page and click on the Install button.
- This will install the Disney+ on your BlueStacks emulator. You can now run it directly.
That’s it! That’s how easy it is to download & install Disney+ on Windows 11 using the Bluestacks emulator.
So, that’s all about how to download & install Disney+ on Windows 11. If you need more help downloading or installing Disney+ on Windows, let us know in the comments. Also, if the article helped you, make sure to share it with your friends as well.
