Windows 10 users would know that the desktop operating system supports a wide range of video and audio file formats. However, sometimes, the operating system requires additional codecs to run a particular file format.
Let’s admit, at some point or another, we all have come across a video that doesn’t seem to play on our computer. Although media player apps for Windows like VLC media player can play almost all video files, there are several file types that it can’t play.
To play those files, one would need to install a codec. For those who don’t know, Codec is basically software that compresses your video so it can be stored and played back. Apart from compressing the files, codecs also optimize video files for playback.
With the right codec pack, the video will run smoothly and with higher frame rates on your PC. So, in this article, we are going to discuss one of the popular third-party codec packs for Windows known as ‘K-Lite Codec Pack’.
What is K-Lite Codec Pack?
The K-lite Codec pack is basically a program that brings a collection of audio and video codecs for the Microsoft Windows operating system.
In short and simple words, it brings the required codecs to play various audio and video formats generally not supported by the desktop operating system.
Apart from the audio and video codecs, the K-lite Codec pack also brings a media player known as ‘Media Player Classic Home Cinema’. You can use the MPC Home to play your video files directly, and it can play all video formats.
Features of K-lite Codec Pac
Now that you know about K-Lite Codec Pack, you might be interested to know its features. Below, we have highlighted some of the best features of the K-Lite Codec Pack for Windows 10. Let’s check out.
100% Free
Yes, you read that right! K-Lite Codec Pack is 100% free to download and use. You won’t even need to create an account or sign up with any free subscription to use the codec pack. It’s free, without asking you to install any bundled apps.
User-friendly design
Usually, Codecs for Windows 10 requires manual installation. However, the K-lite Codec pack has been made by keeping beginners in mind. It brings a user-friendly solution for playing all your audio and video files.
Expert options
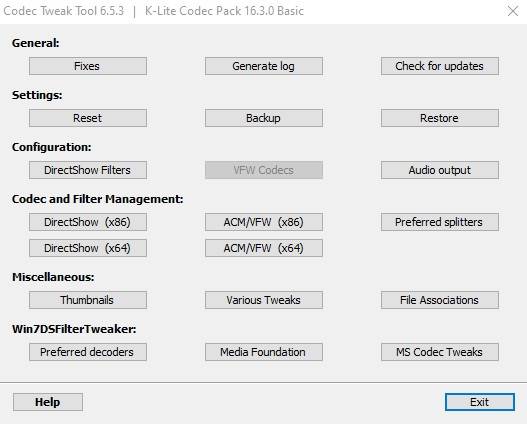
Although K-Lite Codec Pack is designed as a user-friendly solution to benefit novice users, it also offers certain advanced options for expert users. For example, users can configure their preferred decoders and splitters manually.
Compatible with many video player
K-Lit Codec Pack brings a full-fledged Media player app known as ‘Media Player Classic Home Cinema’. Still, it also works great in combination with Windows Media Player, VLC, ZoomPlayer, KMPlayer, and more. So, it’s compatible with almost all major media player tools.
Fully Customizable
The all-in-one K-Lite Codec pack contains both 64-bit and 32-bit codecs. Also, during the installation, you can manually choose which components you want to install. So, the Codec pack is fully customizable, allowing an expert to choose the components manually.
It’s frequently Updated
Another best feature of the K-Lite Codec Pack is that it gets updated frequently. That means the codec pack is always up-to-date with the most required components. And yes, the components have been carefully selected.
So, these are some of the best features of the K-lite Codec Pack for Windows 10. You can explore more features while using the tool.
Download K-lite Codec Pack for Windows
Now that you are fully aware of K-Lite Codec Pack, you might want to download it on your system. Please note that the K-Lite Codec Pack is a freeware tool; hence it can be downloaded and used for free.
Since it’s available for free, one can download it from its official website. However, if you want to install a K-lite Codec pack on multiple systems, it’s best to use the Offline Installer.
The K-Lite Codec Pack offline installer has all the files; hence it doesn’t require an active internet connection. Below, we have shared the latest download links of the K-Lite Codec Pack for Windows 10.
- Download K-Lite Codec Pack (Basic) (Offline Installer)
- K-Lite Codec Pack (Standard) Offline Installer
- Download K-Lite Codec Pack Full (Offline Installer)
- Download K-Lite Codec Pack (Mega) Offline Installer
How to Install K-lite Codec Pack on Windows 10
It’s pretty easy to install the K-Lite Codec pack on Windows 10. However, for that, you would need to follow some of the simple steps given below.
1. First of all, double-click on the K-lite Codec pack installer that you have downloaded. Next, click on the ‘Yes‘ button.
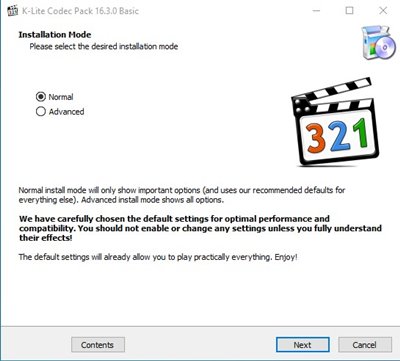
2. On the installation screen, click on the ‘Normal‘ option and click on the ‘Next‘ button.
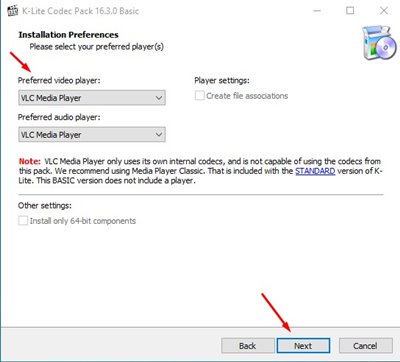
3. On the next screen, select your preferred video and audio player and click on the ‘Next‘ button.
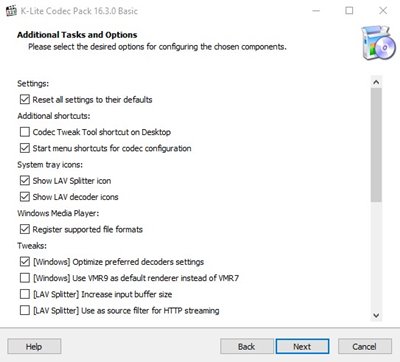
4. On the next screen, select the additional tasks and options. If you do not know this, click on the ‘Next’ button.
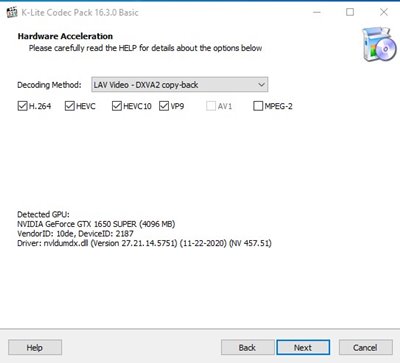
5. You can configure hardware acceleration on the next page. Set everything as per your wish and click on the ‘Next‘ button.
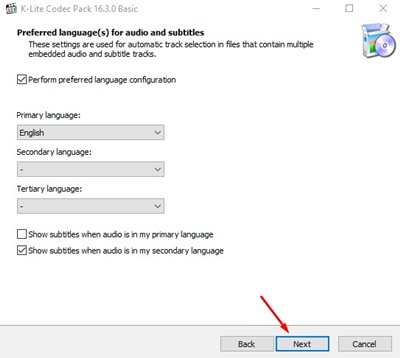
6. On the next page, select the primary language and click on the ‘Next‘ button.
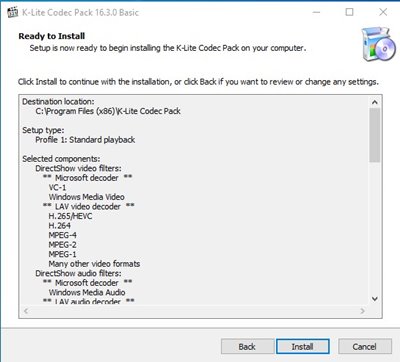
7. Next, select the Audio decoder, and on the installation screen, click on the ‘Install‘ button.
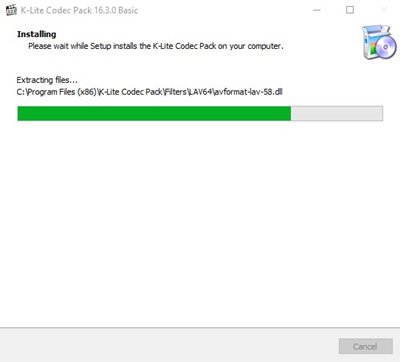
8. Now, wait for a few seconds until the codec pack gets installed on your system.
That’s it! You are done. This is how you can install the K-lite Codec pack on your system.
So, this guide is all about how to download & install the K-Lite Codec pack on your system. I hope this article helped you! Please share it with your friends also. If you have any doubts about this, let us know in the comment box below.
