You don’t need to use any third-party full-disk encryption tool on Windows operating system to protect your data. It ships with a built-in security tool called BitLocker that can lock your Hard Disk Drives, SSD, and even portable storage devices.
Until now, we have shared many articles on Windows 11 BitLocker. Today, we will talk about the Auto Unlock functionality of the full-disk encryption tool. So, let’s explore everything about the BitLocker Auto Unlock feature.
What is BitLocker Auto Unlock?
If you are using BitLocker on your Windows 11 computer to lock your HDD/SSD, you may know that the disk encryption tool automatically locks your drive when you restart your PC.
Even without restart, you can force BitLocker to lock the encrypted drives. However, sometimes, you may want BitLocker to auto-unlock your locked drives for some reason.
You can force BitLocker to unlock the encrypted drive whenever you sign in automatically. And you can force it on both fixed data drives and removable storage.
Also read: How to Set Up OneDrive Personal Vault On Windows 11
Steps to Enable BitLocker Auto Unlock Feature
Well, there are multiple ways to enable the BitLocker Auto Unlock feature. Below, we have shared some of the best ways to enable auto-unlock for BitLocker drives. Let’s check out.
1) Enable Auto Unlock via BitLocker Manager
This method will use the BitLocker manager to enable the auto unlock for the protected drives. Here’s what you need to do.
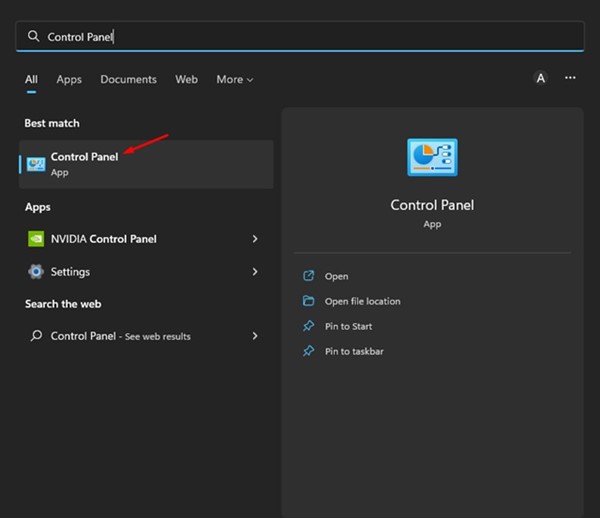
1. First, click the Windows 11 search and type in Control Panel. Next, open the Control Panel app from the list of matching results.
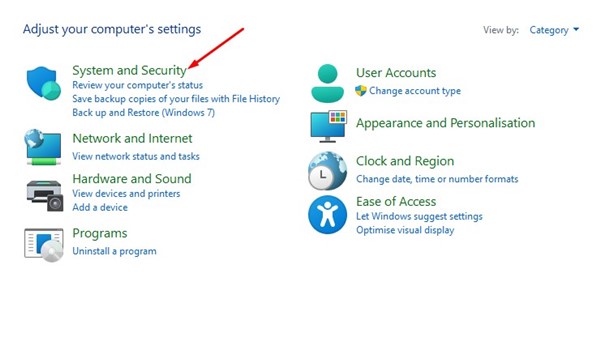
2. Click on the System and Security tab on the Control Panel.
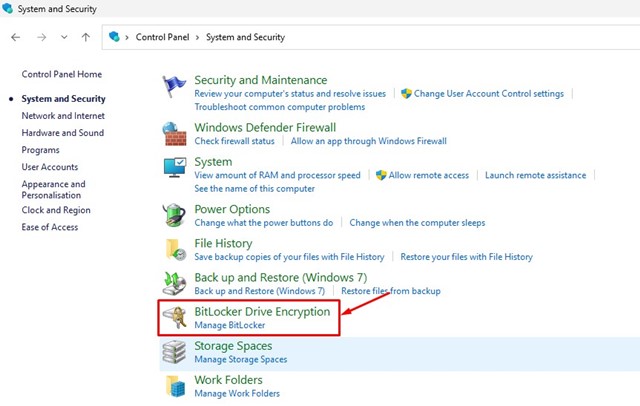
3. On the System and Security screen, click on the BitLocker Drive Encryption.
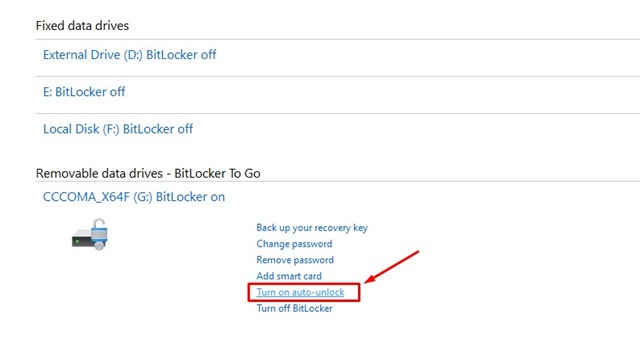
4. Now expand the drive where BitLocker is turned on.
5. To enable auto-unlock, click on the Turn on auto-unlock link.
That’s it! This is how you can enable auto-unlock for BitLocker drives in Windows 11.
2. Enable Auto Unlock for BitLocker drives via CMD
This method will use the Command Prompt utility to enable the auto-unlock feature. Here’s how you can enable auto-unlock for BitLocker drives via CMD.
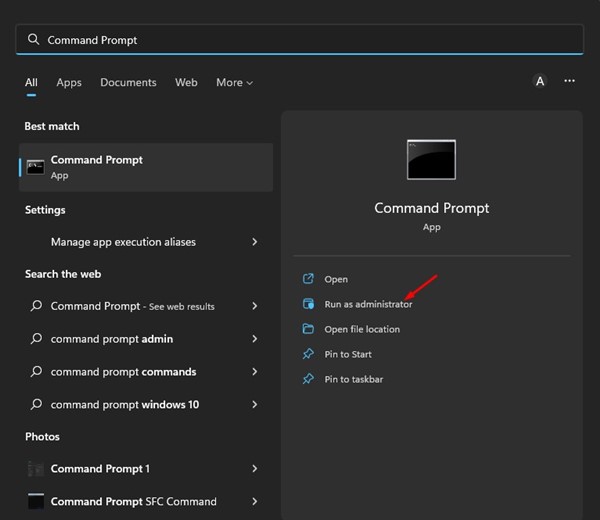
1. Click on the Windows 11 search and type in Command Prompt. Next, right-click on the CMD and select Run as administrator.
2. On the Command Prompt, type manage-bde -autounlock -enable G: and hit the Enter button.

Important: Make sure to replace ‘G’ with the drive letter assigned to your removable or fixed data drive.
3. Now command prompt will show you a success message that reads ‘Automatic unlock enabled’
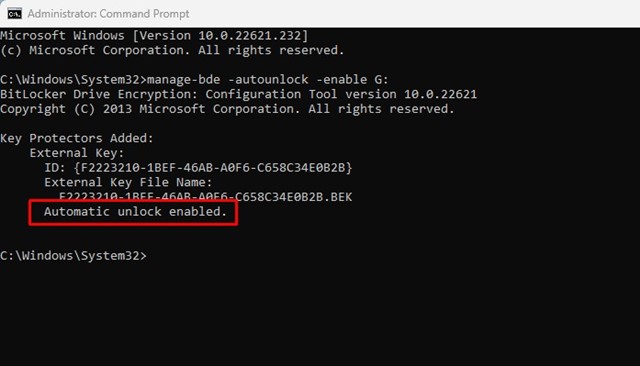
That’s it! This is how you can enable auto-unlock for protected BitLocker drives via CMD.
2) Enable Auto-Unlock for Drive on BitLocker Password Prompt
Windows 11 allows you to enable Auto-unlock for a drive while you’re unlocking it. You need to open the file explorer and double-click on the locked drive.
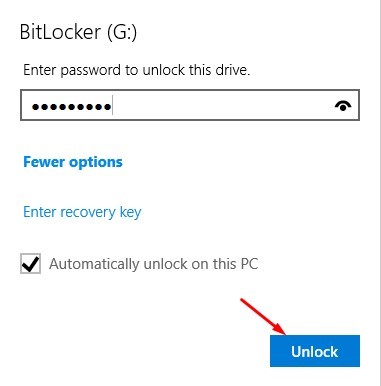
Now you will be asked to enter the password to access the drive. Enter the password, and check the ‘Automatically unlock on this PC’ option. Once done, click on the Ok button.
Also read: Windows 11 Free Download Full Version
BitLocker is a great feature; you should use it to protect your removable or fixed data drives. So, these are the few best ways to enable auto-unlock for BitLocker drives in Windows 11. If you need more help related to BitLocker’s Auto-Unlock, let us know in the comments.


