If you have used the older versions of Windows, you might know about the Aero Shake feature. Aero Shake is a feature that was introduced in Windows 7 by Microsoft. Since the feature received some excellent feedback from the users, it was made available even on the latest Windows 11 operating system.
Aero Shake is also available on Windows 11, but it’s disabled by default. However, you can go through the Settings and enable the feature on your Windows 11 in easy steps. If you don’t know about Aero Shake, it’s a multitasking feature available exclusively for Windows.
Aero Shake, once enabled, allows you to declutter your desktop screen by grabbing and shaking a window. The feature minimizes all opened app windows on your desktop except the one you hold with your mouse. This is an interesting feature and can help you declutter the desktop in no time.
Steps to Enable or Disable Aero Shake in Windows 11
Hence, if you are interested in enabling or disabling the Aero Shake feature on your Windows 11, you are reading the right guide. Here’s how to enable or disable the feature on Windows 11.
Enable Aero Shake in Windows 11
If you want to minimize all open app windows on your desktop except the one you’re holding with your mouse, you need to enable the Aero Shake feature. Here’s how to enable it.
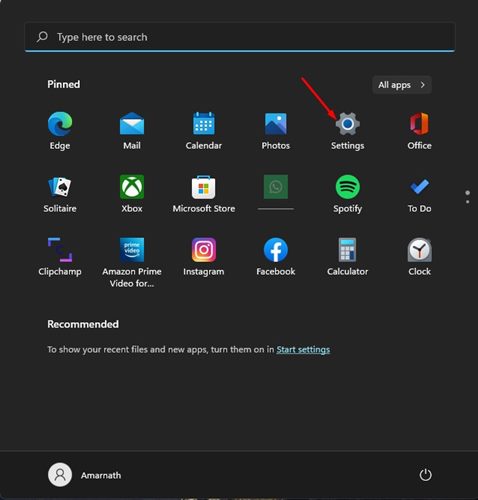
1. First of all, click on the Windows 11 Start button and select Settings.
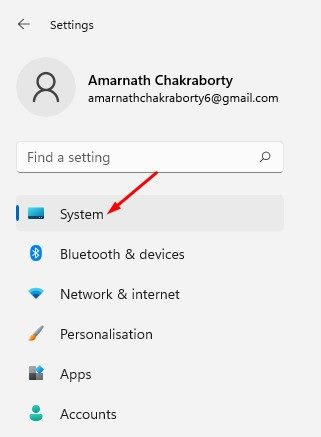
2. On the Settings app, click on the System tab on the left pane.
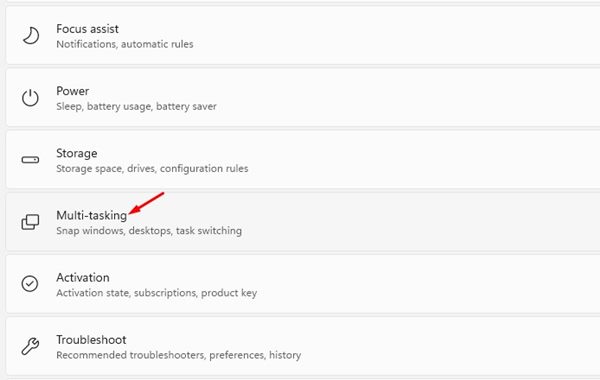
3. On the right pane, click on the Multi-tasking option.
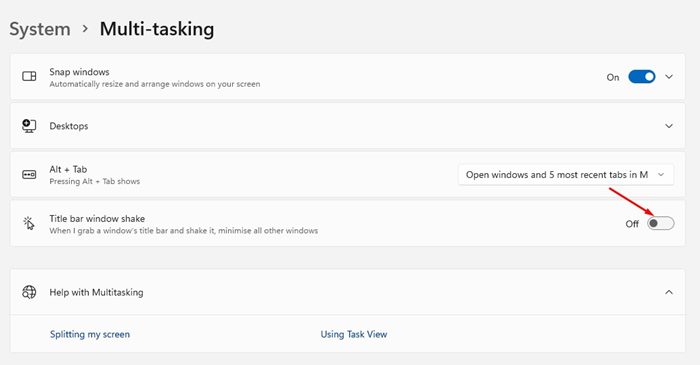
4. Next, on the Multitasking screen, scroll down and enable the option ‘Title bar Window Shake’
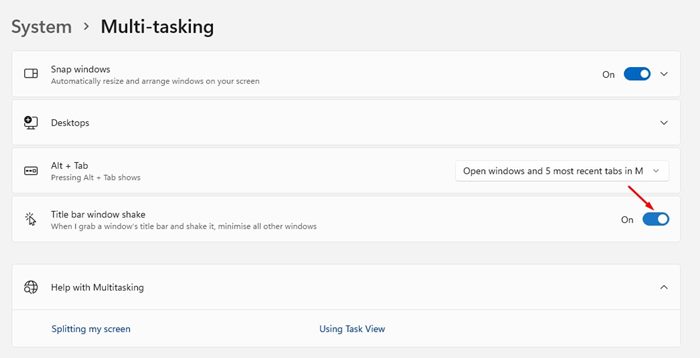
That’s it! This will enable the Aero Shake feature on your Windows 11 computer. You just need to grab a window’s title bar and shake it. Doing so will minimize all other windows in the background.
Disable Aero Shake in Windows 11
If you don’t want to minimize opened Windows with the Aero Shake feature, you need to disable it from the Settings app. Here’s how to disable Aero Shake in Windows 11.
1. First of all, click on the Windows 11 Start button and select Settings.
2. On the Settings app, click on the System > Multi-tasking.
3. Scroll down and disable the Title bar window shake option on the Multitasking screen.
That’s it! This will turn off the Aero Shake feature on your Windows 11 computer.
So, that’s how easy it is to enable or disable the Aero Shake on Windows 11 PC. Apart from the Aero Shake, Windows 11 provides more multitasking options that you can explore from the Settings app. If you need any more help enabling/disabling Aero Shake in Windows 11, let us know.


