If you are using Windows operating system, you might be aware of User Account Control. Whenever you try to install an app on your system, you are presented with a UAC dialog box.
The purpose of UAC is to prevent unauthorized changes from being made to your computer without the administrator’s permission. The UAC feature of Windows 11 can block some actions performed by malware.
For instance, UAC will block or notify you if any program tries to add malware or makes changes to the system settings. Although it’s a useful feature, some might want to change how windows notify about the changes on their computer.
The good thing is that the User Account Control can be easily configured to your preference via the Control Panel. So, in this article, we will share a step-by-step guide on how to turn on user account control on Windows 11.
Also read: How to Download & Install Android Apps in Windows 11
Steps to Enable/Disable User Account Control (UAC) in Windows 11
Here we will use the Control Panel to enable the User Account Control feature. Follow some of the simple steps given below.
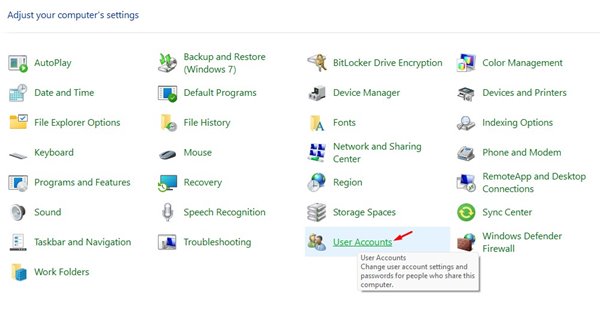
1. First, open the Windows 11 search and type in Control Panel.

2. On the Control Panel, click on the User Accounts option.
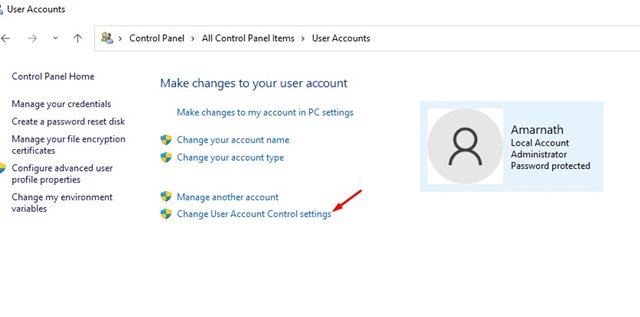
3. On the next screen, click on the Change User Account Control settings.
4. You will now see the User Account Control Setting page with a vertical slider with 4 different settings.
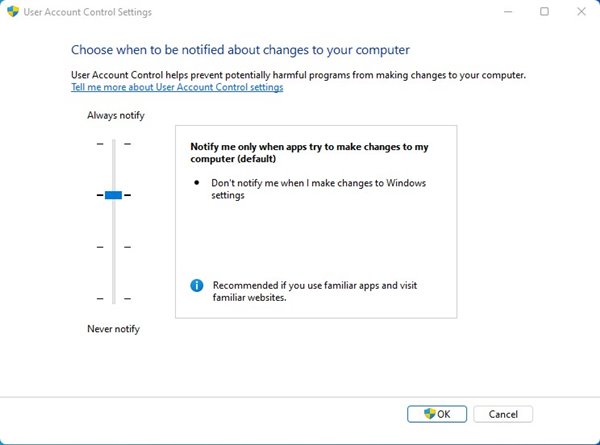
5. At this stage, you need to drag the slider as per your preference. For example, if you set the slider to the very first option, it will trigger a UAC prompt whenever software attempts to make a change.
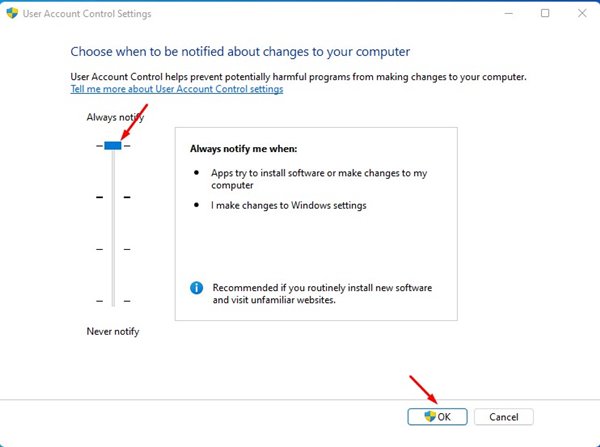
6. The fourth and final option completely disables the UAC. This means any apps can make changes to your computer without any security check.
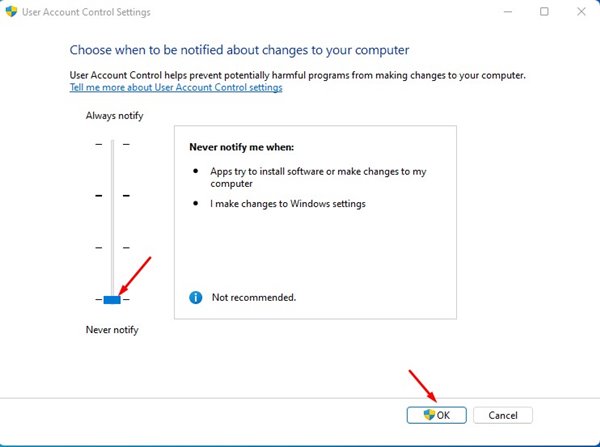
7. If you want to secure your PC, it’s best to set the slider to the second option. This will trigger the UAC prompt whenever a third-party app tries to make changes to the computer.
That’s it! You are done. This is how you can enable/disable the user account control prompt on Windows 11.
User Account Control or UAC is indeed an essential security feature. You should enable the feature on your PC to prevent any unauthorized changes. I hope this article helped you! Please share it with your friends also. If you have any doubts related to this, let us know in the comment box below.


