The Dynamic Refresh rate can only be enabled on a laptop or monitor that supports a refresh rate of at least 120Hz. Also, the laptop/monitor should support VRR (Variable Refresh Rate). The Dynamic Refresh rate also requires a WDDM 3.0 graphics driver.
How to Enable Dynamic Refresh Rate (DRR)
The Dynamic Refresh Rate option is only available on the very latest version of Windows 11. So, even if you have compatible hardware, you will still need to update your PC to enable & use the new feature.
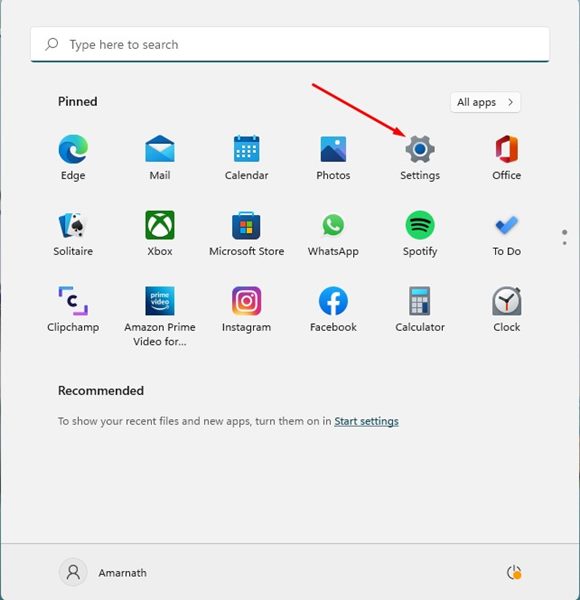
1. Click the Windows 11 Start button and select Settings.
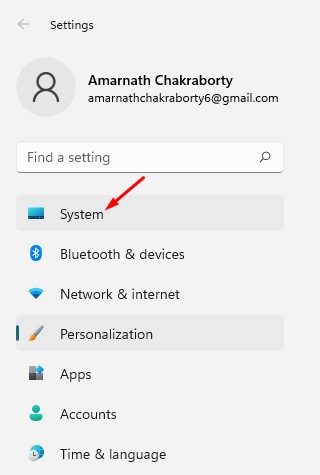
2. Click System.
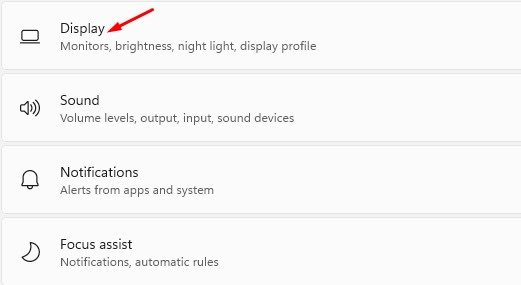
3. Click Display.
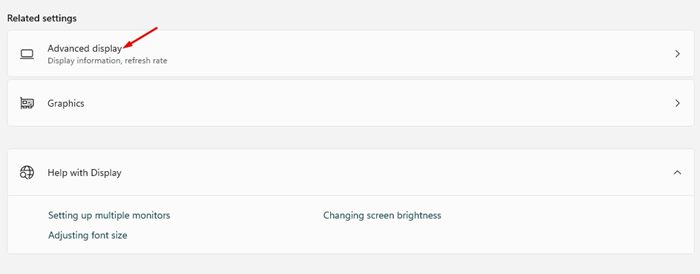
4. Scroll down and find the Related Settings section. Click on Advanced Display.
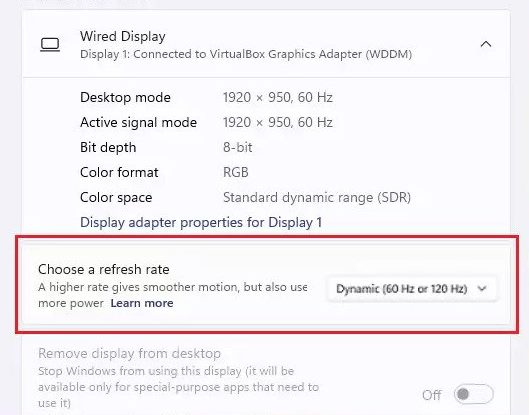
5. On the Advanced Display page, choose a refresh rate option and select the Dynamic option to enable the DRR feature.
This will enable the dynamic refresh rate on your compatible Windows 11 computer. If you cannot find the Dynamic option, you have incompatible hardware. To turn off the Dynamic Refresh rate, navigate to Settings > System > Display > Advanced Display. On the Advanced display page, choose a regular refresh rate such as 60Hz or 120Hz.
Unable to Select Dynamic Refresh Rate?
Dynamic refresh rate will only work on laptops with a minimum 120Hz refresh rate. If your monitor doesn’t meet that requirement, you won’t be able to find or change the dynamic refresh rate.
If your display meets the requirements but still can’t select Dynamic refresh rate, you may have problem with the graphics driver. To enable the dynamic refresh rate, you can try installing the WDDM 3.0 graphics driver.
Dynamic Refresh Rate is mainly designed for laptops, as it helps to preserve battery life. However, if you are experiencing display issues after enabling the feature, you must disable it. If you have any doubts, let us know in the comment box below.


