Most of the audio you listen to on Windows PC/Laptop is in ‘stereo.’ A stereo system plays sound through the left and right speakers. In this case, if one of the speakers is damaged, you will experience sound issues.
However, on Windows 10 and Windows 11, you have an option to mix the sound to mono. The Mono audio combines left and proper audio channels into one channel. That means, if you turn on the mono audio, you will be able to use just one earbud with your PC but still hear both the left & right audio tracks.
Mono audio is instrumental, especially if you have problems with one of your ears. So, in this article, we will share a step-by-step guide on how to enable Mono audio on Windows 10/11.
Steps to Enable Mono Audio in Windows 10/11
It’s relatively easy to enable mono audio on Windows 10 and Windows 11 operating systems. First, you need to follow some of the simple steps as directed. Let’s check out.
1) Enable Mono Audio on Windows 10
The Mono audio option was not available on the old builds of Windows 10. So, make sure to update your Windows 10 to the latest build and follow the steps shared below.
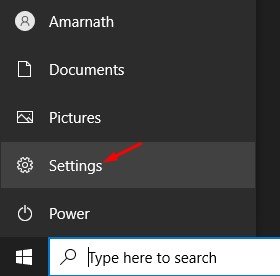
1. First of all, click on the Start button and select Settings.
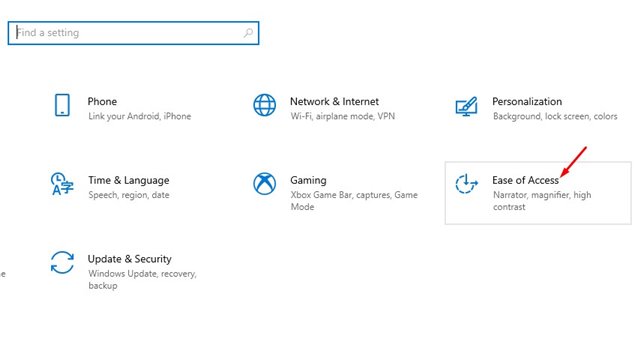
2. On the Settings page, click on the Ease of Access icon as shown below.
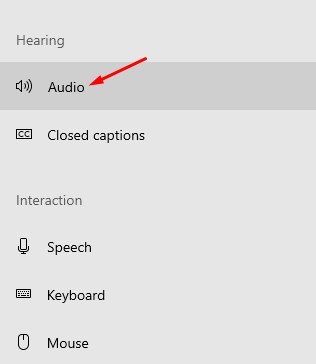
3. On the left pane, click on the Audio option as shown below.
4. On the right, enable the toggle button behind Mono Audio.
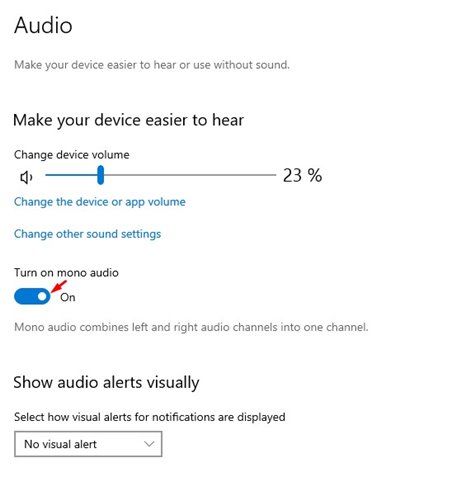
That’s it! You are done. This will enable Mono Audio on your PC. If you ever wish to disable the feature, turn off the toggle button in Step 4.
2) Enable Mono Audio in Windows 11
Just like Windows 10, you can enable Mono Audio even on the new Windows 11 as well. Follow some of the simple steps shared below to enable mono audio in Windows 11.
- First of all, press Windows Key + I button to open the Settings. Then, on the Settings, click on the System.
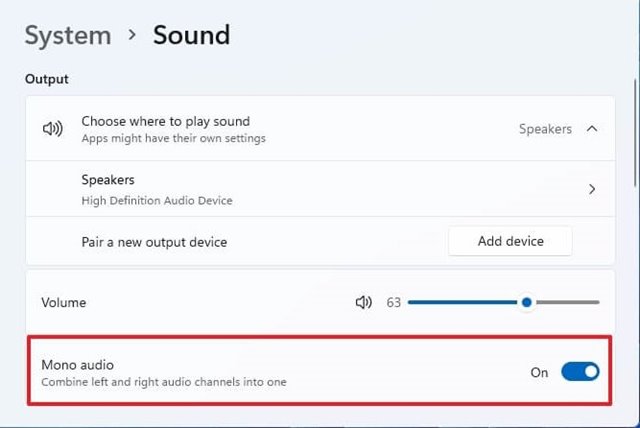
- On the right pane, click on the Sound option.
- Under the Sound settings, you need to turn on the Mono audio toggle switch to enable the feature.
- Turn off the Mono Audio toggle in the above step to disable the feature.
That’s it! You are done. This is how you can enable Mono audio in Windows 11.
After making the above changes, your System will combine the left and proper audio channels to provide a mono sound. If you are not satisfied with the mono sound, you can easily disable it. I hope this article helped you! Please share it with your friends also.


