If you use a Windows laptop or desktop, you might know that the operating system offers you quite a few battery-saving features. For example, on Windows 10 and 11, you get a sleep mode that saves the battery power and shuts down the hard disk to maintain its health.
Although sleep mode is useful, many users were facing problems with it. Many users have reported that while their PC is in sleep mode, it automatically wakes up. This is not a big issue but could be frustrating if this happens at regular intervals.
PC waking up out of nowhere is not a sign of error or system file corruption. You need to make a small change in the Power option settings of Windows. So, if you are facing problems with the Windows sleep mode and looking for ways to troubleshoot it, you are reading the right guide.
Also Read: Windows 11 Theme: Download Pantone Theme Wallpaper
Steps to Enable or Disable Wake Timers in Windows 10/11
In this article, we will share a step-by-step guide on how to enable or disable wake timers in Windows 10/11. Let’s check out.
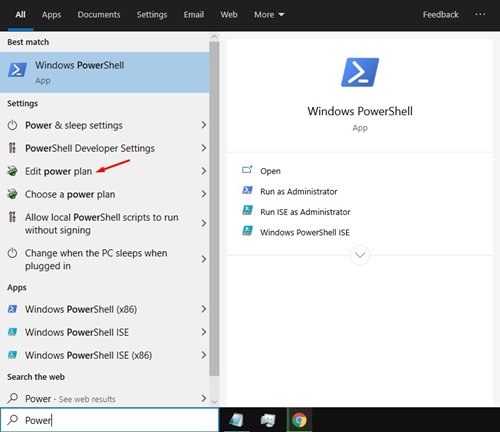
1. First of all, open the Windows 10/11 control panel. Then, on the Search box, type Power and click on the Edit power plan option as shown below.
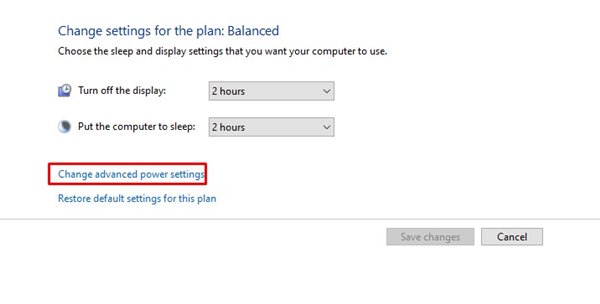
2. On the Edit Power plan page, click on the Change advanced power settings option.
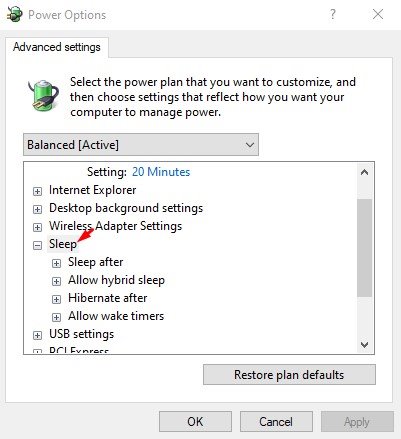
3. On the Power option, you need to expand the Sleep option, as shown below.
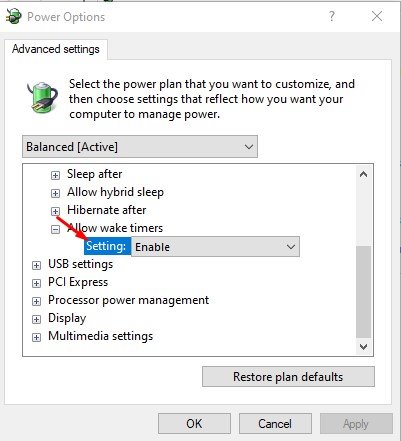
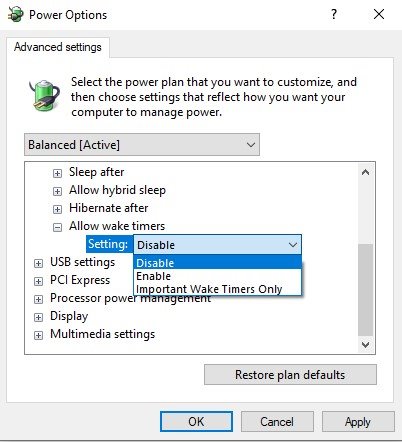
4. Under the sleep, expand the Allow wake timers option, as shown in the screenshot below.
5. If your system is battery enabled, click on the drop-down behind On Battery and select between Enable or Disable.
6. If your PC is not battery enabled, you need to select ‘Enable’ or ‘Disable’ on the Plugged in option.
That’s it! You are done. This is how you can enable to disable wake timers in Windows 10/11.
If your PC wakes up from the sleep mode automatically, the chances are that the Allow wake timers option is enabled. You can easily disable it by following the steps we have shared. I hope this article helped you! Please share it with your friends also.
