Both Android and iOS devices have a feature called WiFi calling. It’s a feature that facilitates crystal-clear calls in locations with bad connectivity. The quality of WiFi calls is always superior as it uses your WiFi to make the call.
Using WiFi calling on Android has two advantages – You will get enhanced audio call quality and reduced call connection time. The feature was designed for people who live in low or bad connectivity areas where telecom networks are always a problem.
Even though all Android smartphone has this feature, it needs to be enabled manually from Settings. So, if you are interested in enabling WiFi calling on your smartphone, continue to read this article.
Steps to Enable Wifi Calling on Android
Below, we have shared a step-by-step guide on how to turn on WiFi calling on an Android smartphone. Let’s get started.
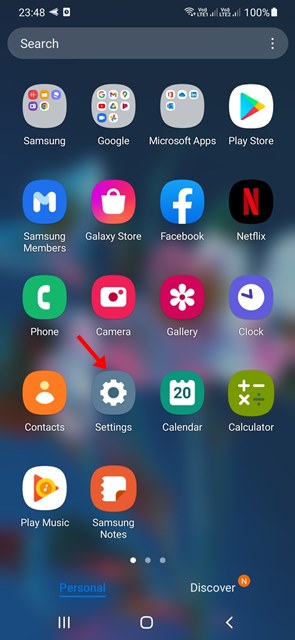
1. First, open your Android App drawer and tap on Settings. You can also pull down the notification shutter and select Settings.
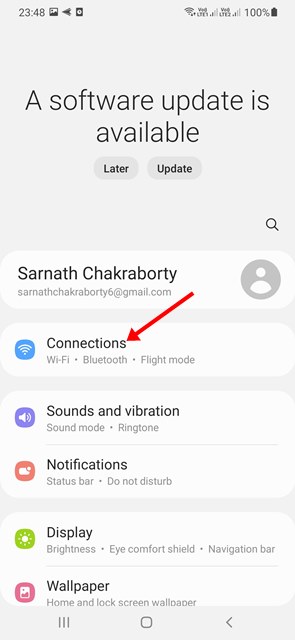
2. On Settings, select Connections. In some Android, you need to tap on the WiFi option.
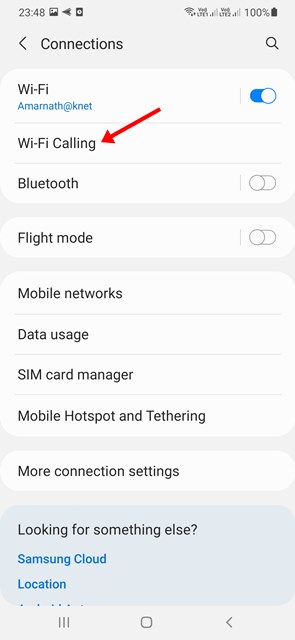
3. On the next screen, tap on the WiFi calling option.
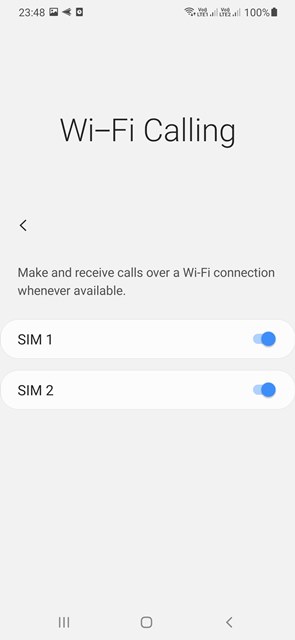
4. Now, on the WiFi calling screen, enable the toggle button beside your SIM to enable the feature.
That’s it! This is how you can enable WiFi calling on any Android smartphone.
While the feature is available on every Android smartphone, WiFi calling will only work if your telecom operator supports the calling feature. Not all telecom operator offers this feature.
So, that’s how easy it is to enable WiFi calling on any Android device. If the telecom network coverage is bad in your area, you should enable and start using the WiFi calling feature. If you need more help enabling WiFi calling on Android, let us know in the comment box below.


