Many users have reported that File Explorer is not responding on Windows 11. This is a common problem, especially if you’ve just installed Windows 11. If you have been facing the same problem, here’s what you can do to fix it.
1. Restart the Windows 11 File Explorer
If you cannot access the file explorer and it’s showing ‘Not Responding’, you should restart it from the Task Manager.
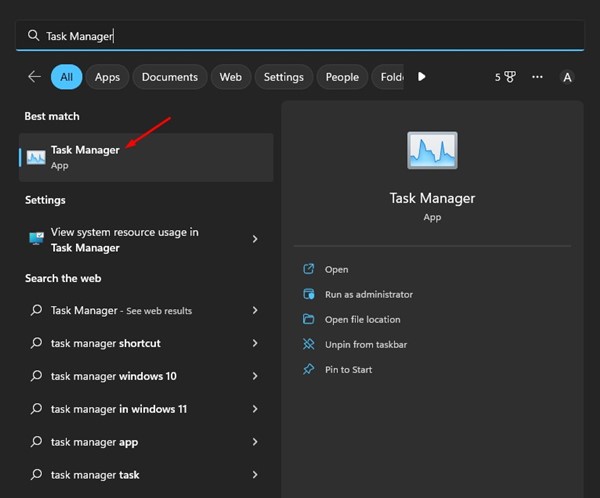
1. Type Task Manager in Windows 11 Search and open it.
2. Find the Windows Explorer Process in the Task Manager.
3. Select Windows Explorer and click on the Restart Task.
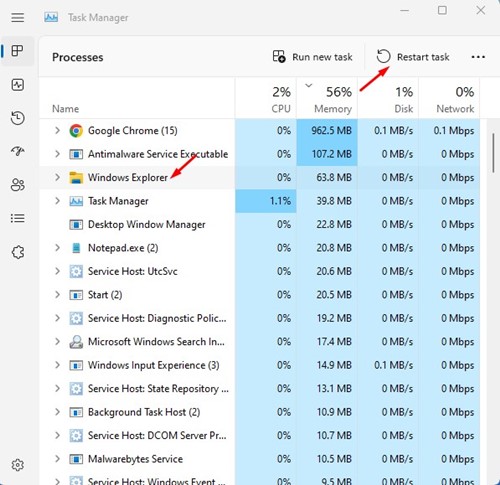
This will restart Windows Explorer. Once you’ve done this, open the File Explorer; this time, it will respond.
2. Restart your Windows 11 PC
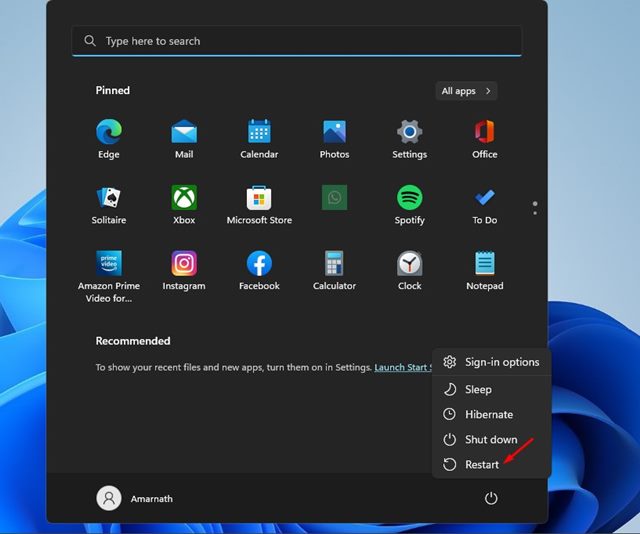
Just like humans, gadgets require some rest, and restarting or shutting down is important since it gives your hardware time to cool down. If restarting Windows Explorer didn’t help, you should restart your computer.
3. Clear the File Explorer History
As you use File Explorer, it stores the cache file on your system installation drive. Along with it, you also have a file that stores all the file Explorer history. Sometimes, these files get corrupted and prevent File Explorer from functioning correctly. To fix this issue, you need to clear the file explorer history.
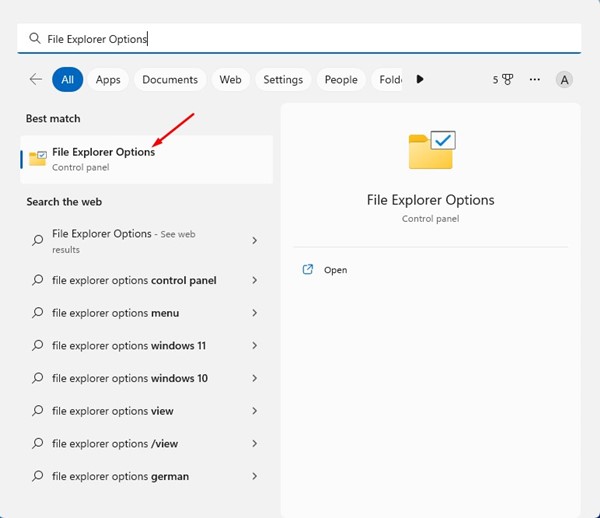
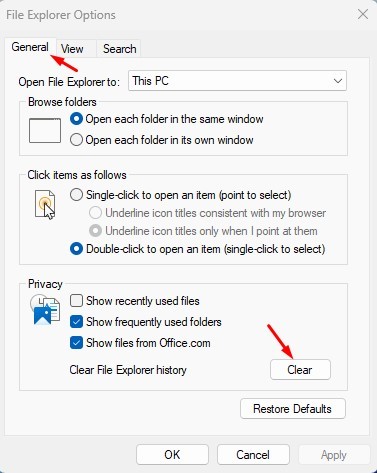
1. Open the File Explorer options from the Windows Search.
2. Switch to the General tab.
3. On the General, click the Clear button in the Privacy section.
4. On the Open File Explorer dropdown, select This PC.
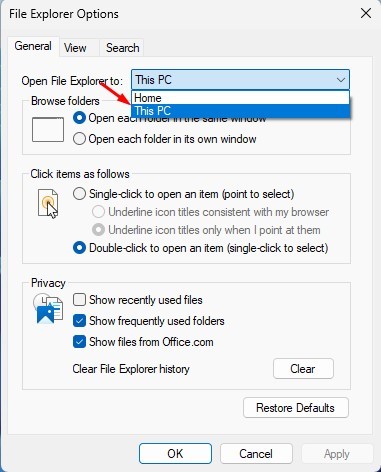
5. After making the changes, click Apply.
4. Run the System File Checker
The System File Checker, or SFC command, is used to resolve corrupted system files. The command effectively scans your PC and finds the corrupted system files. It also attempts to fix or replace the corrupted system files. If your Windows 11 File Explorer isn’t responding, you can try running the SFC command in the Command Prompt.
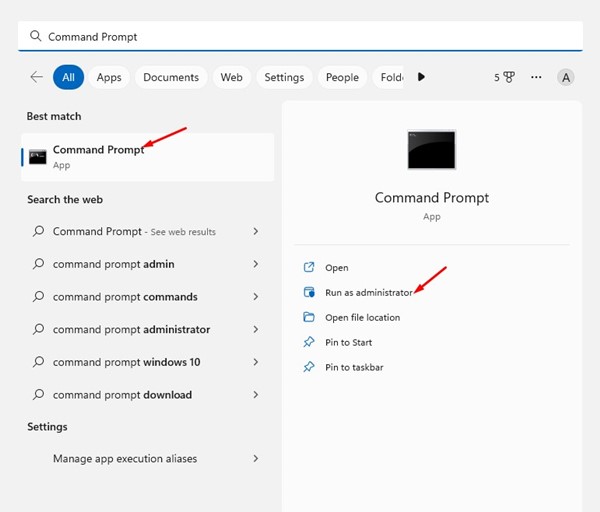
1. Click on the Windows 11 search and type in CMD. Right-click on the CMD and select Run as administrator.
2. Paste the sfc /scannow command and press Enter.
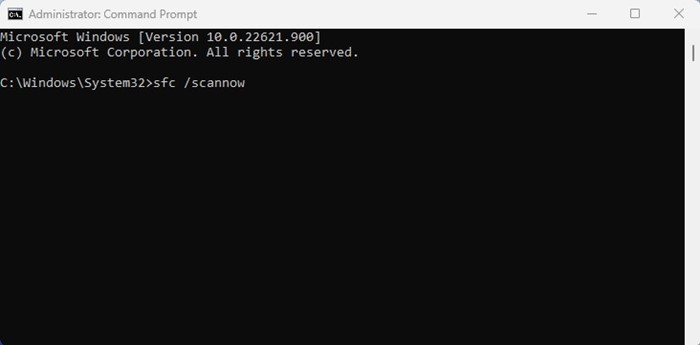
3. This command will run the System File Checker utility. The process might take a few minutes to complete.
5. Run the DISM Command tool
If the SFC method returns an error message, you must immediately run the DISM command. DISM, or Deployment Image Servicing and Management, is a command-line tool for fixing system problems.
1. Click on the Windows 11 search and type in CMD. Right-click on the CMD and select Run as administrator.
2. Paste the command and press Enter.
DISM /Online /Cleanup-Image /RestoreHealth
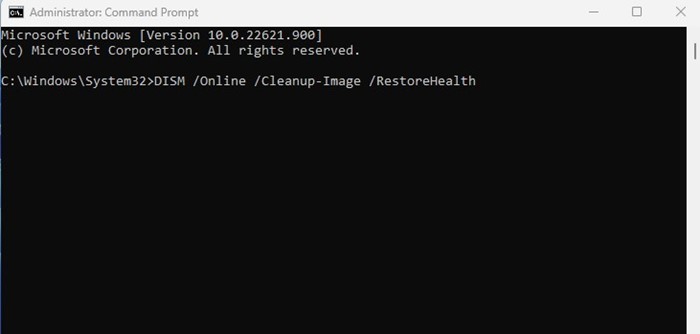
3. This command will run the DISM tool. The process might take a few minutes to complete.
6. Run the Disk Cleanup Utility
There are chances that you are experiencing this problem due to the increased number of junk files and less storage space. The best way to free up storage space and clean junk files is to run the Disk Cleanup utility.
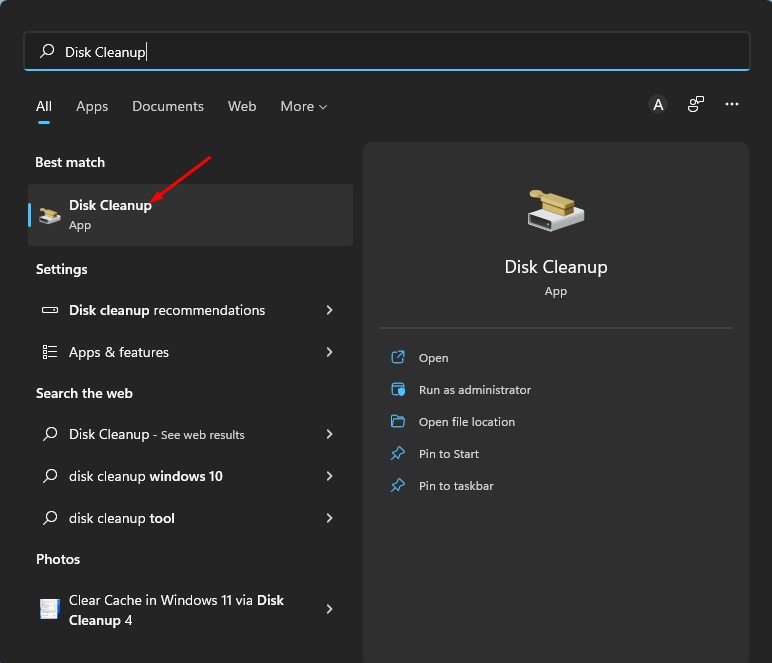
1. Open the Disk Cleanup app from the Windows Search.
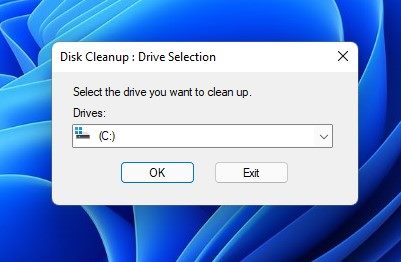
2. When the Disk Cleanup prompt opens, select the drive of your system installation. Once done, click OK.
3. You can now click the OK button to clear all files. If you don’t want specific files to be deleted, uncheck them and click OK.
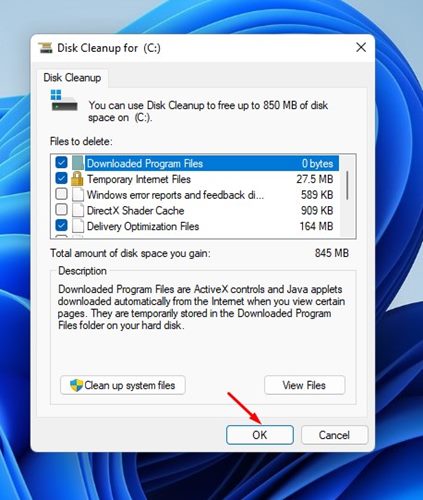
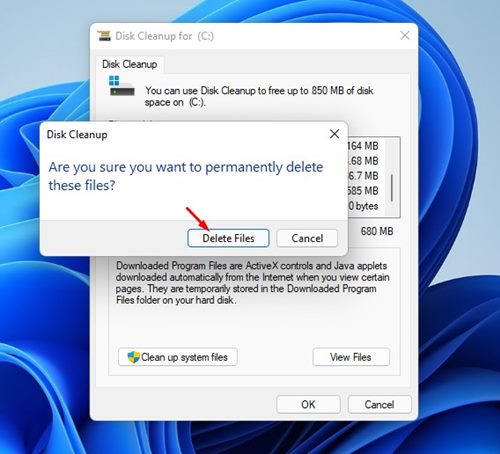
4. Click the Delete Files.
7. Disable the Antimalware Software
Even though Windows 11 ships with a full-fledged security tool called Windows Security, users still prefer to use third-party antimalware software. While there’s no problem using reputable antimalware programs, sometimes security tools conflict with File Explorer.
The best way to determine whether the Antimalware program is the culprit is to disable it and restart your computer. After the restart, open File Explorer. If the File Explorer opens and functions properly, your antimalware program is the culprit.
Open your antimalware program and check whether it’s blocking system files. If not, start using the Windows Security app that ships with Windows 11.
8. Update your Windows 11
A bug or a glitch in the operating system version may prevent File Explorer from functioning correctly. You can easily resolve this by installing all pending updates.
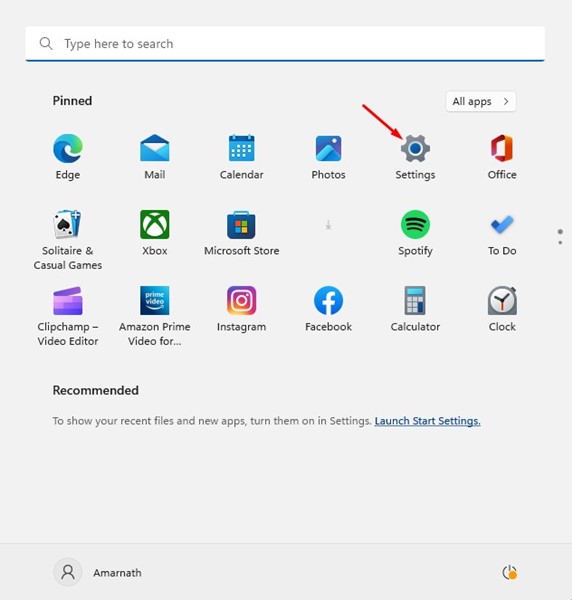
1. Click the Windows 11 Start button and select Settings.
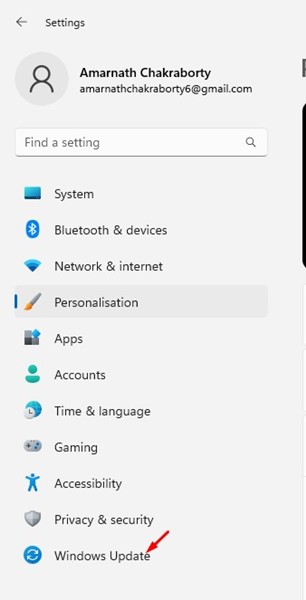
2. Click on Windows Update.
3. Click on Check for Updates.

9. Reset Windows 11 PC
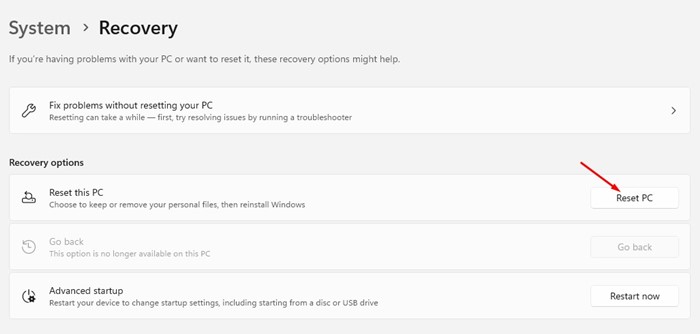
If nothing worked for you to fix the File Explorer problem, you can reset your PC. Resetting Windows 11 to its default factory settings is a good idea if you don’t know how to fix certain problems.
It will give your PC a fresh start and possibly fix File Explorer crashing on Windows 11. We have already shared a detailed guide on how to reset a Windows 11 PC using Settings. Make sure to follow the steps shared in that guide.
These are the best ways to fix file explorer problems. If you need more help fixing a Windows 11 File Explorer freeze or crash, let us know in the comments below.


