Although Windows 11 has lots of new features, the core largely remains the same as Windows 10. Actually, Windows 11 introduced lots of visual changes like the Settings page looks different, the taskbar icon is placed at the centers, Windows have rounded corners and more.
Just like Windows 10, you can easily find the IP Address of your computer in Windows 11 as well. There are multiple ways to find the IP Address on Windows 11 operating system.
Best Methods to Find the IP Address in Windows 11
Hence in this article, we have shared few best methods to find the IP Address on Windows 11 computer. Please note that most of these methods will work in Windows 10 as well. So, let’s check out.
1. Find IP Address via Control Panel
Control Panel serves as the easiest way to check the IP Address. To find your IP Address using the Control Panel, you need to follow some simple steps below.
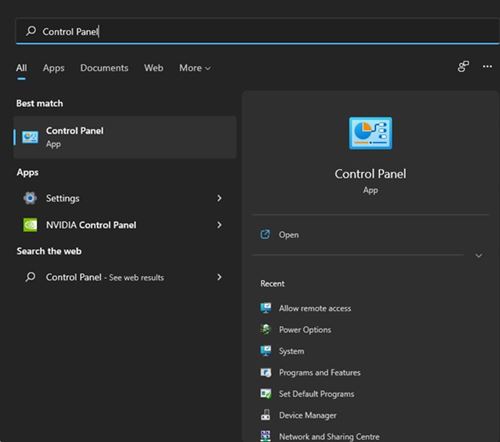
Step 1. First of all, open Windows 11 search and type in ‘Control Panel’. Then, open Control Panel from the list.
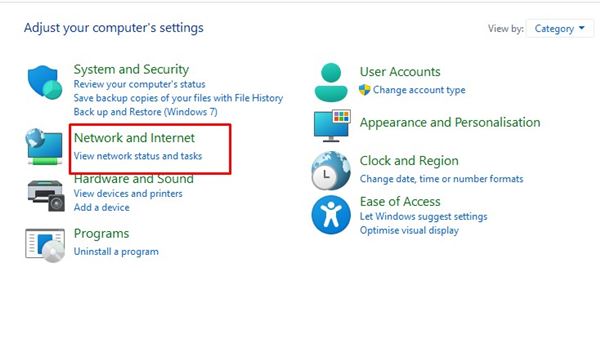
Step 2. On the Control Panel, click on the ‘Network and Internet’ option.
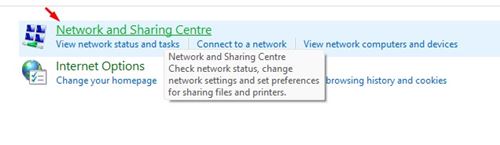
Step 3. On the next page, click on the ‘Network and Sharing Center’ option.
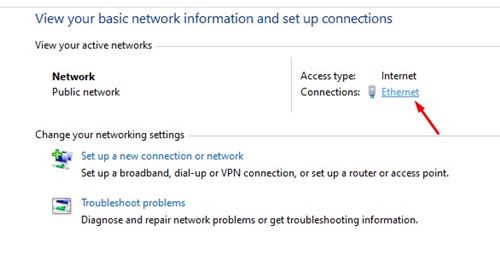
Step 4. On the next page, click on the connected network.
Step 5. Next, click on the ‘Details‘ button, as shown in the screenshot below.
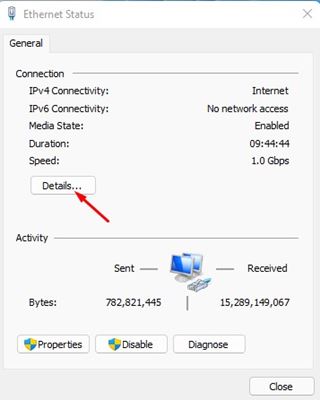
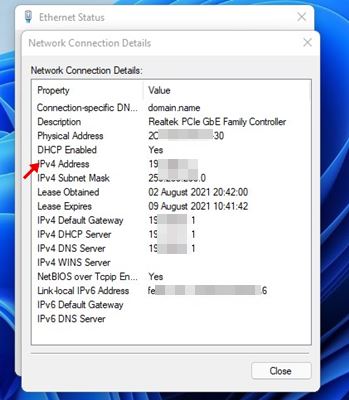
Step 6. The next Window will display you the IP Address. Look for the IPv4 address. That’s your local IP Address.
That’s it! This is how you can check the IP Address of your Windows 11 computer.
2. Find IP Address via Windows Settings
In this method, we are going to use Windows Settings to find the IP Address. Here’s what you need to do.
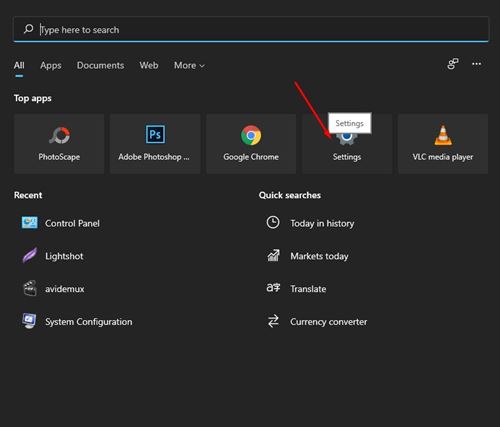
Step 1. First of all, click on the Windows Start button and select ‘Settings.’
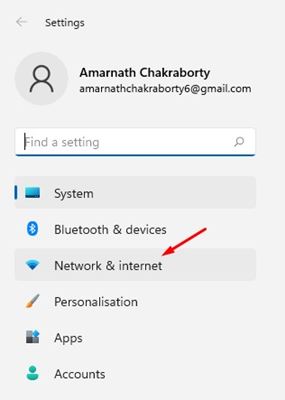
Step 2. On the Settings page, click on the ‘Network & Internet’ option.
Step 3. If you are using WiFi, click on ‘WiFi‘. If you are using a wired connection, click on the ‘Ethernet.’

Step 4. Next, click on the network you are currently connected to.
Step 5. Scroll down and find the IPv4 address. That’s the local IP Address of your Windows 11.

So, this is how you can use the Windows 11 Settings app to check the IP Address of your computer.
3. Finding IP Address via Task Manager
Task Manager seems to be the easiest option to find the IP Address on Windows 11. You need to implement some of the simple steps shared below.
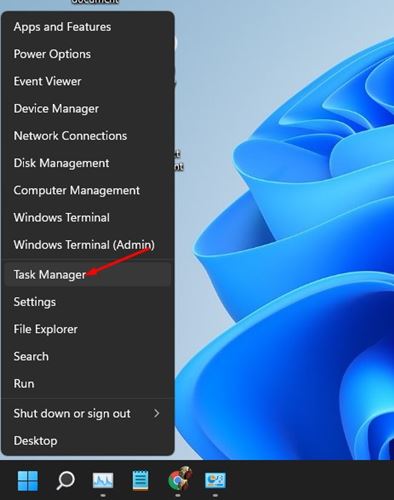
Step 1. First of all, right-click on the Start button and select ‘Task Manager.’
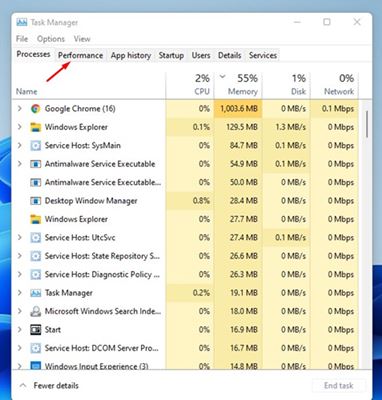
Step 2. On the Task Manager, select the ‘Performance‘ tab.
Step 3. On the performance, click on the ‘WiFi or Ethernet’ option.
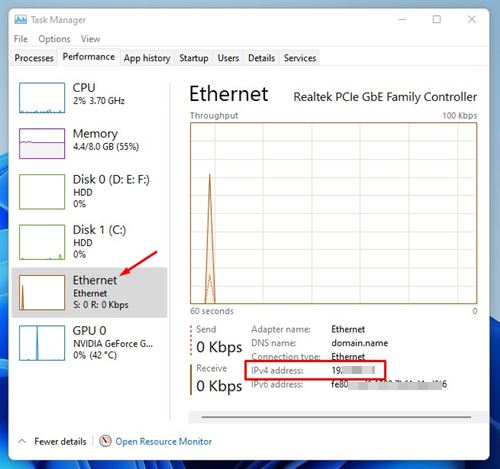
Step 4. On the right pane, check the IPv4 and IPv6 addresses.
This the most easiest option to check the IP Address in Windows 11 computer
4. Find IP Address via Command Prompt
If you are a bit technical, you can rely on Windows 11 Command Prompt to check your IP Address. Here’s what you should do to check the IP Address.
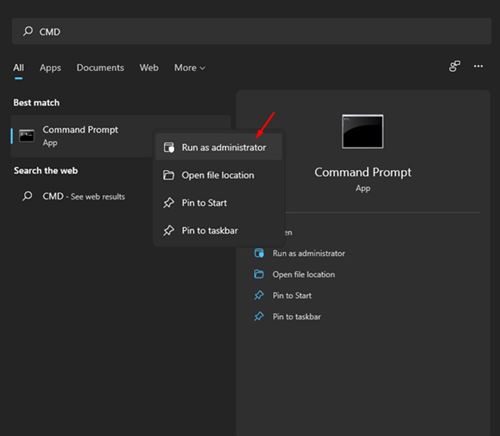
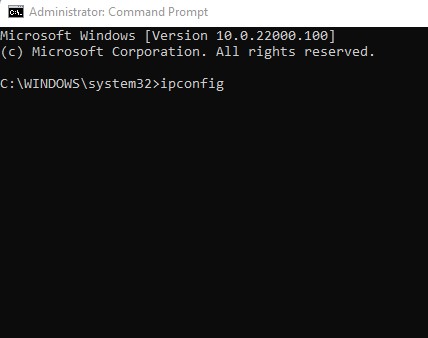
Step 1. First of all, open Windows search and type in CMD. Then, right-click on the CMD and select ‘Run as administrator.’
Step 2. On the command prompt, enter ‘ipconfig‘ and hit the Enter button.
Step 3. CMD will provide you many pieces of information. You need to check the ‘IPv4 Address.’
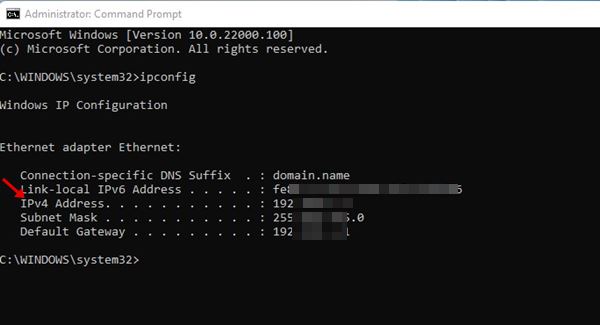
That’s it! CMD will display much information. You just need to look at the IPv4 Address.
5. Using IP Checker Websites
Several IP checker websites are available on the web that provides you every IP-related information of yours. You can use any of those sites to check your current IP Address on Windows 11.
We have already shared a list of the best sites to find the IP Address of your computer. You can use any of them to check your Public IP Address.
So, these are the best methods to check your Public IP Address. I hope this article helped you! Please share it with your friends also. If you have any doubts related to this, let us know in the comment box below.


