Do you love watching YouTube videos? Well, this is not a question you would ask someone today. Almost everyone with a smartphone/computer and access to the internet watches at least 5 to 10 videos on YouTube every day.
YouTube is a free platform that allows users to stream endless hours of video content. While the platform is mostly bug-free, certain things might prevent you from binge-watching your favorite shows on YouTube.
One such issue is YouTube Audio Stuttering in the Chrome browser, which can ruin your video-watching experience. So, if you are experiencing unstable or stuttering audio on YouTube, don’t panic, as you can fix the problem very quickly.
8 Best Ways to Fix YouTube Audio Stuttering in Chrome on Windows
Hence, this article will share some of the best methods to fix the YouTube Audio Stuttering issue in the Chrome browser on Windows. So, let’s get started.
1) Mute and Unmute the Youtube Tab
Sometimes, muting and unmuting the problematic YouTube tab seems to fix the problem. You can mute and unmute a YouTube tab to resolve the audio stuttering issue.
1. First of all, open your Favorite web browser and head to YouTube.com.
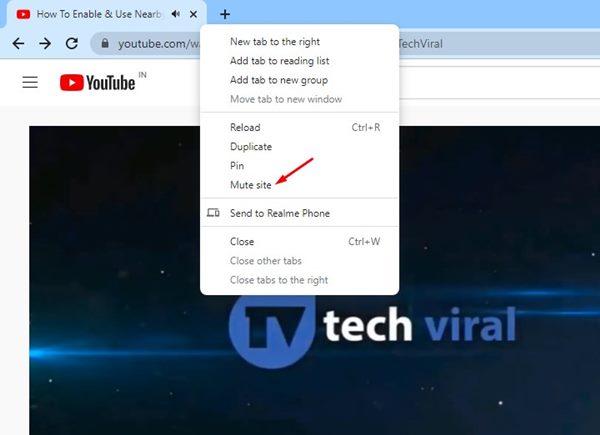
2. On the YouTube website, open the video. If the audio is stuttering, right-click on the Tab and select the Mute site option.
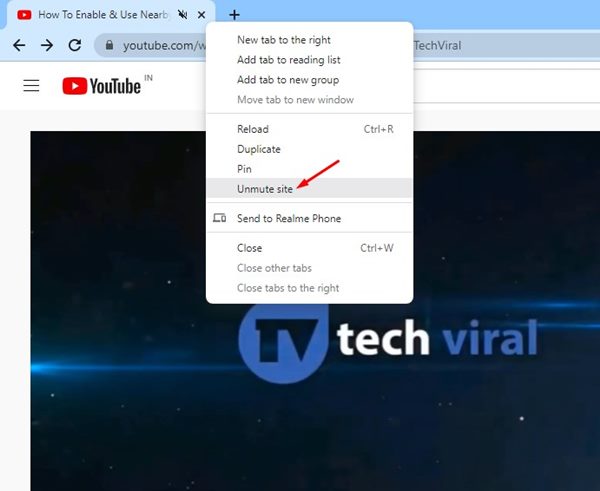
3. To unmute the site, right-click on the Tab once again and select Unmute site.
That’s it! You are done. This is how you can mute and unmute the YouTube tab to fix the audio stuttering issue in Chrome.
2) Restart YouTube
If the YouTube audio is still stuttering, you need to restart the YouTube. Sometimes, this problem occurs due to problematic cache and cookies. Hence, you need to continue your YouTube tab to establish a new audio connection to fix the audio stuttering problem.
To restart YouTube in the Chrome browser, close the Tab where YouTube is open and re-open it. If you want to increase the probability of fixing the YouTube Audio Stuttering issue, you can restart the web browser.
3) Try Playing YouTube videos in a different browser
Even though you don’t want to use a different web browser other than Chrome, it’s advised to switch your web browser and play a YouTube video temporarily.
This will help you verify whether you have a problem with the YouTube or the web browser. If the audio stuttering on YouTube videos doesn’t appear on other web browsers, Chrome is the culprit here.
So, you need to troubleshoot the browser-related issues to fix the YouTube audio stuttering issue.
4) Block or Remove Extensions
Sometimes third-party extensions that you install via the Chrome web store interferes with the workings of YouTube, which leads to video lagging or YouTube Audio Stuttering issue.
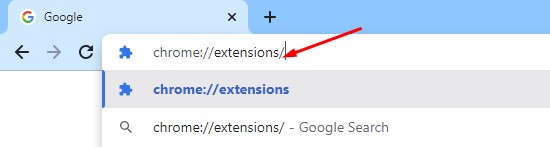
Open the chrome://extensions/ page on your Chrome browser and review the extensions. You need to pay close attention to the extensions that have access to all web pages and are associated with video/audio playback.
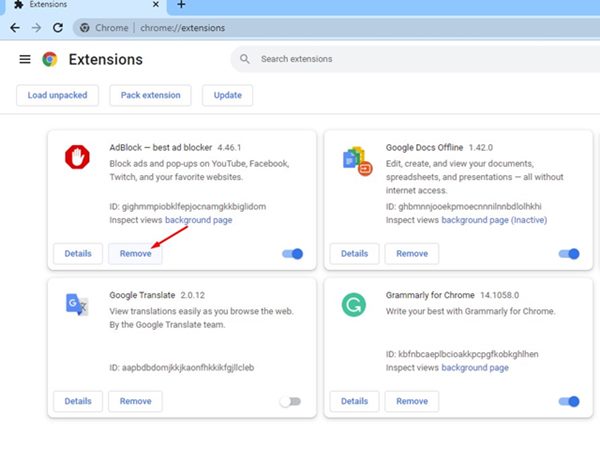
If you find any shady extensions on the list, it’s best to remove them. If you don’t want to remove any extension, open a new Incognito tab and play a YouTube video. The attachments were not allowed to run on the Chrome Incognito mode until you permit them.
5) Disable the Hardware Acceleration in Chrome
For those who don’t know, the Hardware Acceleration feature of Chrome puts loads on your GPU to improve the video playback quality and performance. However, if your PC lacks a powerful GPU, it may create video lags or audio stuttering problems. Hence, it’s best to disable the feature and check temporarily.
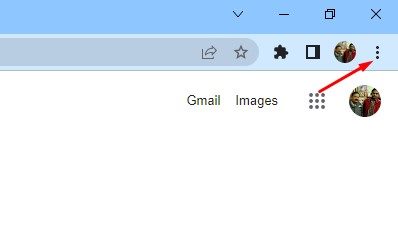
1. First, click on the three dots in the top-right corner.
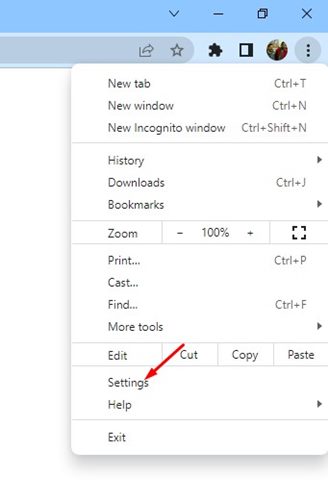
2. From the list of options, click on Settings.
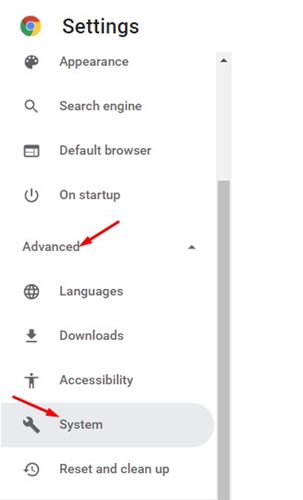
3. On the Settings page, expand the Advanced section and select System.
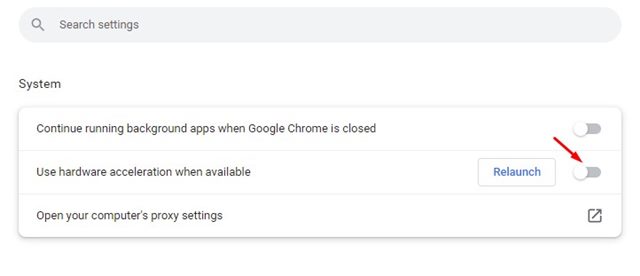
4. On the System page, toggle off the Use hardware acceleration when available switch.
That’s it! You are done. After making the changes, restart your web browser and play a YouTube video. The audio won’t stutter anymore.
6) Update the Audio Driver on Windows
If the YouTube audio is still stuttering even after applying all browser-based fixed, you need to troubleshoot audio-related problems on your PC. The first thing that you should do is update the audio driver.
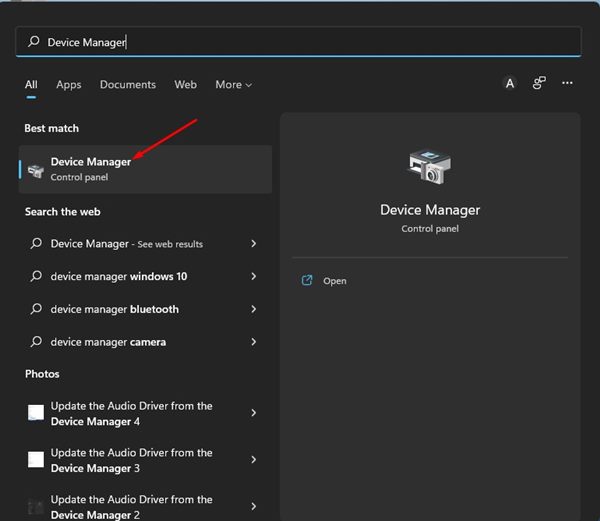
1. First, click on the Windows Search and type in Device Manager. Next, open the Device Manager app from the list.
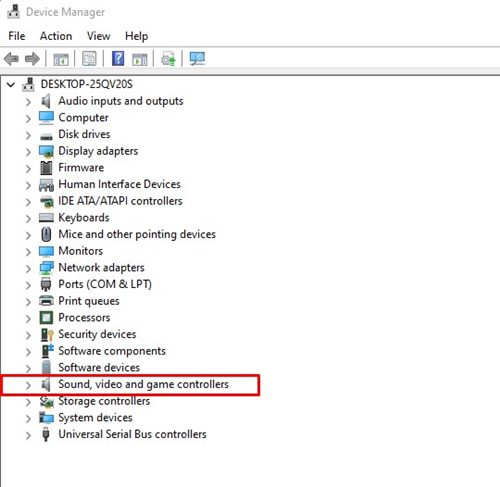
2. On the Device Manager, expand the Sound, video, and game controllers option.
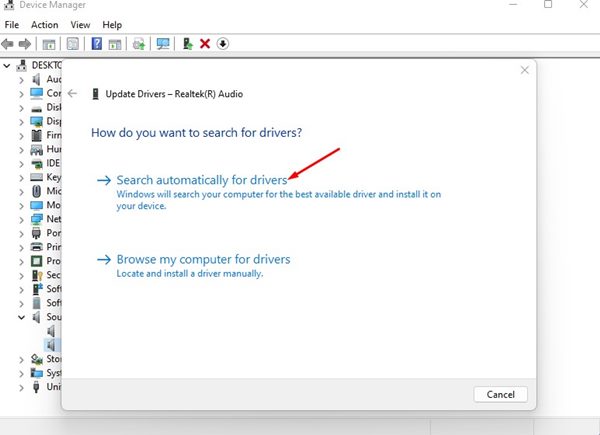
3. Now, right-click on the Sound driver and select the Update driver option.

4. On the next screen, you will see two choices. Select Search Automatically for Drivers.
That’s it! You are done. Now follow the on-screen instructions to install the latest version of the Audio driver. Once updated, restart your PC and test your YouTube audio again.
7) Disable the Audio Enhancements on Windows
Both Windows 10 and Windows 11 offer you an audio customization option called Audio Enhancements. Although most of the time, the Audio Enhancements on Windows improve the audio quality, sometimes it also triggers problems while playing audio online. Hence, if you have enabled audio enhancements, it’s best to disable the feature and check.
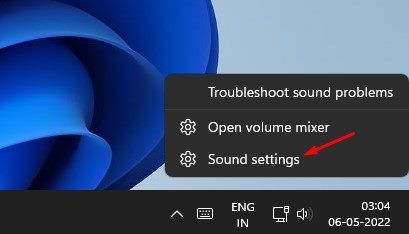
1. First, right-click on the speaker on the taskbar and select Sound Settings.
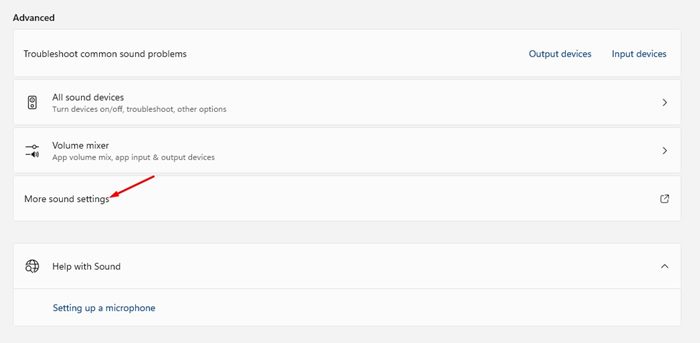
2. On the Sound settings page, scroll down and click on the More Sound Settings option.
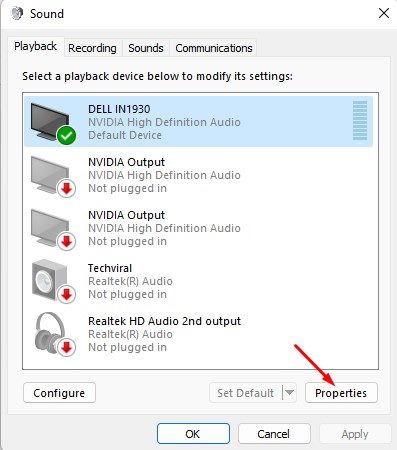
3. On the Sound Window, select the speaker and click on the Properties.
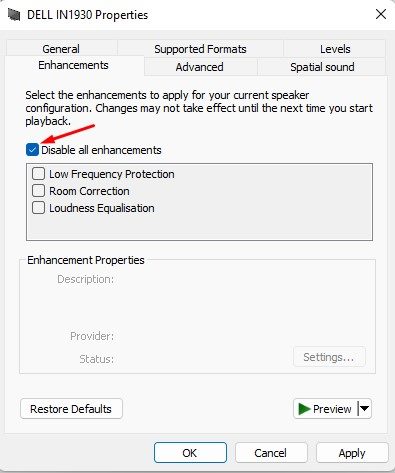
4. On the Speaker Properties, switch to the Enhancements tab and check the Disable all enhancements.
5. Once done, click on the Apply button and then on Ok.
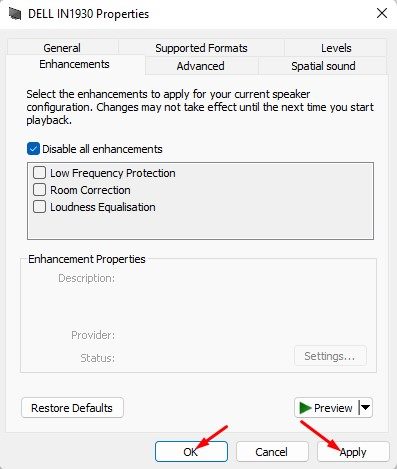
That’s it! You are done. After disabling the audio enhancement, make sure to restart your computer. After the restart, play the YouTube video; the audio stutter issue is likely to be fixed.
8) Run the Audio Troubleshooter
If disabling the audio enhancement doesn’t work for you, you need to try this method. Here we will run the Audio Troubleshooter to find and fix existing audio-related problems on Windows PC. Here’s how you can run Audio Troubleshooter in Windows 11.
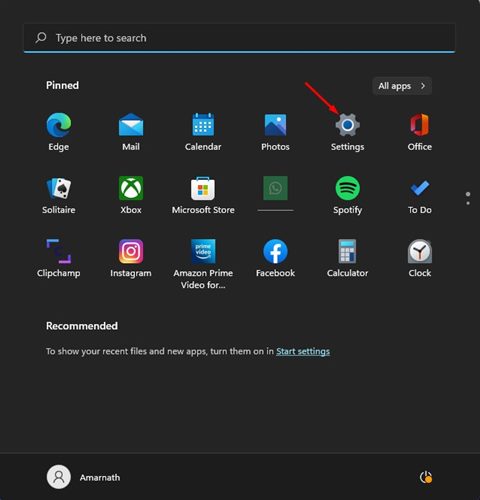
1. First of all, click on the Windows 11 Start menu and select Settings.
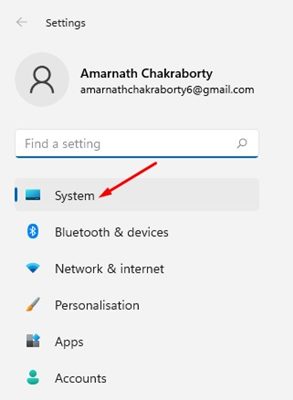
2. On the Settings app, click on the System tab on the left pane.
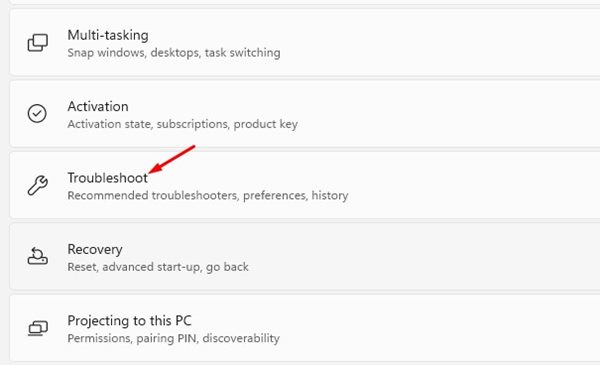
3. On the right, click on the Troubleshoot option as shown below.
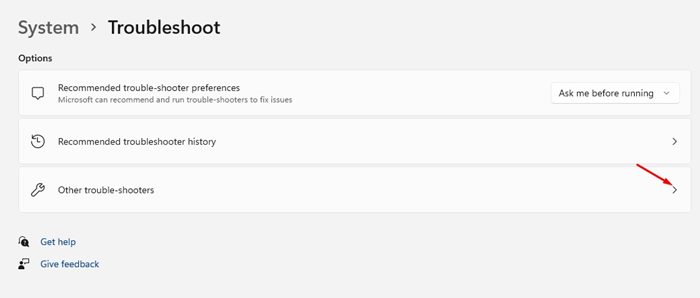
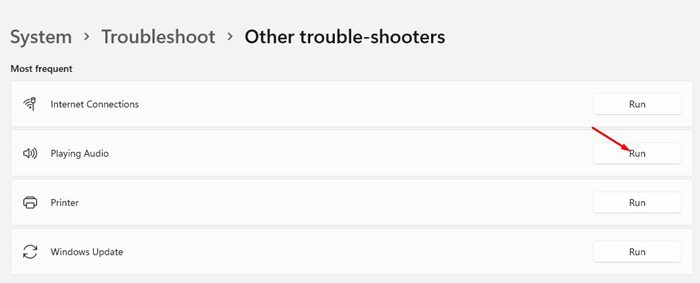
4. On the next screen, select the Other trouble-shooters.
5. Now click on the Run button behind the Playing Audio.
This will run the Audio troubleshooter on your Windows 11 PC. You need to follow the on-screen instructions to complete the process. The troubleshooter will take time to find and fix the problem.
So, these are the few best ways to fix YouTube Audio Stuttering in Chrome for Windows 10 and Windows 11. These simple methods would fix most audio-related issues on your computer, not only audio stutter. We are sure that these methods will help you select the audio-related problems.


