A few days ago, Microsoft released the first Windows 11 Preview build to the beta channel. If you have joined the Windows Insider program and selected the Beta Channel, you would receive the free Windows 11 upgrade.
If you are a Windows 11 user already, you might have noticed that the upgrade consumed almost 20-25GB of disk space. Many users have claimed that the drive where they installed the update is showing low disk space.
If you are also experiencing low disk space problems after upgrading to Windows 11, you are reading the right article. In this article, we will list a few best methods to free up disk space on Windows 11.
Steps to Free Up Disk Space After Upgrading to Windows 11
Before following the methods, please note that the steps include deleting the Windows.old file. That means, if you follow these steps, you won’t be able to roll back to Windows 10 again. Let’s check out.
1. Clean Junk Files via Windows Settings
In this method, we are going to utilize the Windows 11 Settings to clean up the junk files. Follow the steps given below.
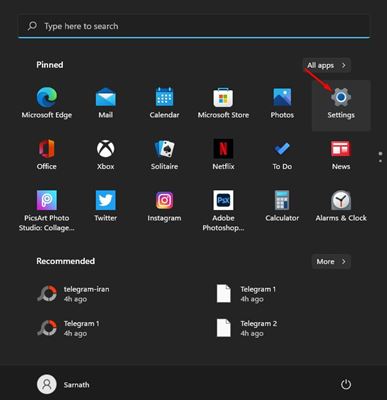
Step 1. First of all, click on the Windows 11 start menu and select ‘Settings‘.
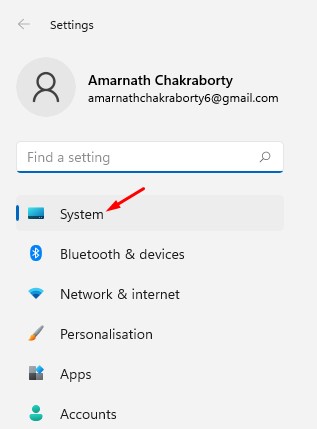
Step 2. On the Settings app, click on the ‘System‘ option.
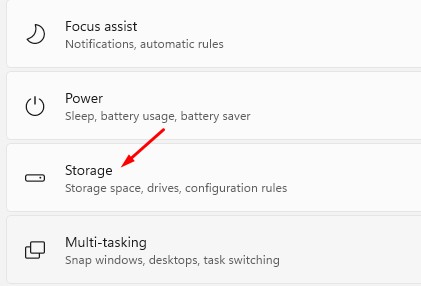
Step 3. On the right pane, click on the ‘Storage‘.
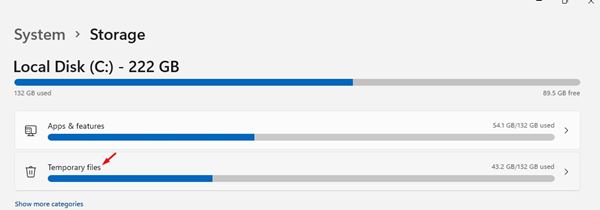
Step 4. On the next screen, click on the ‘Temporary Files’ option.
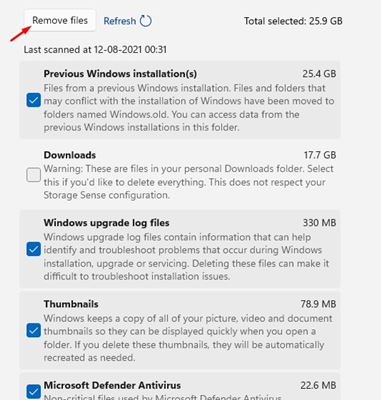
Step 5. On the next Window, select all options. If you have important files stored on the Download folder, then uncheck the ‘Downloads.’
Important: This will delete the previous Windows Installation files also. You won’t be able to roll back to the previous version.
Step 6. Once done, click on the ‘Remove Files’ button.
That’s it! You are done. This is how you can free up disk space in Windows 11 computer.
2. Using the Disk Clean-up Utility
Well, you can even use the Disk Clean-up utility to free up disk space on Windows 11. For that, you need to implement some of the simple steps given below.
Step 1. First of all, press Windows Key + R button on your keyboard. This will open the Run dialog box.
Step 2. On the Run dialog box, enter ‘cleanmgr‘ and hit the Enter button.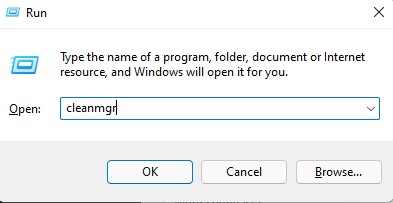
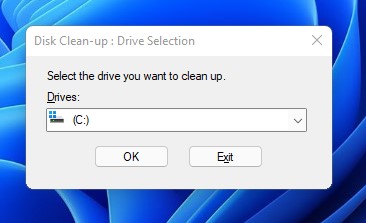
Step 3. Now you will be asked to select the drive you want to clean up. Just select the New Volume (C:) and click on the ‘Ok‘ button.
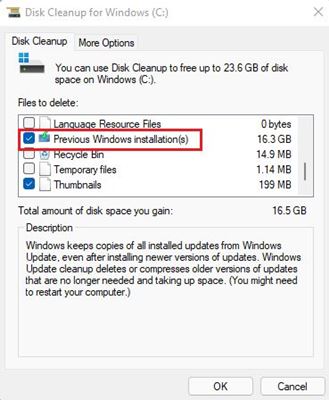
Step 4. On the Disk Clean-up pop-up, scroll down and select the ‘Previous Windows Installation’ and ‘Windows Update Clean-up’ options. Once done, click on the ‘Ok’ button.
That’s it! You are done. This is how you can free up disk space in Windows 11 computer.
So, this guide is all about how to free up disk space in Windows 11 computers. I hope this article helped you! Please share it with your friends also. If you have any doubts related to this, let us know in the comment box below.