Let’s admit it: We don’t want anyone to see certain types of files & folders on our computer. Be it a photo, video, document, or any other file type, we look for ways to keep specific files & folders hidden on Windows computer.
While there are numerous softwares available on the web that claims to hide files & folders on Windows 11, the easiest way to use is the native file/folder hider of the Windows operating system.
Windows 11 has many features often left undiscovered by users; one is the ability to hide specific files & folders. A built-in option on Windows 11 lets you hide files without any software.
How to Hide Files in Windows 11 (Without Any Software)
So, if you are looking for ways to hide files on Windows 11 without any software, continue reading the guide till the end. Below, we have shared all working methods to hide files & folders on Windows 11 without any software. Let’s get started.
Hide Files in Windows 11 From the File Explorer
You can hide files on Windows 11 without any software right from File Explorer. It’s pretty easy to hide files on Windows 11 via File Explorer; follow some simple steps we have shared below.
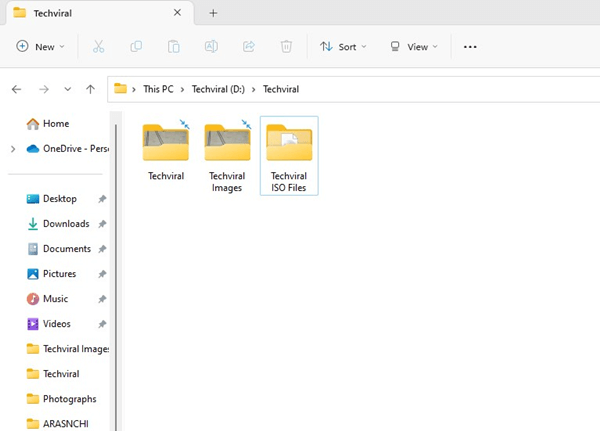
1. Press the Windows Key + E button to open the File Explorer on your computer.
2. Now, navigate to the folder or file which you want to hide.
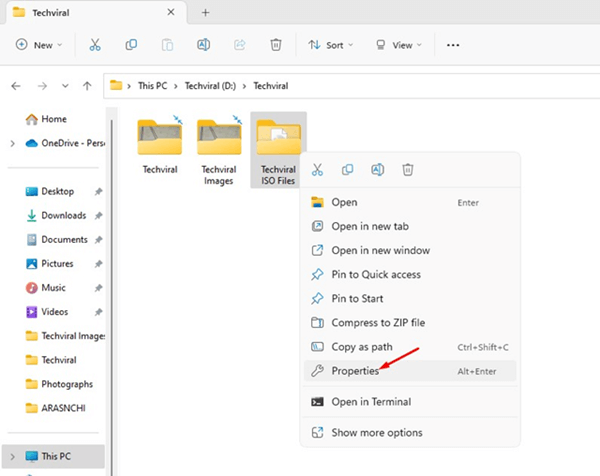
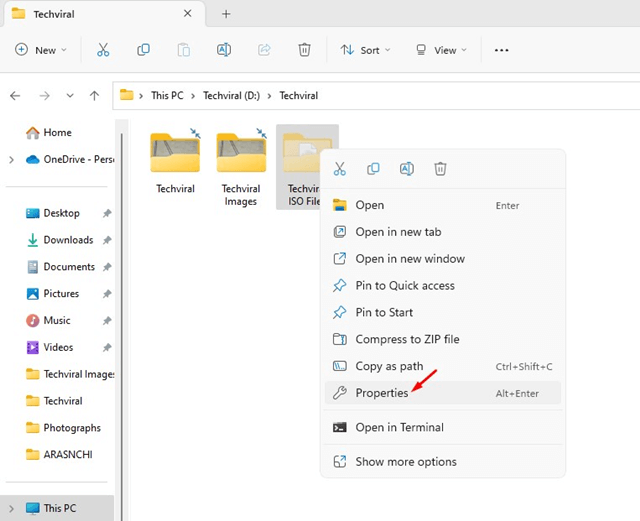
3. Now right-click on the File/folder you want to hide and select Properties.
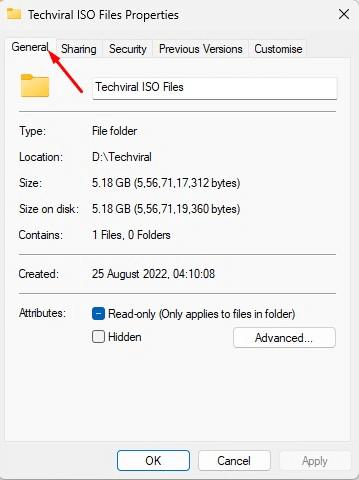
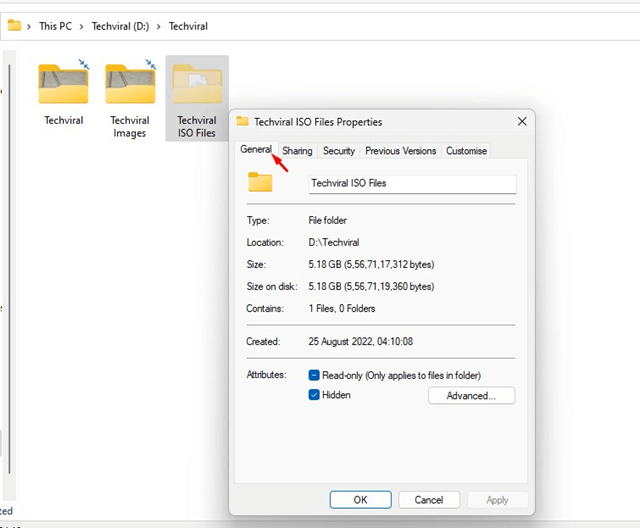
4. On the Properties, switch to the General tab as shown below.
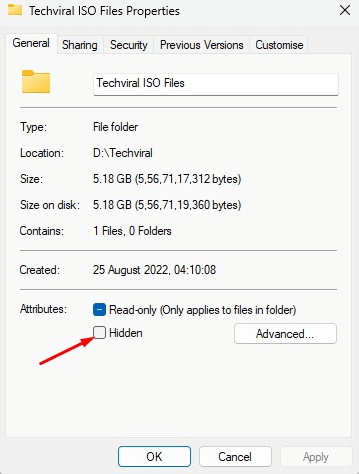
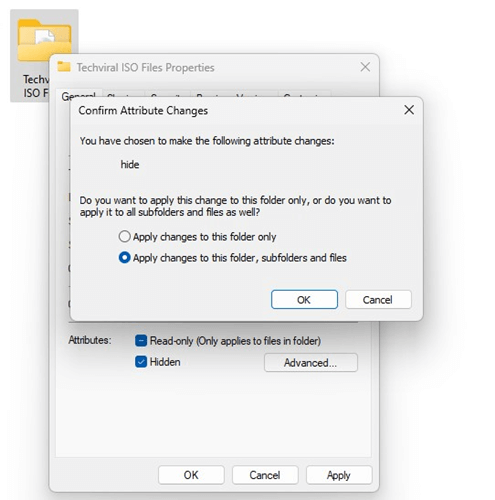
5. On the attributes, check the Hidden and click on Apply, then on OK.
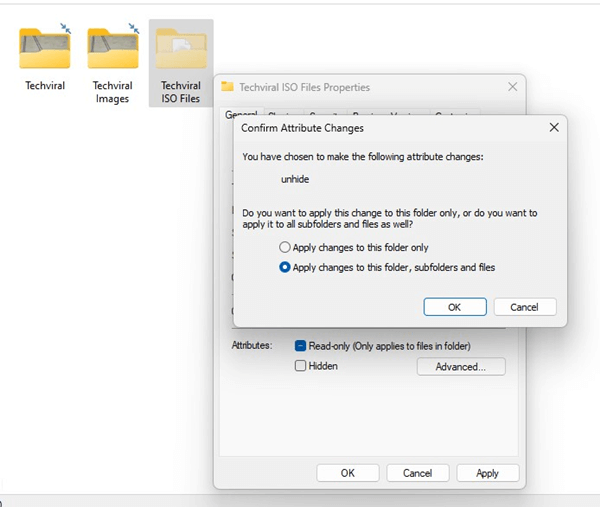
6. Now, you will be asked whether you want to apply changes to this folder or its subfolders & files. If you want to hide all subfolders & files in this folder, select the second option and click OK.
7. The file will be hidden on your computer.
That’s it! This is how you can hide the files in Windows 11 from the File Explorer options.
How to View the Hidden File/Folder on Windows 11?
Once the file is hidden, you must enable the view hidden folders option. To view the hidden file or folder, follow some simple steps we have shared below.
1. Click on the Windows Key + E button to open the File Explorer.
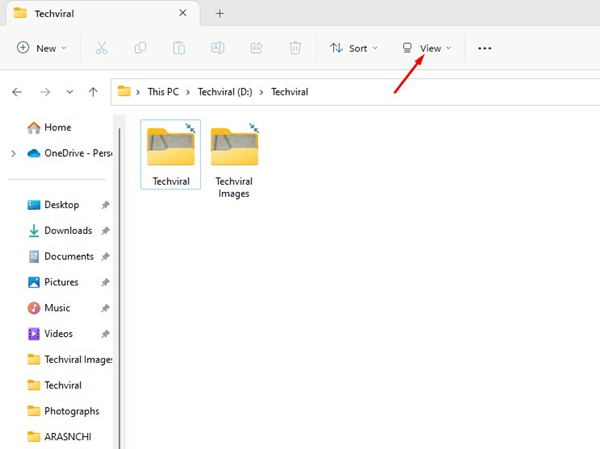
2. On the top bar, click on the View drop-down button.
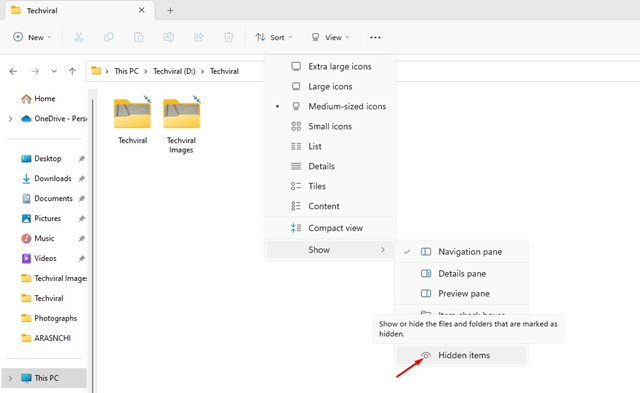
3. On the menu that appears, select Show > Hidden Items.
4. Check the hidden items option to view the hidden files.
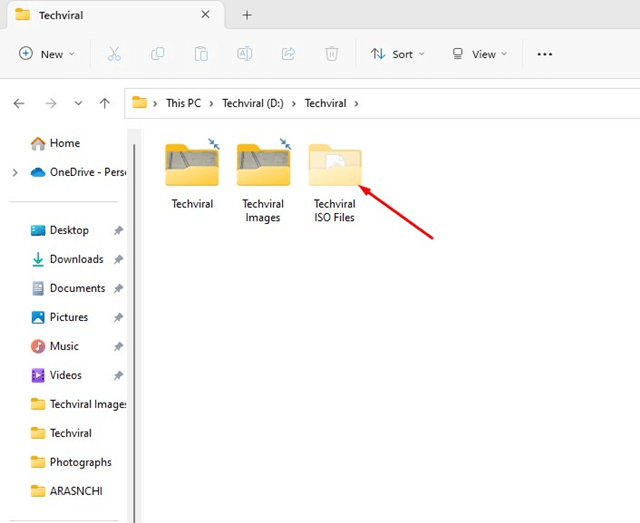
5. Now move back to the folder where you have hidden a file. You will be able to view the hidden files.
That’s it! This is how you can view the hidden files and folders on your Windows 11 computer. To hide the file again, uncheck the Hidden Items option in Step 4.
How to Unhide Files/Folders in Windows 11?
Now that you know how to hide or view the files & folders on Windows 11 without any software, it’s time to know how to unhide the hidden files. If you unhide the file, the file will appear even when the hidden items is enabled/disabled. Here’s how to unhide files on Windows 11.
1. Press the Windows Key + E button to open the File Explorer.
2. When the File Explorer opens, navigate to the path containing the hidden file/folder.
3. Right-click on the hidden item and select Properties.
4. Now switch to the General tab.
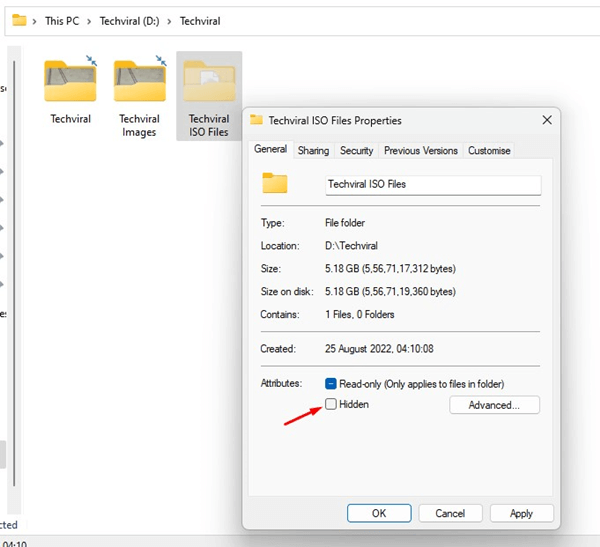
5. Under the Attributes, uncheck the Hidden option.
6. Now, you will be asked whether you want to apply changes to this folder or its subfolders & files. If you want to unhide all subfolders & files in this folder, select the second option and click OK.
7. After making the changes, click on the Apply button, then on OK.
That’s it! This is how you can unhide files/folders in Windows 11.
Hide Files on Windows 11 using Command Prompt
Command Prompt is another great utility that can be used to hide files & folders on Windows 11 without any software. Here’s how to hide files on Windows 11 using the Command Prompt.
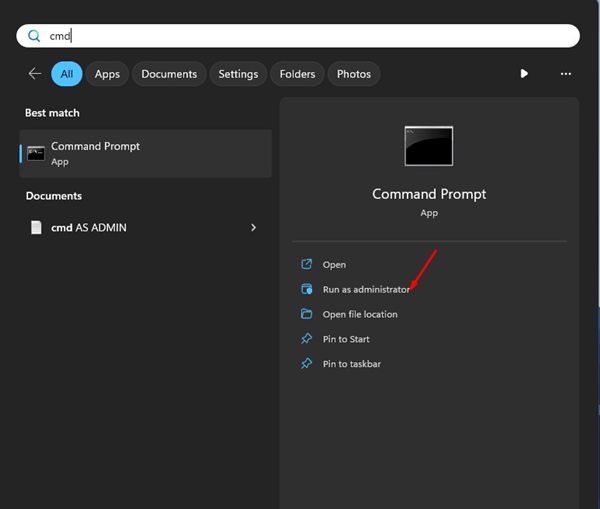
1. Type in Command Prompt on Windows 11 search. Right-click on the CMD and select Run as administrator.
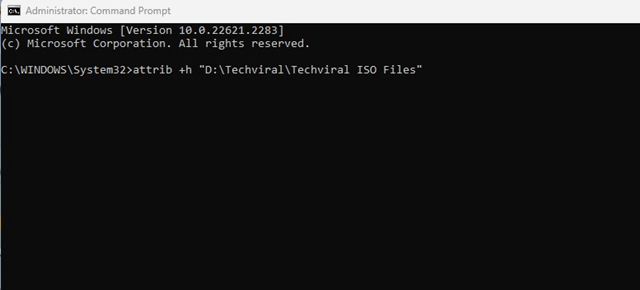
2. When the Command Prompt opens, execute the command attrib +h “full path of file”
In the command, replace the “full path of file” with the actual location of the folder you want to hide. This will immediately hide your file or folder.
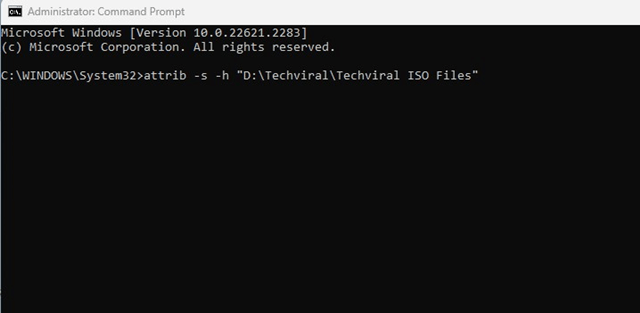
4. To bring back the hidden file, execute the command: attrib -s -h “full path of file”
In the above command, make sure to replace the “full path of file” with the actual location of the folder you want to unhide.
That’s it! This is how you can hide or unhide files on Windows 11 without any software.
So, this guide is all about how to hide files on Windows 11 without any software. You can follow these simple steps to hide any file or folder you want on your Windows 11 computer. Interestingly, this method can hide executable files and less popular file types. Let us know if you need more help hiding files/folders on Windows 11 without any software.
