Windows 11 introduced lots of visual changes and new features. Also, Microsoft is constantly striving to make the operating system better. Until now, Microsoft released several new apps for the operating system like a new media player app, Photos app, etc.
Microsoft has also redesigned the Paint app on the Windows 11 operating system. However, since the redesigned Paint app is exclusively available for Windows 11, Windows 10 users can’t have access to it directly.
To install Windows 11 Paint app on Windows 10, users need to go through a lengthy process. So, if you are interested in installing the new Windows 11 Paint app on your Windows 10, you are reading the right guide.
Also read: How to Install Windows 11 From USB (Full Guide)
Install the Windows 11 Paint App on Windows 10
In this article, we will share a step-by-step guide on installing the Windows 11 Paint app on Windows 10. Let’s check out.
1. First, open this website and select ‘ProductID‘ on the left drop-down menu. Then, on the right drop-down menu, select ‘Fast‘. Now paste the below content in the text field and click on the Checkmark button.
9PCFS5B6T72H

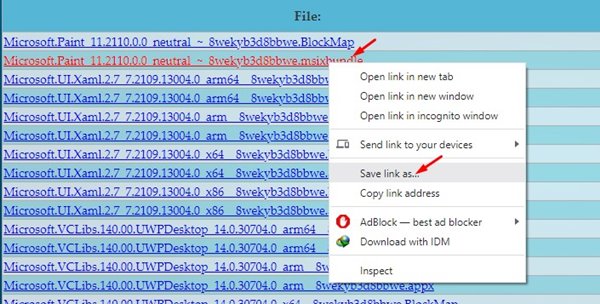
2. You will now see a long list of files. Right-click on the Microsoft.Paint_11.2110.0.0_neutral_~_8wekyb3d8bbwe.msixbundle and select the ‘Save link as’ option to download the file.
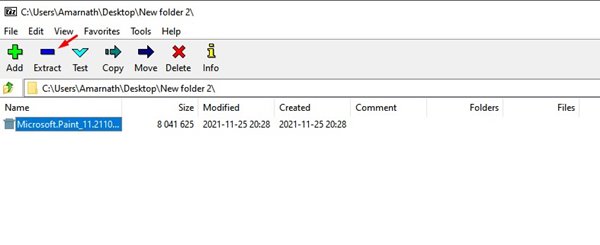
3. Now install 7-zip on your PC. Once installed, open 7-Zip and locate the file that you have downloaded. Select the file and click on the ‘Extract ‘button.
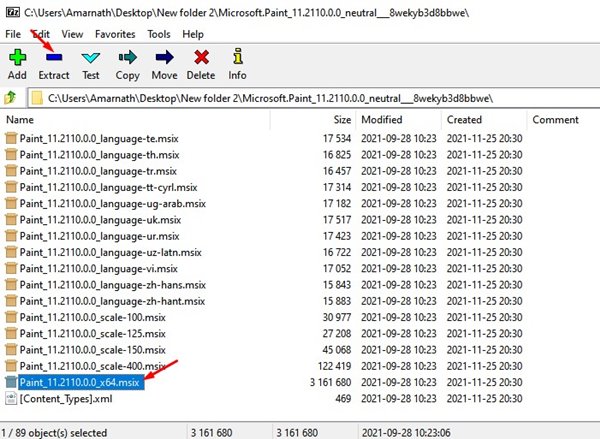
4. Next, open the Extracted folder and locate the x64.MSIX package. Select the package and click on the Extract button on the top.
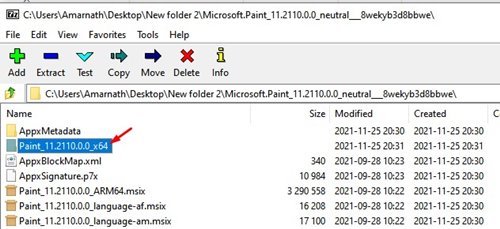
5. Now, you need to open the Paint_x64 folder.
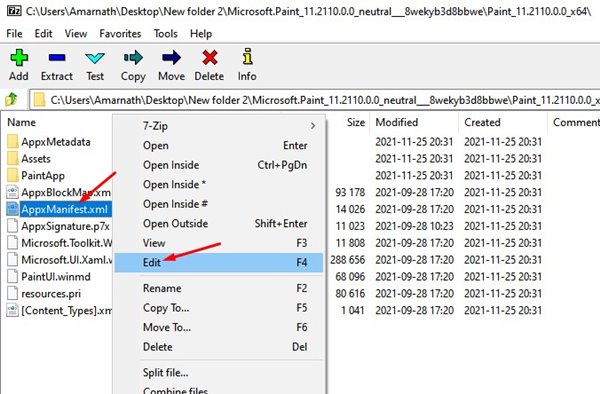
6. On the Paint_x64 folder, right-click on the ‘AppsManifest.xml’ file and select ‘Edit‘ to open the file in the Notepad.
7. Now move to the System > About section and note down the OS build version you are using.

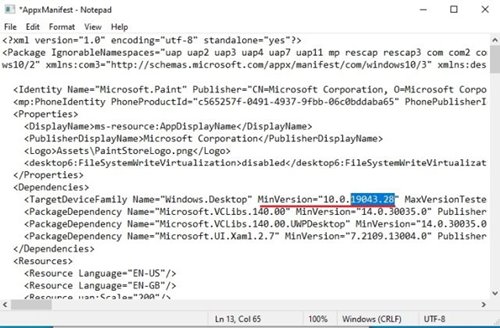
8. Now, move back to the Notepad file that you have opened. Find the line containing MinVersion=”10.0.xxxx.xx”. You need to replace the X with your build number. Once done, save the file.
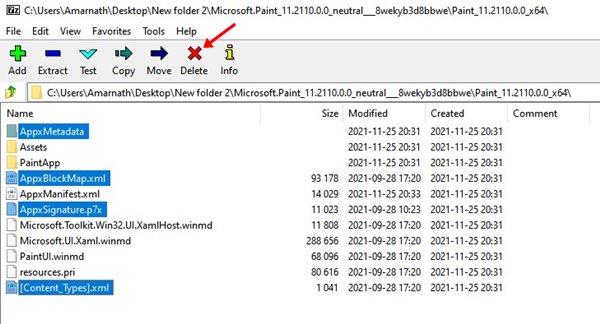
9. Now, on the same folder, delete the four folders as mentioned below.
AppxBlockMap.xml
AppxSignature.p7x
[Content_Types].xml
AppxMetadata folder
Installing the Windows 11 Paint App
Well, now you have modified the Paint app’s package. You now need to install the Windows 11 Paint app on your Windows 10. For that, follow some of the steps shared below.
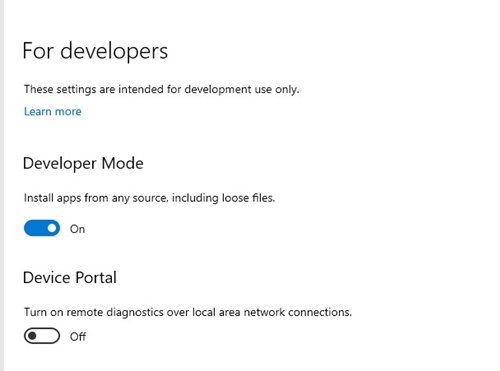
1. Open Windows 10 search and type in Developer Settings. Click on the Developer Settings option from the list.
2. On the right pane, enable the Developer Mode option.
3. Now open Windows 10 search and type in Powershell. Right-click on Powershell and select the Run as administrator option.

4. Now, move to the folder where you have extracted the MSIXBUNDLE folder and open the x64 folder. Right-click on the AppxManifest.xml file and select the ‘Copy as Path’ option.

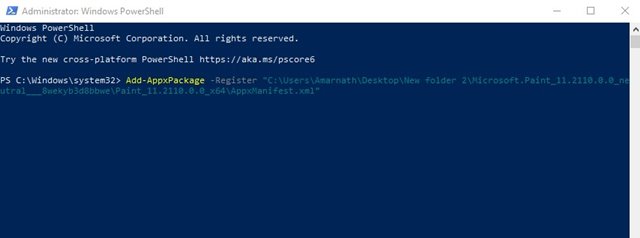
5. On the Powershell Window, enter the command given below and press the Enter button.
Add-AppxPackage -Register filepath
Make sure to replace the filepath with the path you copied.
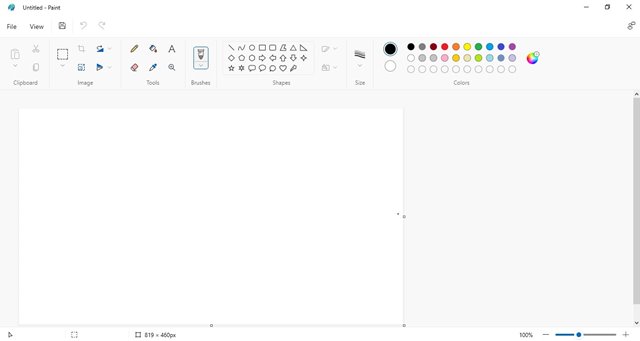
That’s it! You are done. This will install the Windows 11 Paint app on your Windows 10. Open the Start menu, and you will find the new Paint app there.
So, this guide is all about how to get the Windows 11 Paint app on Windows 10. I hope this article helped you! Please share it with your friends also. If you have any doubts related to this, let us know in the comment box below.


