Although the Antimalware Service Executable is a necessary process that secures the system, it consumes lots of resources, which causes our computer to slow down. What’s worse is that users can’t directly ‘End Task’ the Antimalware Service Executable from the task manager.
If you use a third-party antivirus program and don’t want Antimalware Service Executable to consume too many resources, here’s how to terminate it.
1. Disable the Real-Time Protection of Windows Security
You can disable the real-time protection feature of Windows Security to get rid of the Antimalware executable process.
1. Open the Windows Security app from the Windows Search.
2. When the Windows Security app opens, click on Virus & Threat Protection.
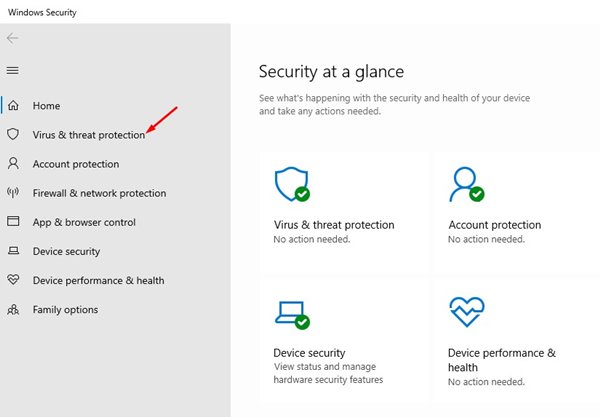
3. Click the Manage Settings link under the Virus & Threat Protection settings.

4. Disable the toggle for Real-time protection. You can also disable the other two options – Cloud-delivered protection and Automatic sample submission.
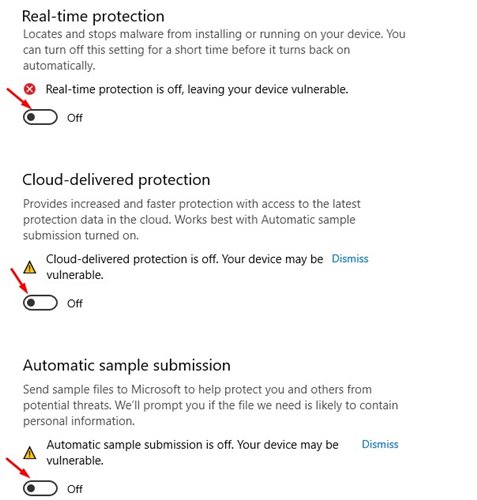
This will disable the real-time protection feature of Windows Security/Defender and would fix the Antimalware Service Executable high CPU usage problem.
2. Disable Windows Defender From The Registry Editor
Since the ‘Antimalware Service Executable’ is associated with Windows Defender, we need to disable Windows Defender from the Registry Editor. Here’s how to disable Windows Defender from the Registry Editor.
1. Open the Run Dialog box and type in regedit.

2. Navigate to this path – HKEY_LOCAL_MACHINE\SOFTWARE\Policies\Microsoft\Windows Defender
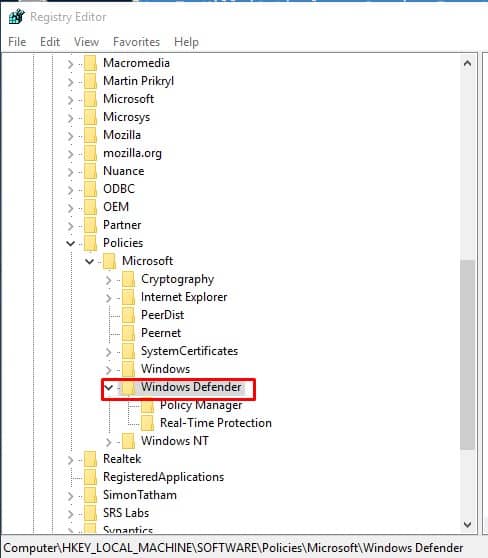
3. Right-click on Windows Defender and choose New > DWORD.
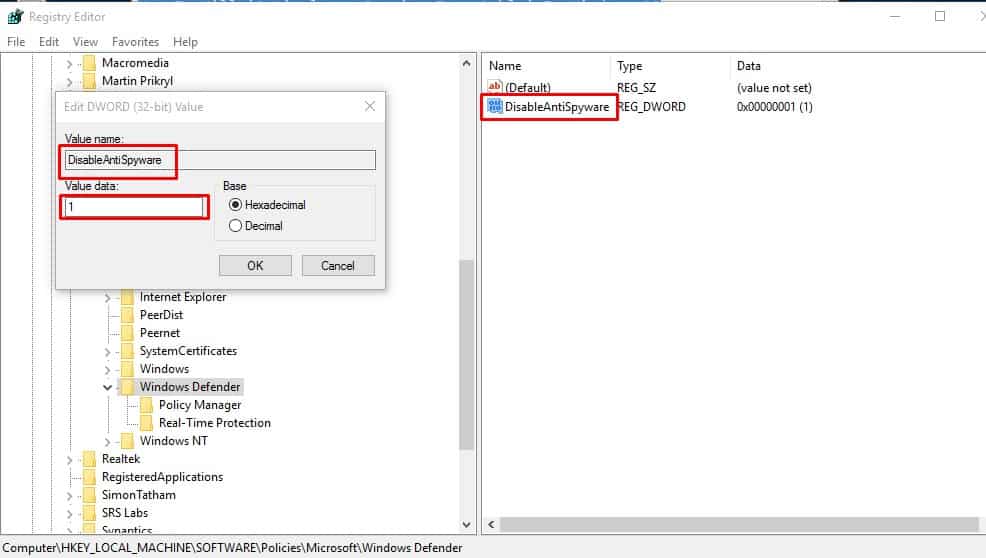
4. Name the new key as DisableAntiSpyware, double-click on it, and set the value to 1.
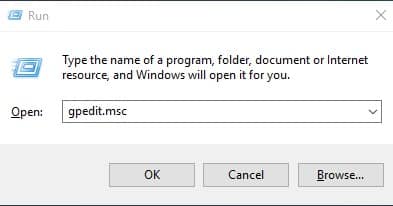
3. Stop ‘Antimalware Service Executable’ from Group Policy Editor
If the registry method fails to stop the process, you need to stop it by making some changes to the Group Policy Editor.
1. Open the RUN dialog box and type gpedit.msc
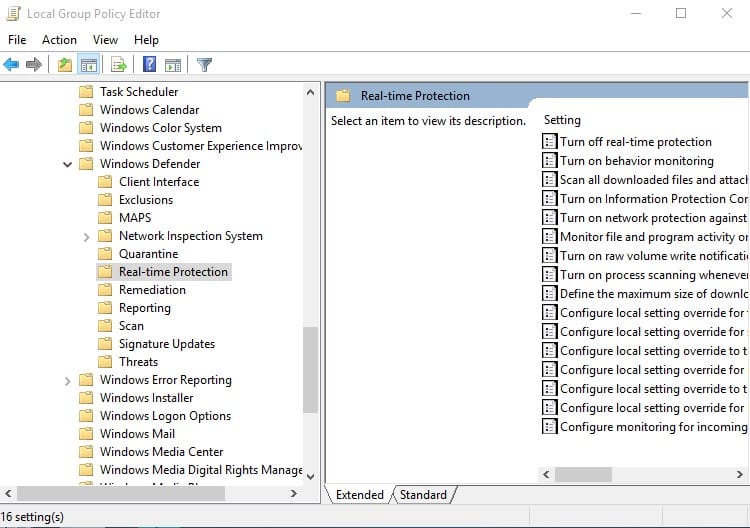
2. In the Group Policy Editor, head to the following path:
Computer Configuration/Administrative Templates/Windows Components/Windows Defender Antivirus/Real-time Protection.
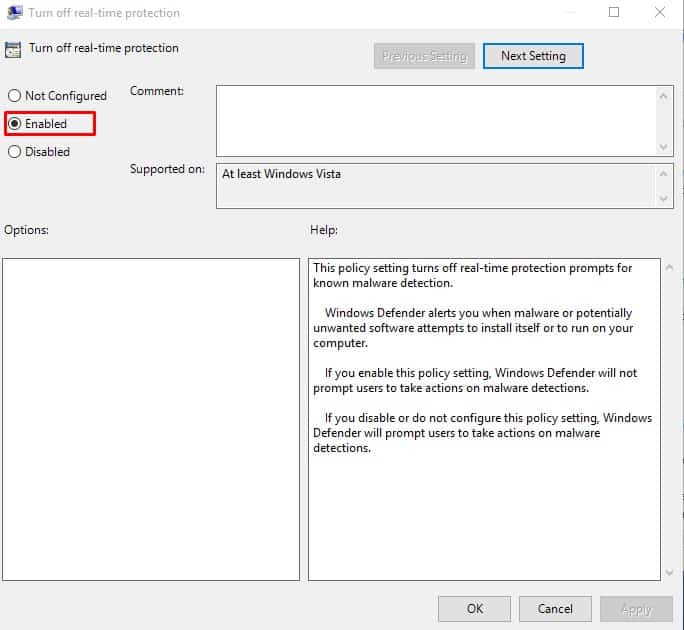
On the right-hand side menu, double-click on Turn off real-time protection.
3. Select Enabled and click Apply.
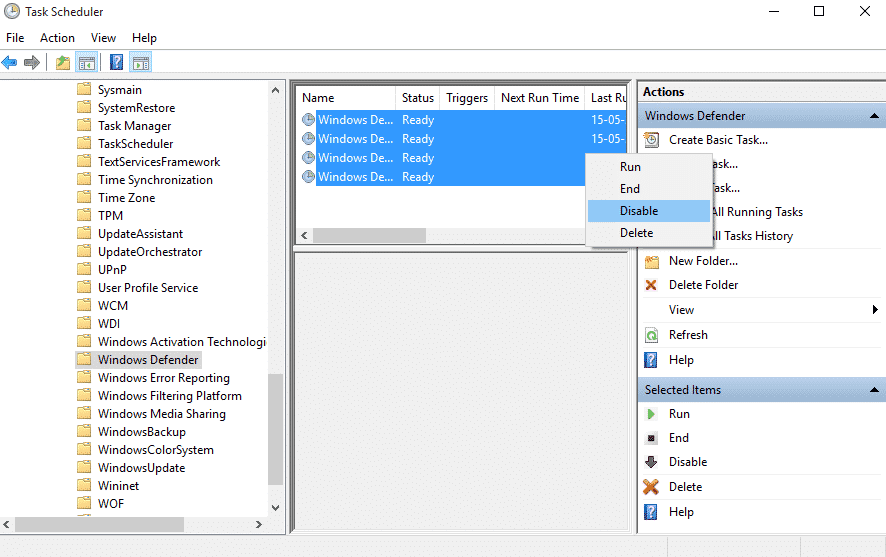
4. Disable Scheduled Tasks
Windows Defender has a few tasks scheduled to ensure proper security and protection. Since it’s scheduled to start at a given time, users don’t get the option to end the ‘Antimalware Service Executable’. You need to disable every scheduled task associated with Windows Defender.
1. Open the Windows search menu and search for Task Scheduler
2. Head to the following path – Task Scheduler Library > Microsoft > Windows > Windows Defender.
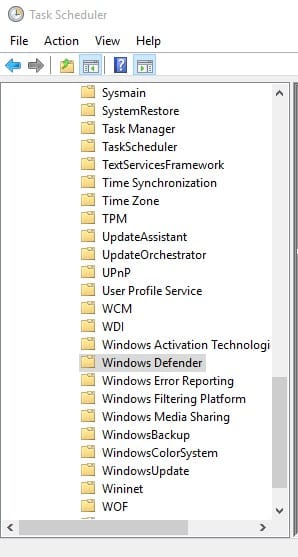
3. You will see four scheduled tasks. Right-click on all of them and select Disable
5. Install Any Other Antivirus tool
Windows Defender won’t run side by side with third-party security software. If the methods mentioned above fail to disable the ‘Antimalware Service Executable’ from the Task Manager, you can start using a third-party antivirus.
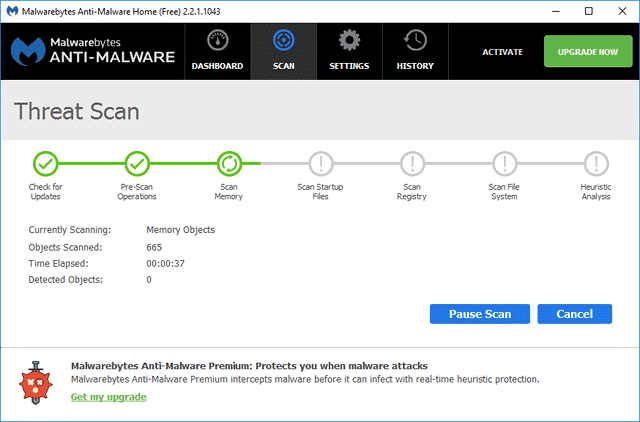
Third-party security tools like Malwarebytes and Kaspersky Security are more powerful and capable than the default Windows Defender. For a complete list of security tools, check out our article.
These are the best methods for fixing the ‘Antimalware Service Executable’ on a Windows PC. If you know other ways to fix the problem, please let us know in the comment box below.


