While the desktop Messenger app is free to download & use, it has a few problems that may ruin your instant messaging experience. For example, many users have recently reported that Messenger is not working on the Windows 11 problem.
So, if you have just upgraded your computer to Windows 11 and the Messenger app is no longer working, continue reading the guide.
Why is Messenger not working on Windows 11?
There is not one but many different reasons why Messenger is not working on your computer. Below, we have listed some prominent reasons for Messenger not working or being stuck on loading problems on Windows.
- Many variants of Messenger are running in the background.
- The Windows 11 version isn’t compatible with Messenger.
- Wrong Date & Time on your smartphone.
- The installation files for Messenger are corrupted.
- Outdated Messenger cache files.
Now that you know all the possible reasons Messenger does not work on Windows 11, here are the best ways to resolve the problem.
1. Relaunch the Messenger app on Windows 11
If Messenger is not working on Windows 11, the first thing you can do is relaunch the app. This is a simple troubleshooting tip, but it can fix most Messenger-related errors and issues.
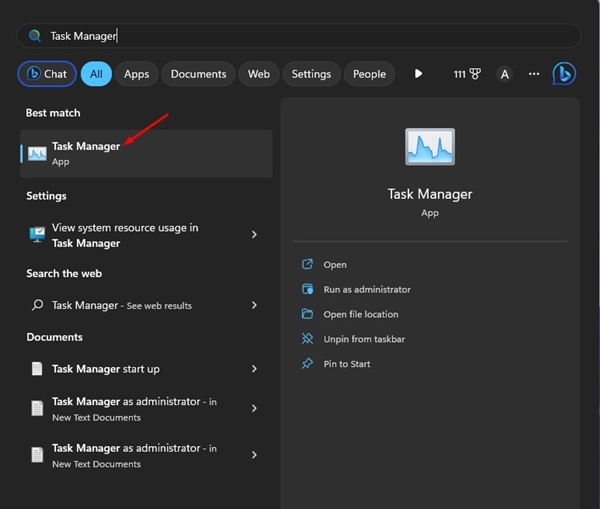
1. Click on the Windows 11 search and type in Task Manager. Next, open the Task Manager app from the list.
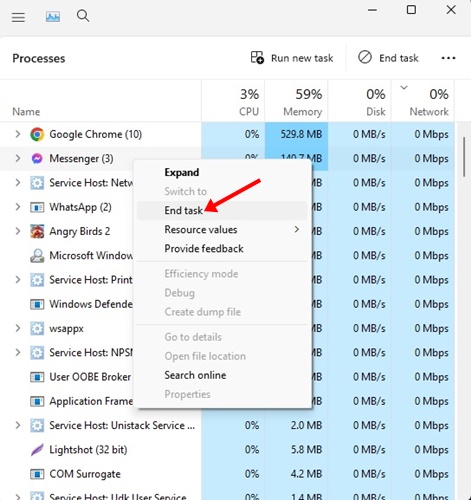
2. Next, switch to the Processes tab on the right side.

3. Right-click on Messenger and select End Task.
4. Once done, open the Messenger app from the desktop screen or Start Menu.
2. Restart your Windows 11 computer

If relaunching the Messenger app doesn’t help, restart your Windows computer. Sometimes, bugs in Windows 11 may prevent apps from running.
The best way to eliminate such bugs is to restart the computer. To restart your Windows 11 computer, click the Start button and then the Power Menu.
On the Power Menu, select the Restart option. This will immediately restart your Windows 11 computer. After the restart, relaunch the Messenger app.
3. Check your internet
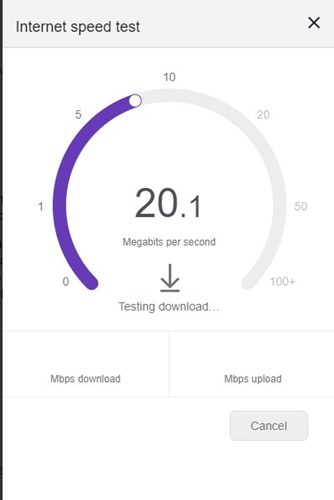
If your internet connection has been unstable, you will face problems running most online services and apps. It’s essential to check and rule out network connectivity issues to fix the Messenger not working problem.
To start off, you should check if your PC is connected to a working and stable internet connection. You can confirm that by visiting fast.com or any other speed check website.
If there’s an internet issue, you can try restarting your router and reconnecting to the WiFi network.
4. Check if Facebook Messenger is down
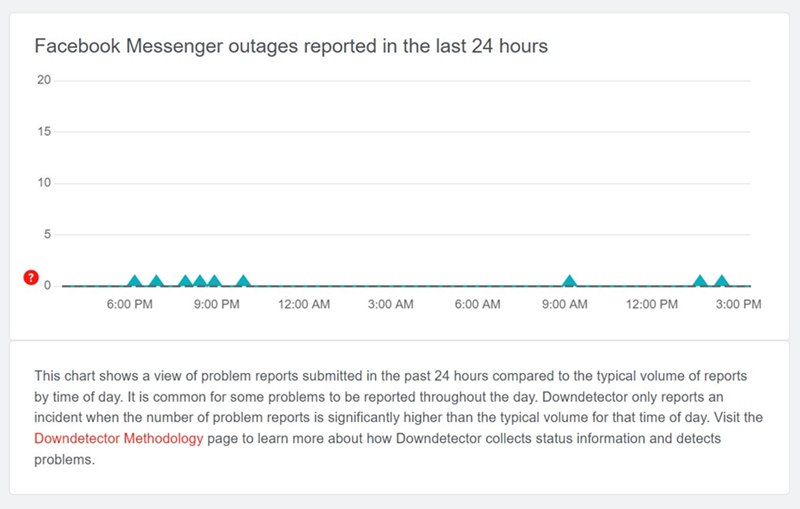
Before everything else, you should check if the official servers of Facebook Messenger is up and running.
Like all web services, Facebook Messenger’s servers are often down for maintenance. When this happens, you will experience problems using the Messenger app.
So, visit this webpage and check whether the Facebook Messenger servers are down globally. If they are, you should wait until they are restored.
5. Correct the Time & Date Settings
Incorrect time and date settings can affect the Messenger app’s functionality. Hence, you must confirm whether your device uses the correct date and time. Here’s what you can do.
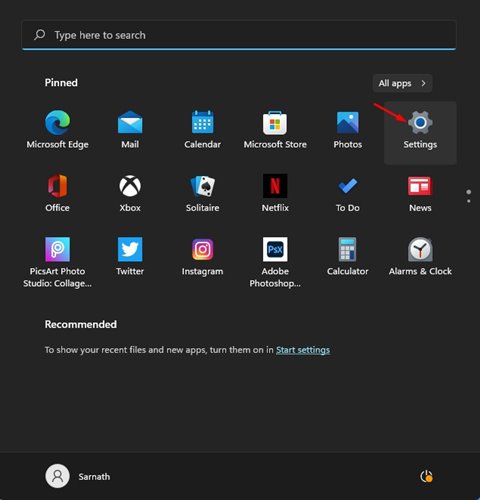
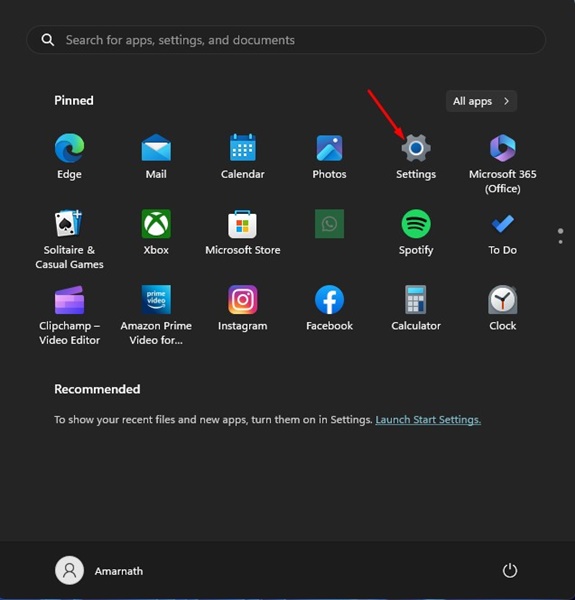
1. Click on the Windows 11 Start button and select Settings.
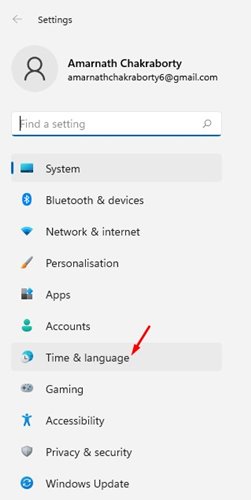
2. On Settings, click on Time & Language.
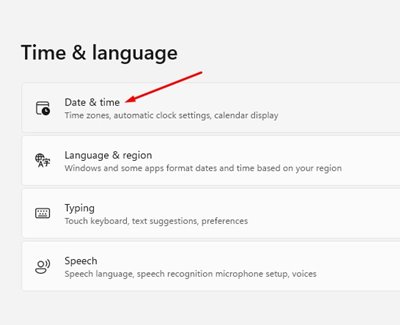
3. On the right side, click on the Date & time.
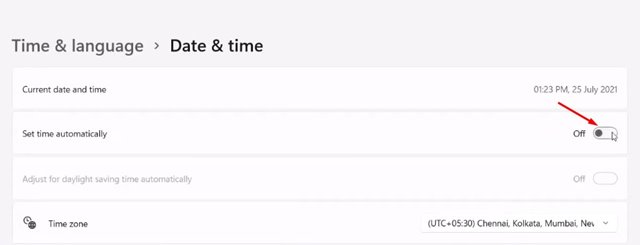
4. Enable the toggle for Set time zone automatically.
5. Click the ‘Sync now’ button after making the changes.
6. Update the Facebook Messenger App
It’s a good security practice to keep PC apps up to date. Doing so will ensure better compatibility and stability and bring new features.
To update the Messenger app on Windows 11, open the Microsoft Store app and switch to the Library tab.
Find the Messenger app and click on the Update button beside it. This will update the Facebook Messenger app on your PC.
7. Repair & Reset the Messenger App
On Windows 11, you can repair and reset the Microsoft Store apps. This feature is helpful, especially if the app isn’t working correctly.
So, if the Messenger app is still not working on Windows 11, you can repair or reset it. Here’s what you need to do.
1. Click on the Windows Start button and select Settings.
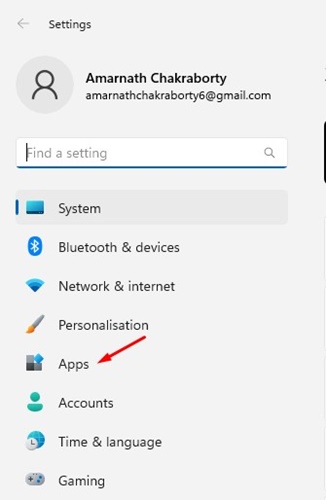
2. On Settings, switch to the Apps section on the left.
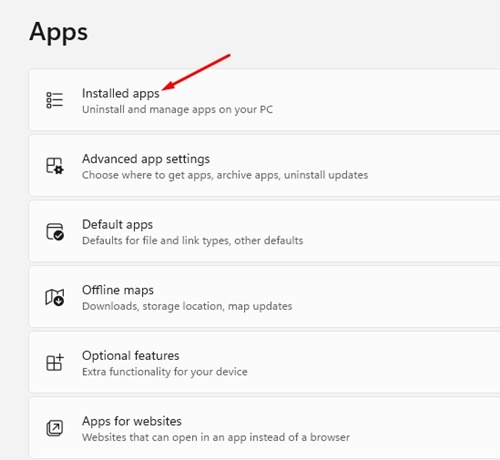
3. On the right side, click Installed Apps.
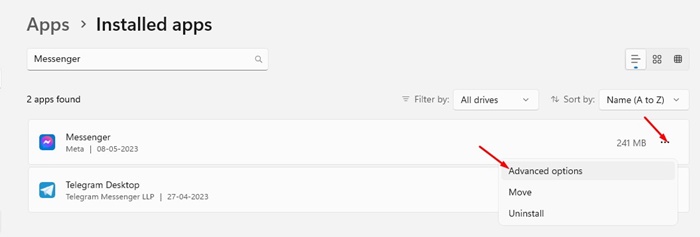
4. Now, find the Messenger app, click the three dots, and choose Advanced options.
5. On the next screen, click the Repair button.
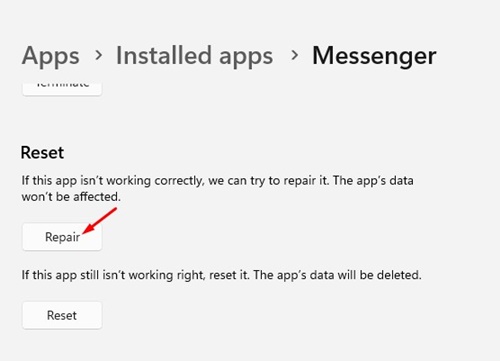
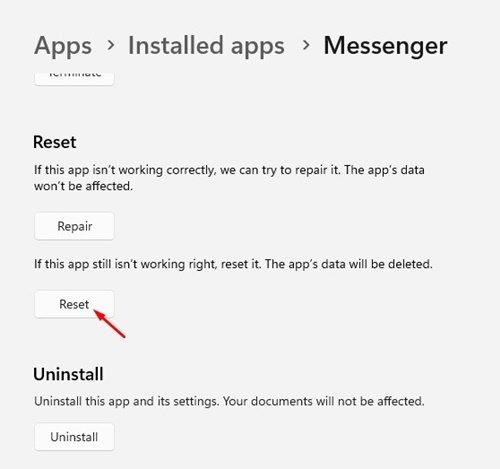
6. This will repair the Messenger app installation files. Once repaired, launch the Messenger app. If the app is still not working, move to the Advanced options screen and click the Reset option.
8. Clear the Microsoft Store Cache
While Clearing the Microsoft Store cache has no direct link with Messenger, clearing the Store app cache has helped many users.
Several Windows 11 users claimed to resolve the error message by clearing the Microsoft Store cache. Hence, you can also try doing it to check if the problem is resolved. Here’s how to clear the Microsoft Store Cache.
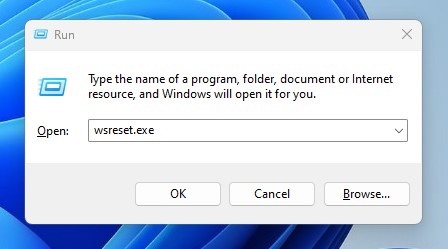
- First, press the Windows Key + R button to open the RUN dialog box.
- When the RUN dialog box opens, type wsreset.exe and press Enter.
9. Install all Pending Windows 11 Updates
Sometimes, bugs in the operating system can prevent the Messenger app from working on your Windows 11. The best you can do to resolve such an issue is to update your operating system to the latest version.
You need to head to the Windows Update Settings from Settings > Windows Updates. On the right side, you will find all your pending Windows 11.
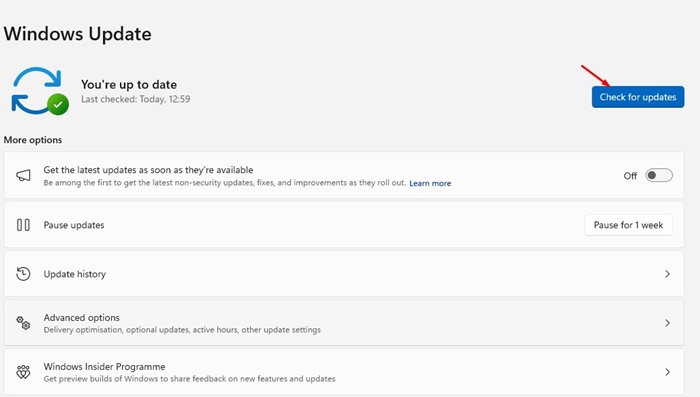
Just download and install all pending updates. After installing the updates, restart your computer and launch the Messenger app.
10. Reinstall the Messenger App
If Messenger is still stuck on the loading screen, you can try reinstalling the app. Reinstallation is the ultimate way to deal with problems that don’t resolve.
To reinstall the Messenger app, click Windows Search and type in Messenger. Right-click on the Messenger and select Uninstall.
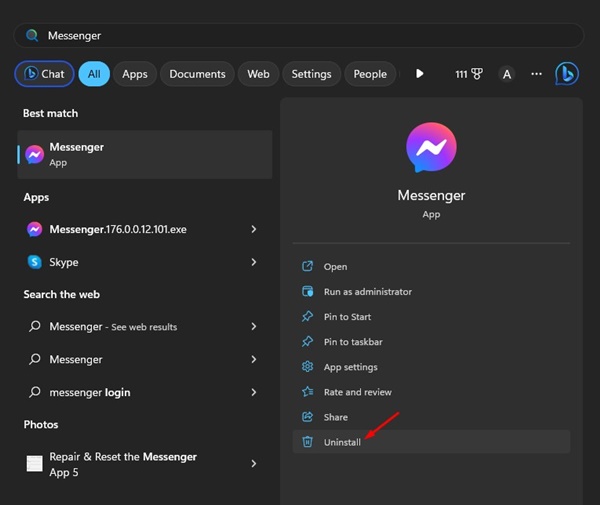
On the prompt that appears, select Uninstall again. Once uninstalled, open the Microsoft Store and install the Messenger app again. After the installation, log in with your Facebook account and use the app on your Windows 11 PC.
11. Use the Messenger Web Version
If you don’t have time to go through all these methods and are looking for an easier way to access the Messenger chat, you can use the Messenger Web Version.
Messenger’s web version allows you to chat with your Facebook friends and access it from any web browser.
Just open your favorite web browser and visit https://www.messenger.com/. Next, sign in with your Messenger account and start conversing with your friends.
Also read: Windows 11 ISO Free Download Full Version
These are simple fixes for Messenger not working on Windows 11 computers. All these methods would have fixed the Messenger issues on Windows 11. If you find this guide helpful, don’t forget to share it with others facing the same problem.


