The ‘No Audio Output Device Is Installed’ error can be annoying, as it keeps popping up when you increase the volume or turn on the computer. The worst part is that the error completely turns off the audio, and users can’t do anything to bring the sound back. If you’ve been facing the same problem, here’s what you should do.
1. Inspect the Physical Connection
Before you proceed with the troubleshooting steps, you should check the Physical connection between your speaker and your PC. You can try unplugging the audio device from your PC and plugging it in again.
If you are using a wired audio device, check the connecting end of the wires for fraying or physical damage. If the wires are damaged, you need to replace the cables.
2. Enable the Correct Audio Device
It’s possible that multiple audio devices are connected to your device, and the wrong one is selected for audio playback. You should check whether you’ve selected the wrong audio device for playback and enable the correct one.
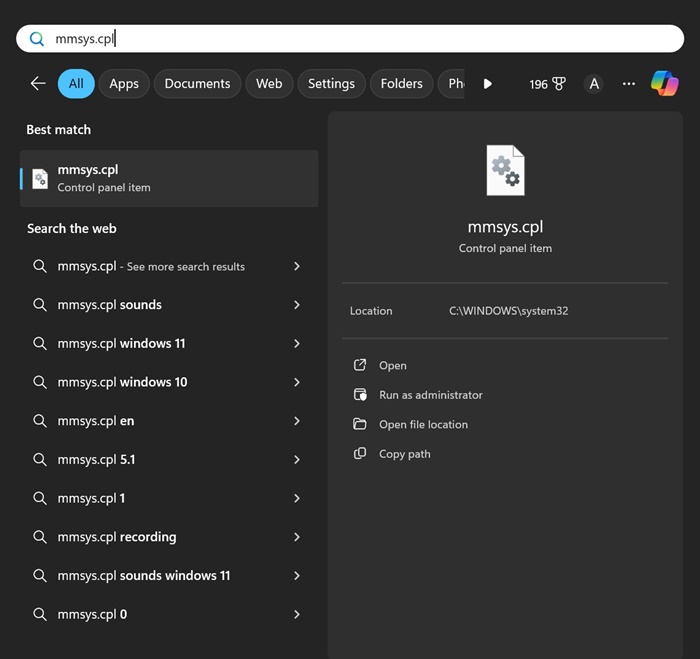
1. Type mmsys.cpl in the Windows 11 search. Open the mmsys.cpl Control Panel item from the list of best match results.
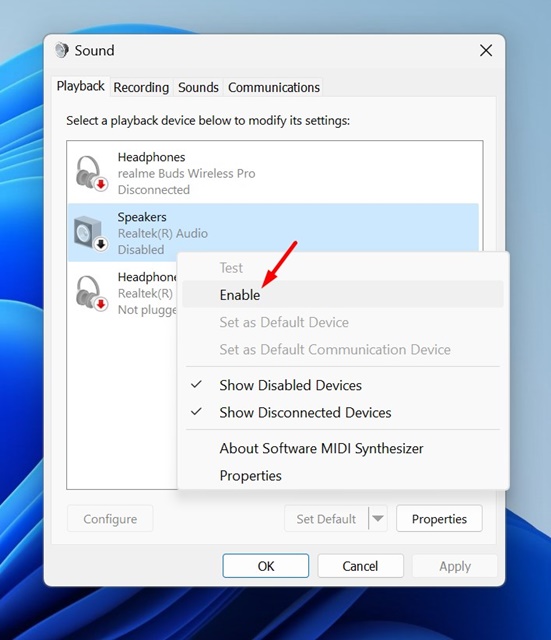
2. Select the correct audio device. Right-click on it and choose Enable.
3. Click on OK to close the Sound settings window.
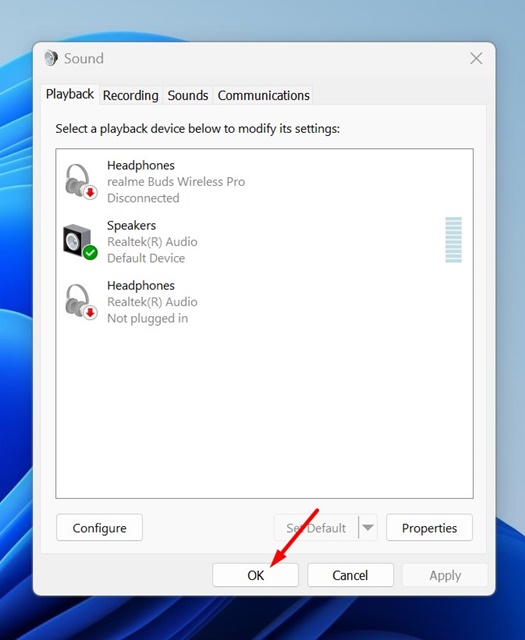
After making the changes, play an audio file on your device. The audio should now play without any errors.
3. Restart your PC
If you continuously get the audio output device error message, you should restart your PC.
Restarting will probably fix most system errors, including installing no audio output device. If you still get the error message after the restart, you must follow the next methods.
4. Use the Audio Troubleshooter
This is the next best thing Windows users should do to fix audio-related problems.
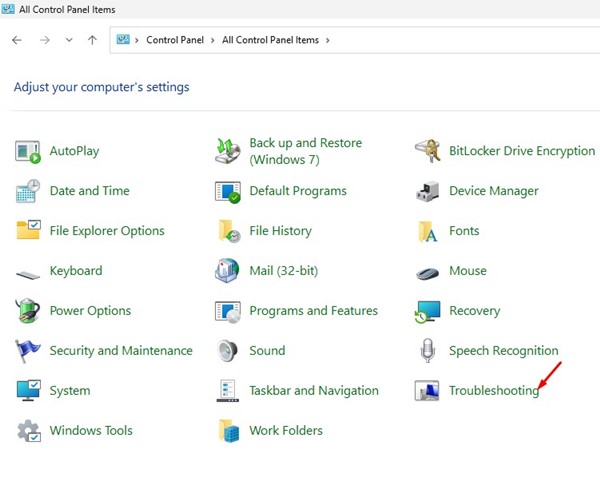
1. Open the Control Panel and click on Troubleshooting.
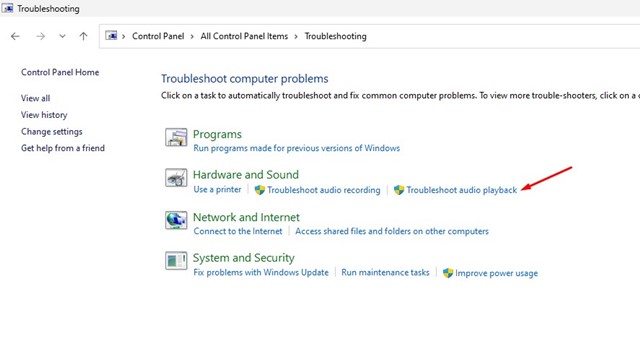
2. Click on the Troubleshoot audio playback link in the Hardware and Sound section.
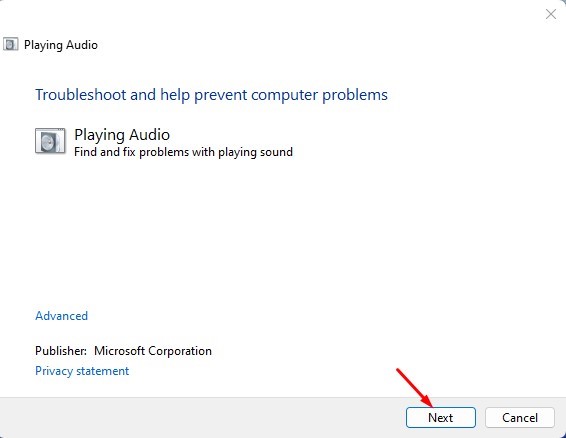
3. Click on Next.
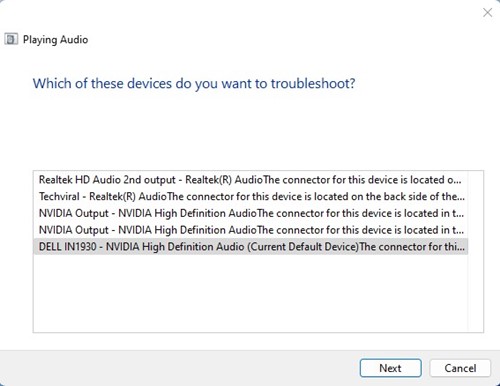
4. Wait until the Audio Troubleshooter scans for audio devices. Once it has been scanned, select your audio device and click on Next.
5. Follow the on-screen instructions to complete the troubleshooting process.
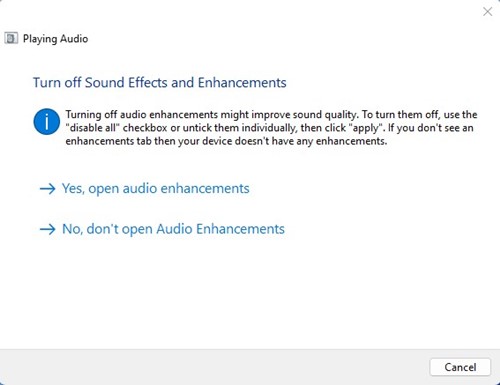
5. Update the Audio Driver
Updating the Audio driver can help fix the error message you’ve encountered. Here’s how you can update the audio drivers of your PC.
1. Open Device Manager on your Windows Computer.
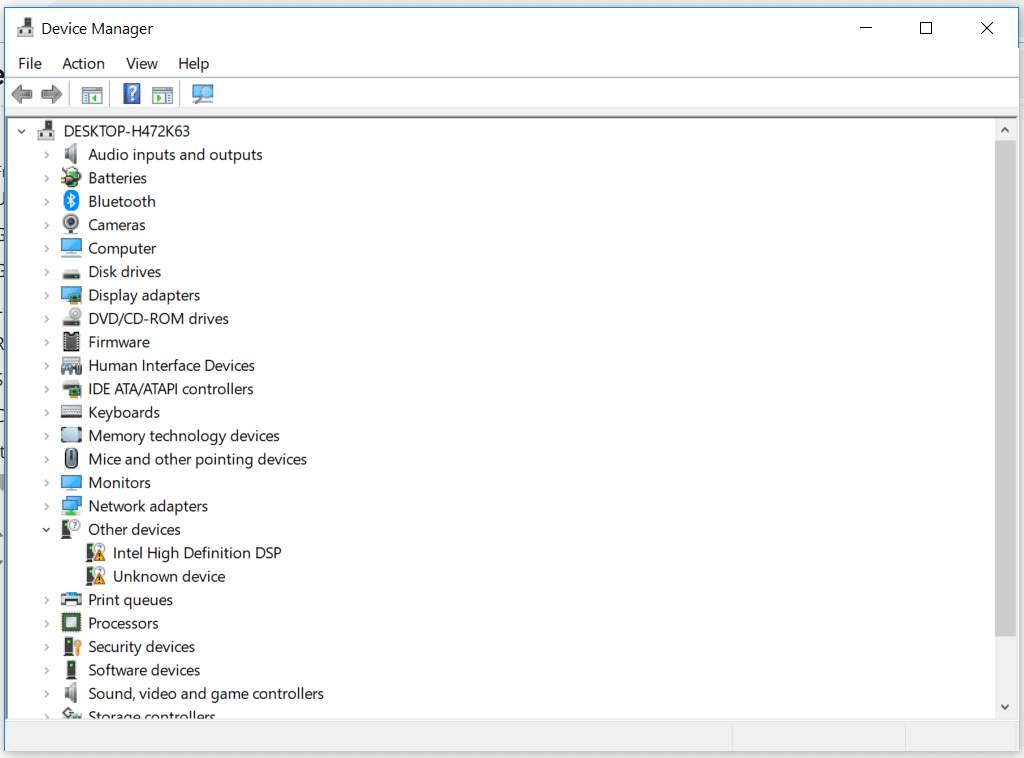
2. Select and expand System Devices.
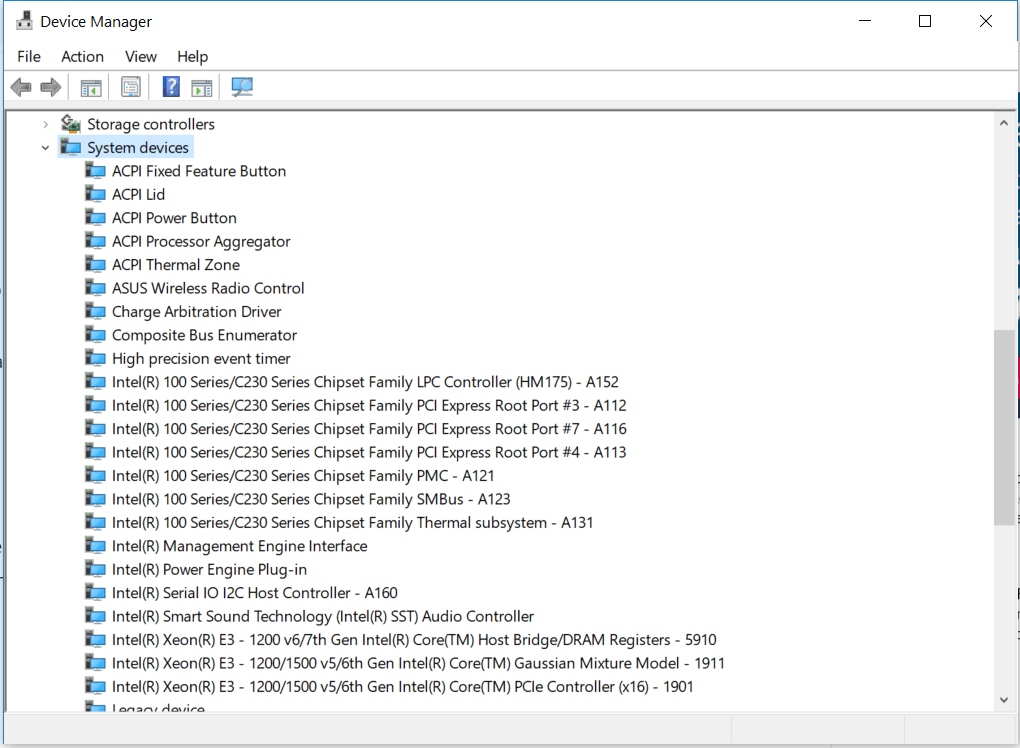
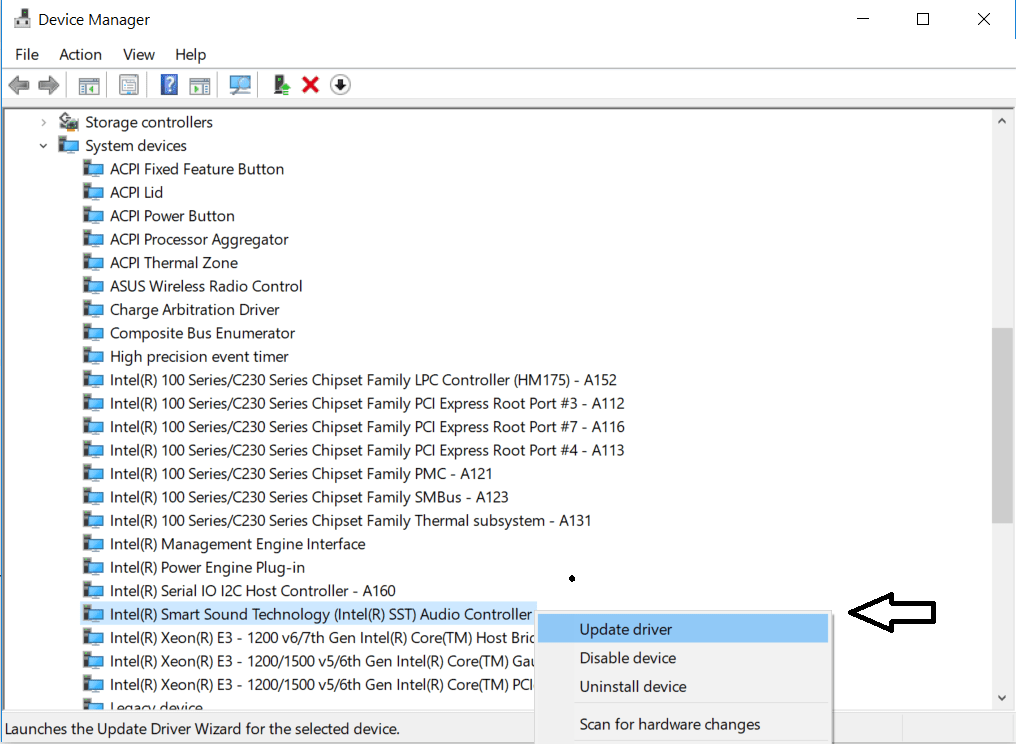
3. System Devices will list all the devices or hardware installed. You need to search for an audio driver that has SST. Right-click on it and choose Update Driver.
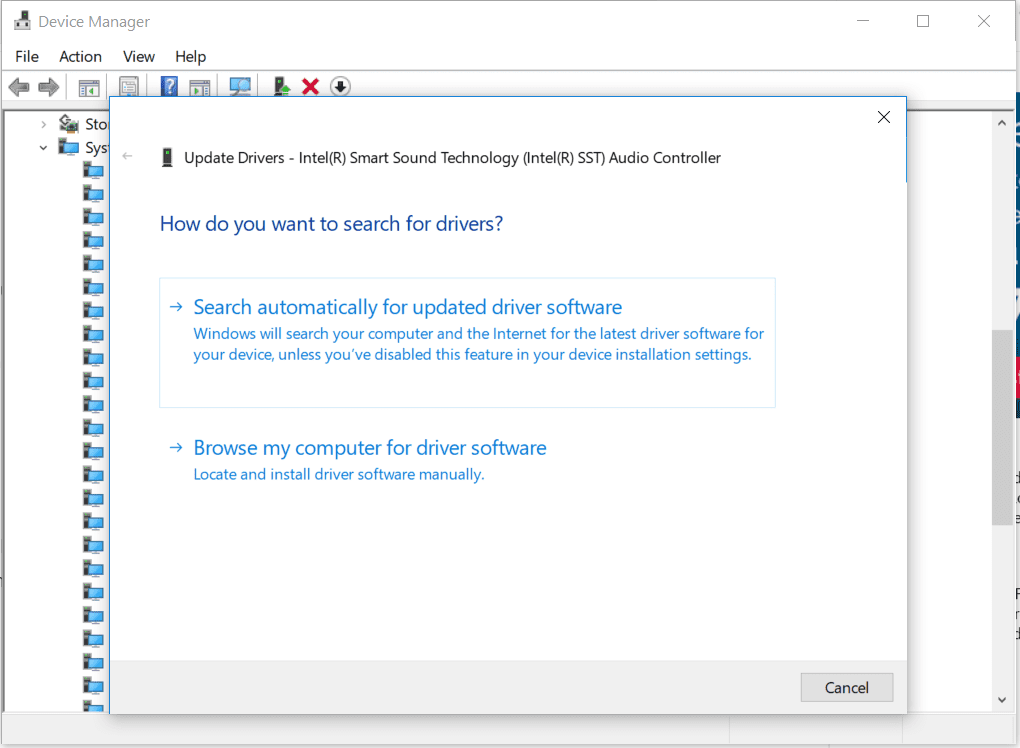
4. You will see a pop-up asking you, ‘How do you want to search for drivers?’ Select the Second option to continue.
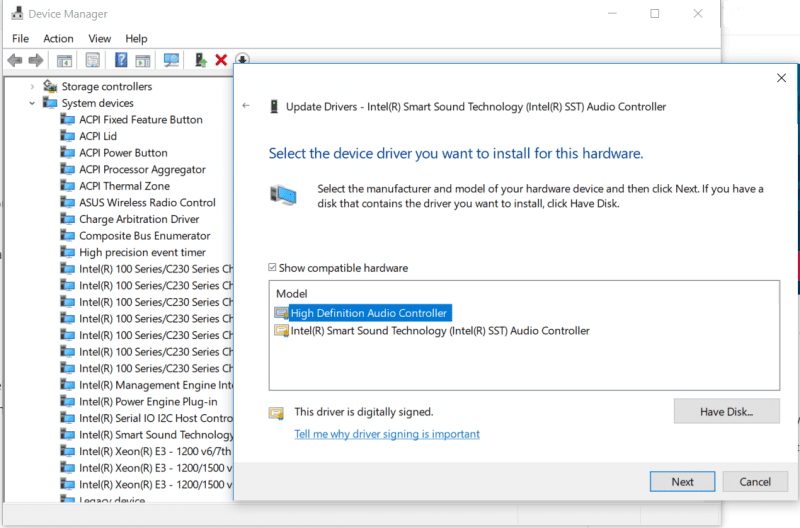
5. Choose the option Let me pick from a list of available drivers on my computer
6. Select High Definition Audio Controller and click Next.
6. Uninstall the Intel SST Audio Controller
There is one more method that you can follow to fix the No Audio Output Device Is Installed error on your Windows computer.
- Open Device Manager and expand the Sound, Video, and Game Controllers
2. Search for the Realtek Device or any Audio component with a yellow triangle and an exclamation mark.
3. Select the particular device. Right-click on it and select Properties. Under the Driver tab, select Uninstall Device
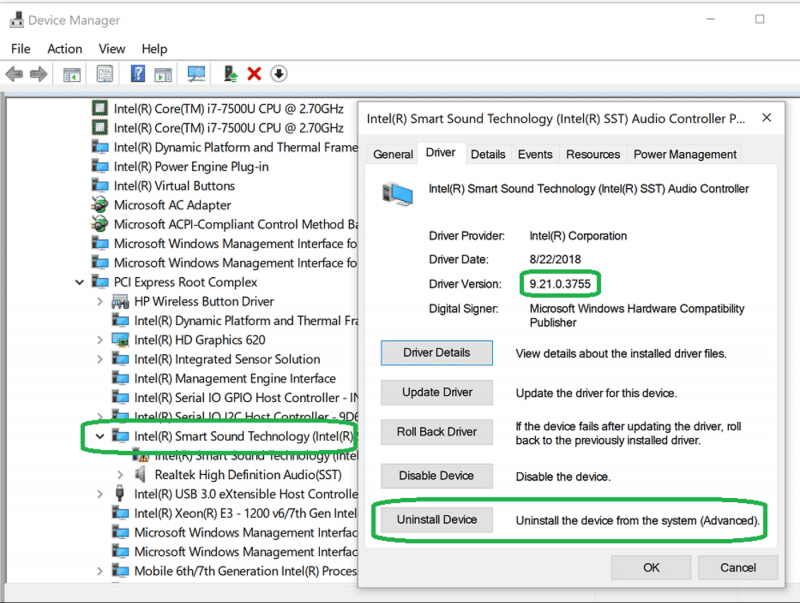
4. You will see a confirmation pop-up. Check the checkbox Delete the driver software for this device, and click Uninstall
Now restart your computer.
7. Install the Generic Audio Device Driver
If you still get the No Audio Output device installed error, you must install the generic audio device driver.
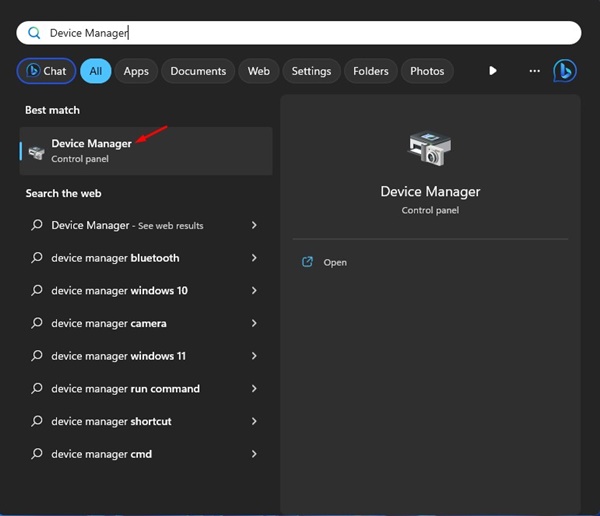
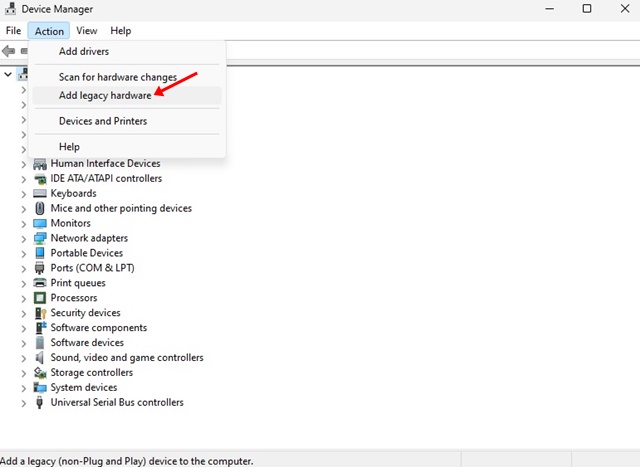
1. Open the Device Manager app from the Windows Search.
2. Click on Action and select Add Legacy Hardware.
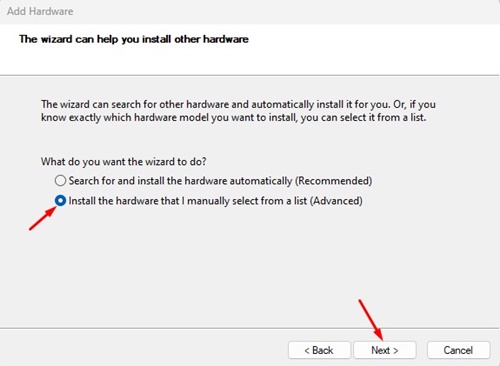
3. Check the second option and click Next.
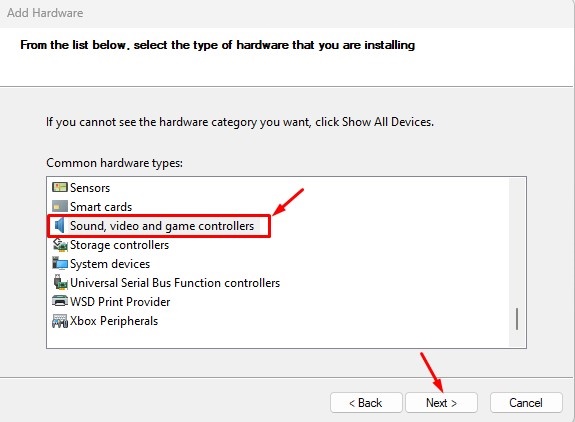
4. Select Sound, video, and game controllers and click Next.
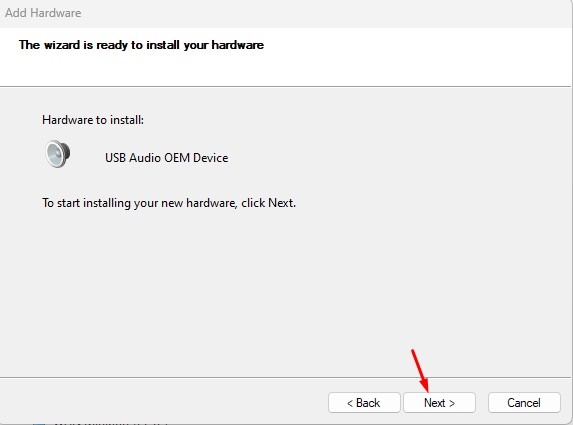
5. Select (Generic USB Audio) on the left and USB Audio OEM Device on the right.
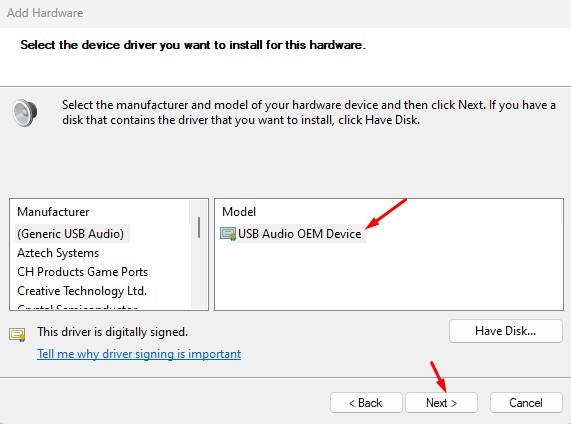
6. After making the selection, click Next. On the confirmation prompt, click Next.
8. Check if Audio Services are Running
Next, you should check whether the Audio services on your computer are running properly.
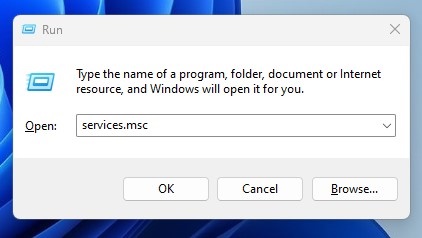
1. Press the Windows Key + R button on your keyboard. On the RUN dialog box, type services.msc and press Enter.
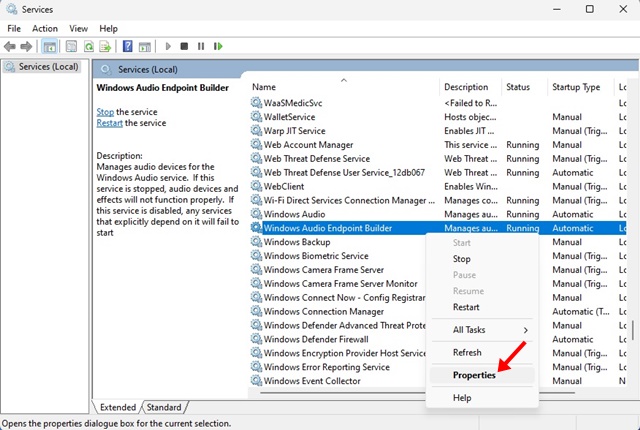
2. Search for Windows Audio Endpoint Builder. Right-click on it and select Properties.
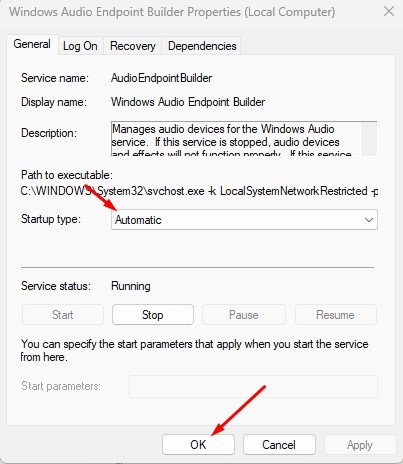
3. Select Automatic and click OK.
4. Right-click the Windows Audio Endpoint Builder service again and select Restart.
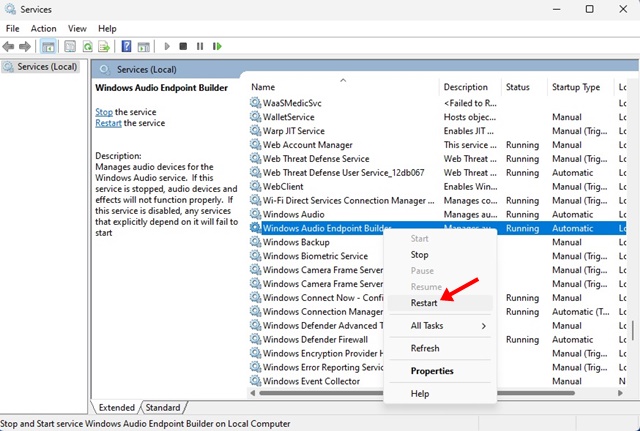
5. Find and right-click Windows Audio Service and select Properties.
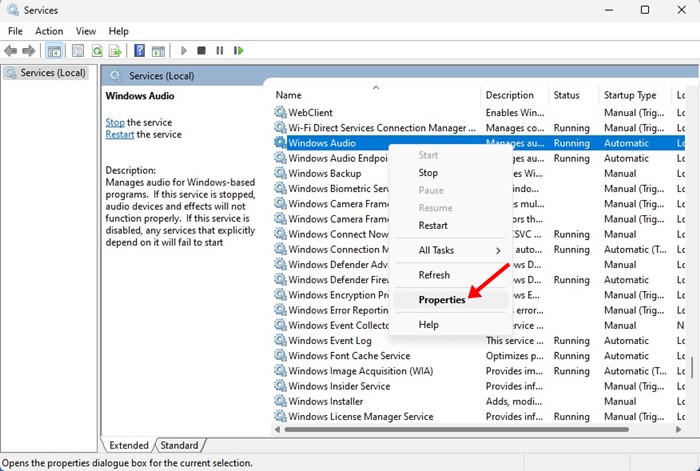
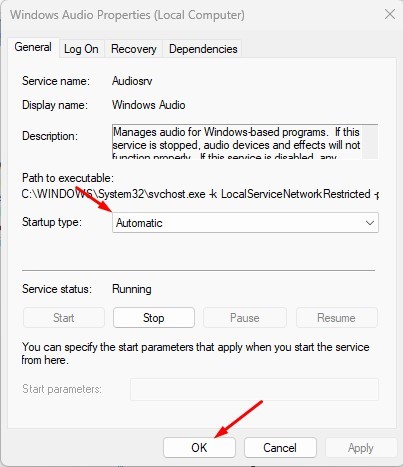
6. Select Automatic under the Startup type and click OK.
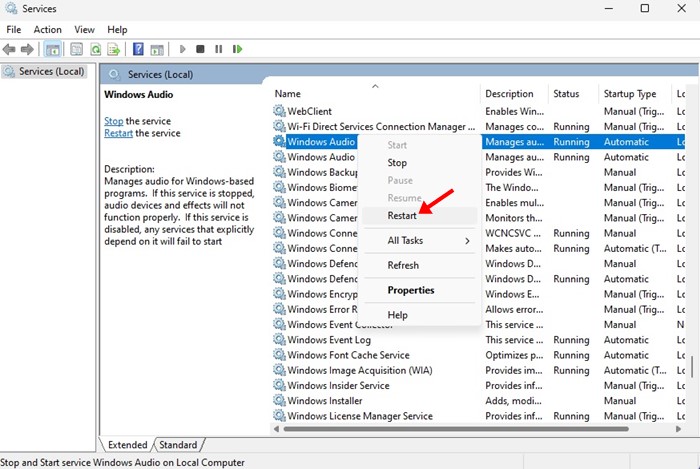
7. Right-click on the Windows Audio Service and select Restart.
9. Run the DISM Command to fix the Windows Image
Problems with the Windows Image also affect the connected devices. Many users have fixed the ‘No Audio Output device is installed’ error by repairing the Windows Image file with the DISM command. You can try doing the same.
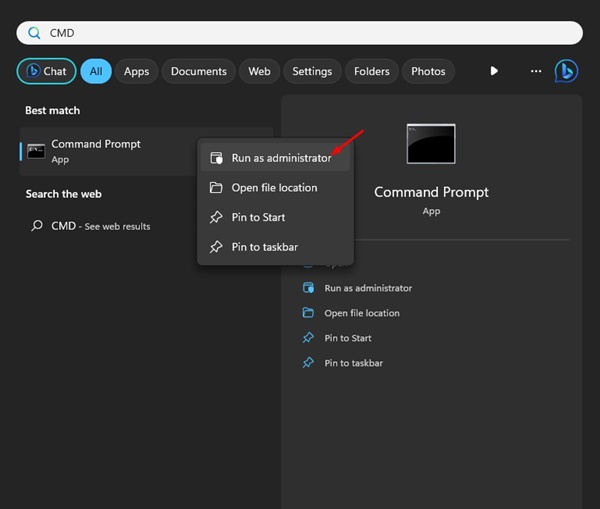
1. Click on Windows Search and type CMD. Right-click on CMD and select Run as administrator.
2. Execute the following commands individually.
DISM /Online /Cleanup-Image /ScanHealth
DISM /Online /Cleanup-Image /RestoreHealth
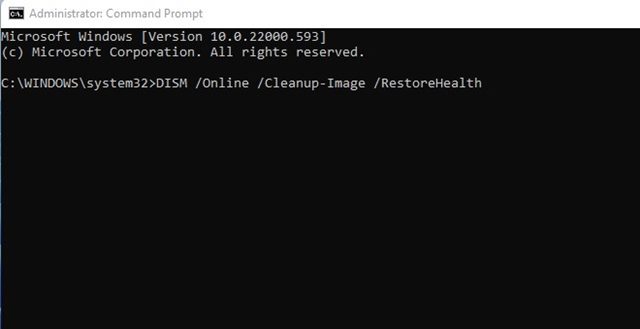
3. The second command may take time to complete. So, be patient and wait for the process to complete.
After completing the process, restart your Windows computer to resolve the No Audio Output Device is Installed error.
These are the best methods to fix the No Audio Output Device Is Installed error. If you need more help with this topic, let us know in the comments.