Just like internal hard drives, sometimes we want to create partitions on External hard drives too. Partitioning is splitting a drive into pieces and assigning a filesystem and name for those who don’t know.
The C, D, E drive you find on your File explorer is known as Partition. Similarly, you can partition your external hard disk as well. This way, you can store different files on different partitions.
Steps to Partition an External Hard Disk in Windows 10/11
Partitioning an external hard disk is pretty straightforward, but you might need to use third-party software sometimes. So, in this article, we have shared some of the best ways to partition an External Hard Disk Drive in Windows 10. Let’s check out.
1. First of all, in your Windows 10 OS, you need to click on the windows button and then type diskmgmt.msc and then press enter.
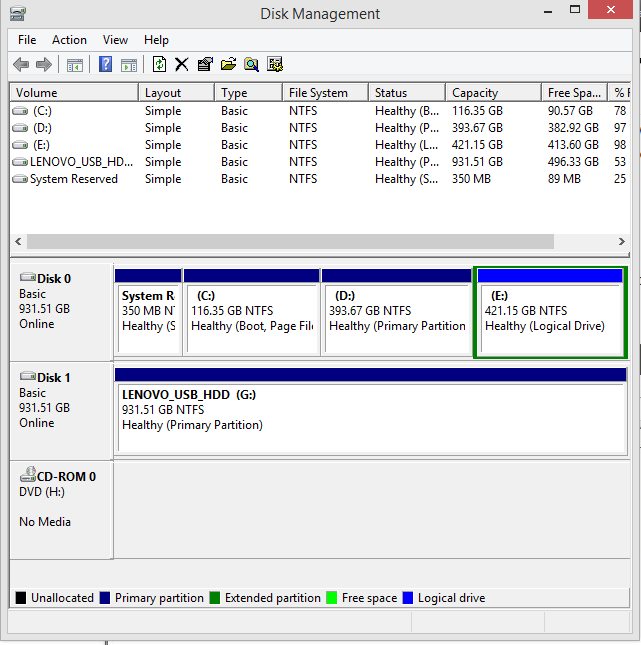
2. Now the disk management dialog box will appear. You will see your external drive storage, right-click on it and select the shrink option.

3. Enter the storage in an amount you want to partition in a different drive and click on ok.
4. You will see unallocated space left in the drive after you shrunk the volume, and this space will you now assign to a new drive.
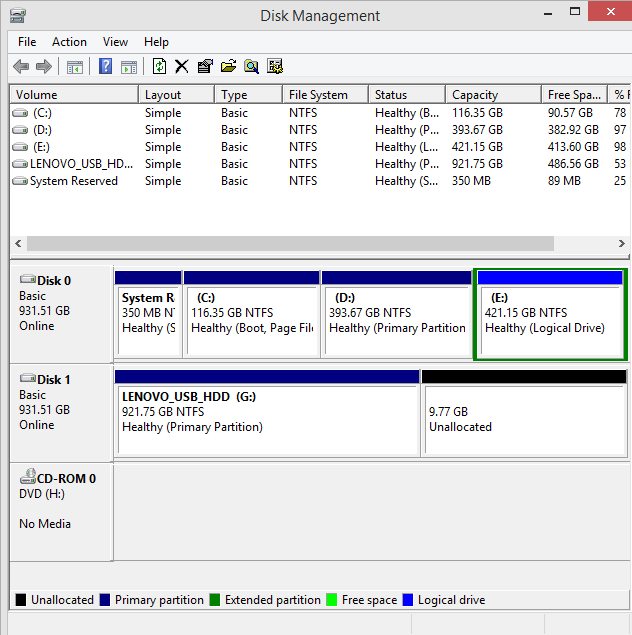
5. Now right-click on unallocated space and there select New Simple Volume.

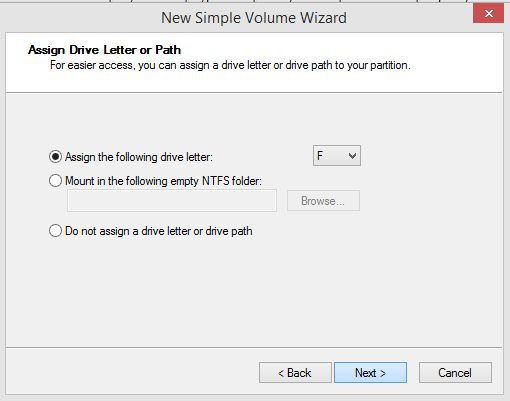
6. Now follow the guide to choose the size you want to allocate to that drive.
7. After you are done, a finish message will be displayed by simply clicking on the next option.
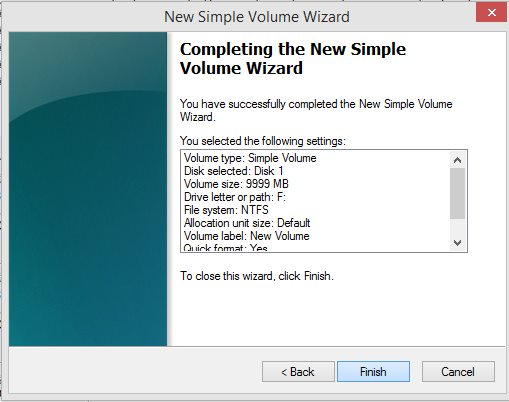
That’s it! You are done, a new drive will get created with your allocated space to that drive, and you can now use that space to store files differently on your external drive.
Using Easeus
EaseUS is a third-party tool that allows users to partition the external hard drive. You can use the tool to resize, delete, and add partitions on your external hard disk. You need to follow some simple steps to proceed.
1. First, download EaseUS Partition Master on your Windows 10 Computer and launch the software.
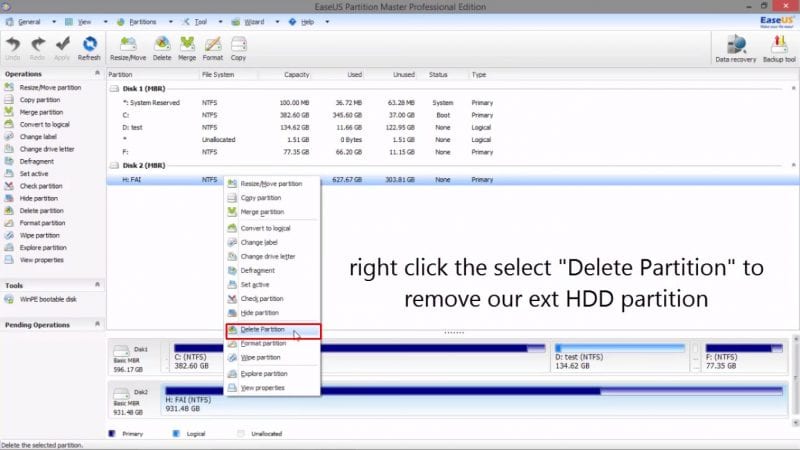
2. In the next step, you will see a screen like the below. Here you need to choose your external HDD.
3. Now, you need to right-click on the partition and then select ‘Delete Partition.’ This will delete the existing partition.
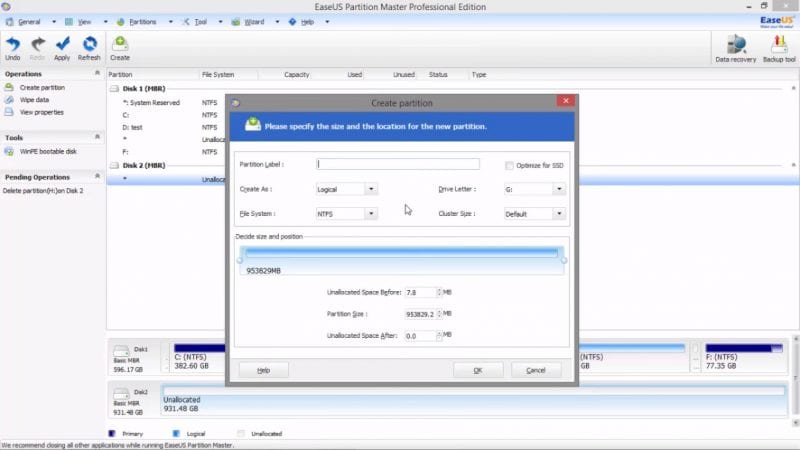
4. Now, to create a new partition, you need to right-click on your drive and then select ‘Create Partition.’

5. Give the name of the partition and then select the size as per your wish and click on ‘OK.’
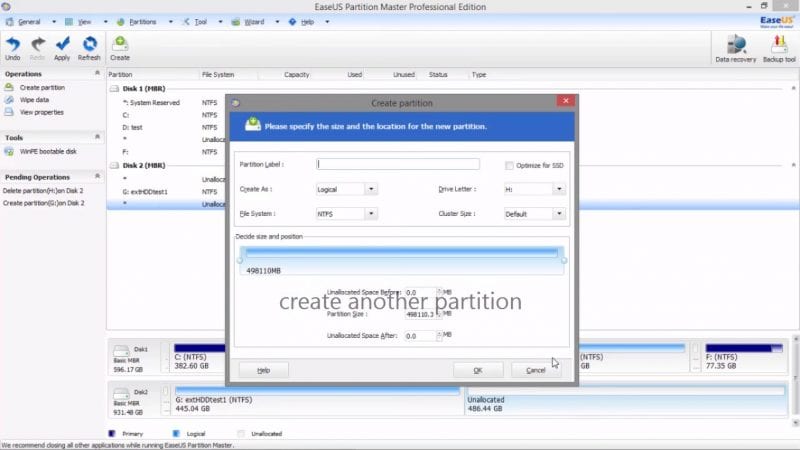
6. Now you will see the new partition. To create another partition, you need to repeat all methods from step 4.
So, this is how you can use EaseUS to partition an external hard drive. If you need further help, then ask us in the comments.
Using AOMEI Partition Assistant
AOMEI Partition Assistant is another best third-party tool you can use to partition your external hard drive. The tool is straightforward to use, and it can partition any hard disk drive. So, insert the external hard drive and follow some of the simple steps given below.
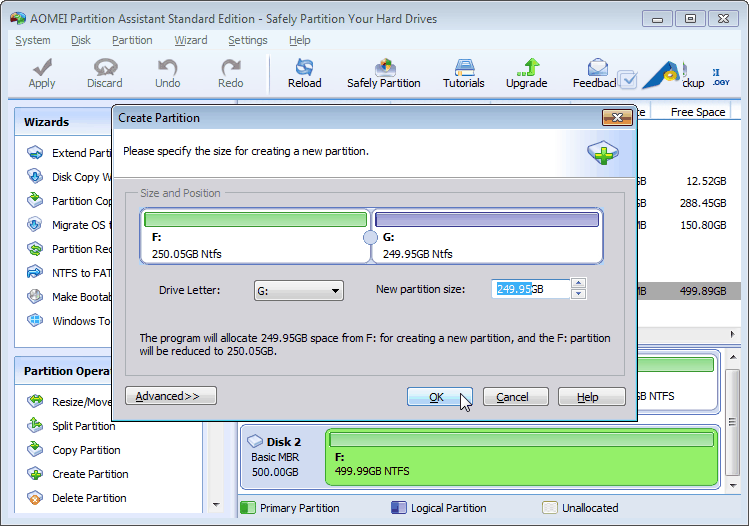
1. First of all, download & install the AOMEI Partition assistant on your Windows 10 computer. Next, connect the external hard drive and open the tool. Now on the tool, right-click on the external hard drive and click on ‘Create Partition.’
 2. Now, you see another pop-up window. There you need to drag the slider bar to commit the sizes of new partitions. After setting the size, click on ‘Ok.’
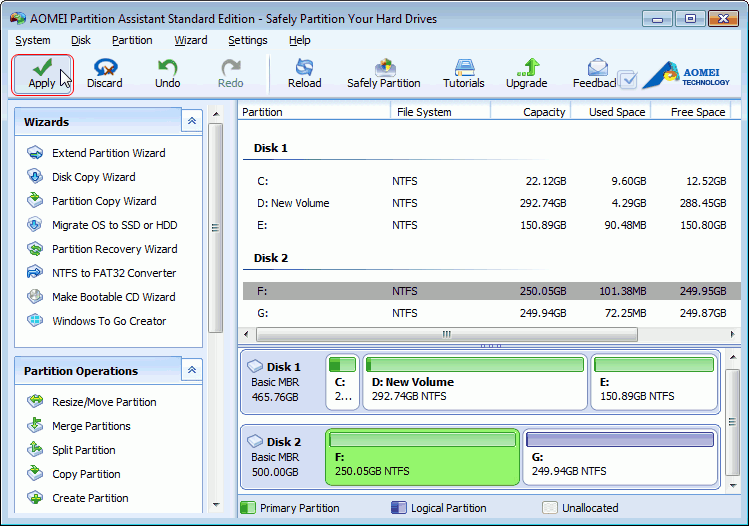
3. Now, you will see that your hard disk drive shows two partitions. Click on ‘Apply’ for the changes to take effect.
4. Now, if you want to resize the partition, right-click on the Partition name and select the option ‘Resize a partition.’ You can also split or create a new partition on an existing partition with AOMEI Partition Assistant.

So, this is how you can use AOMEI Partition Assistant to partition an external hard drive. If you have any doubts, then discuss them with us in the comments.
So above discussion was all about how to partition an external hard disk in Windows 10. I hope this article helped you! Please share it with your friends also. If you have any doubts about this, let us know in the comment box below.
")

