If you have been using Microsoft’s Office suite, you might know about Excel. Microsoft Excel is a spreadsheet developed by Microsoft for Windows, macOS, Android, and iOS.
Microsoft Excel features some essential features that will help you organize data and perform financial analysis. Businesses and companies use Excel sheets from small to large. Also, it’s widely used by an individual to share their sales report across different platforms.
If you have created a Microsoft Excel file and are looking for ways to prevent unauthorized access, you need to password protect it. It’s pretty easy to password protect Excel files on Windows.
2 Methods to Password Protect Excel Files in Windows
So, in this article, we will share two best methods to password protect an Excel file on Windows. Let’s check out.
1) Password Protect Microsoft Excel File
We will use the Microsoft Excel app to enable password protection in this method. Here’s what you need to do.
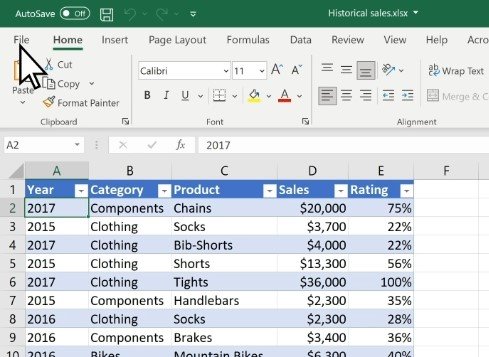
1. First of all, open the Microsoft Excel program on your Windows PC.
2. Now, you need to open the Excel file you want to password-protect. Next, click on the File button as shown in the screenshot.
3. Click on the ‘Info‘ option from the left sidebar.
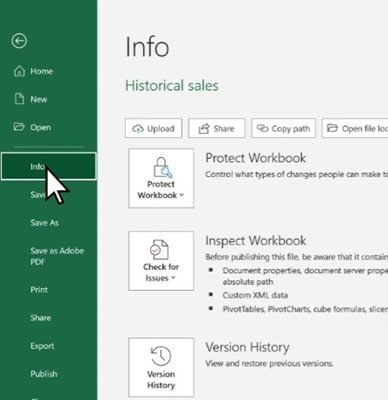
4. On the right, click on the Protect Workbook option as shown below.
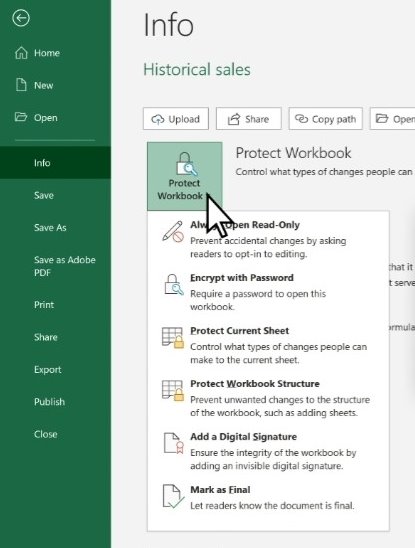
5. Next, click on the ‘Encrypt with password’ option.
6. Now, enter the password you want to set and click on the Ok button.
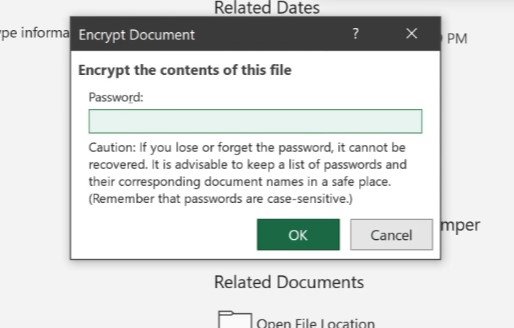
This will password protect the excel file in Windows. You can now share the encrypted file with anyone.
2) Password Protect Excel File via OneDrive
Well, you can also password protect an Excel file via OneDrive. For that, you need to follow some of the simple steps shared below.
Note: The encryption feature is available only on OneDrive premium. So, follow the steps only if you have a premium account.
1. First, visit the OneDrive webpage and sign in with your Microsoft account.
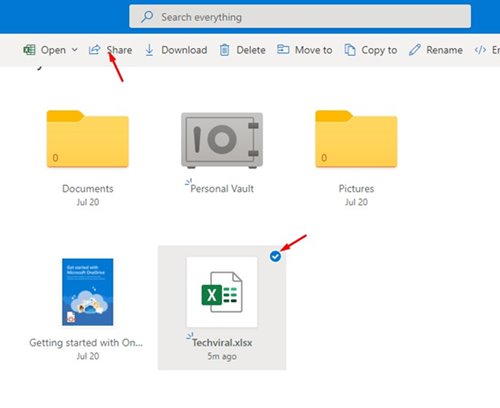
2. Find an Excel file from the. If you don’t find your Excel file, you need to upload it.
3. Once uploaded, select the Excel file and click on the Share icon below.
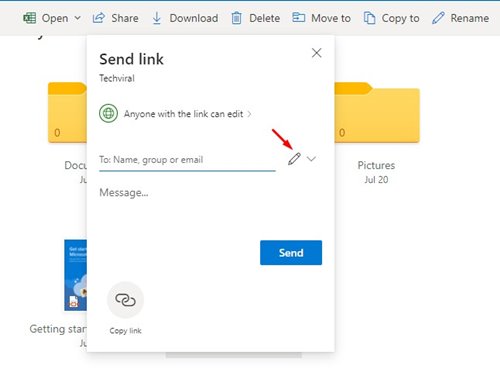
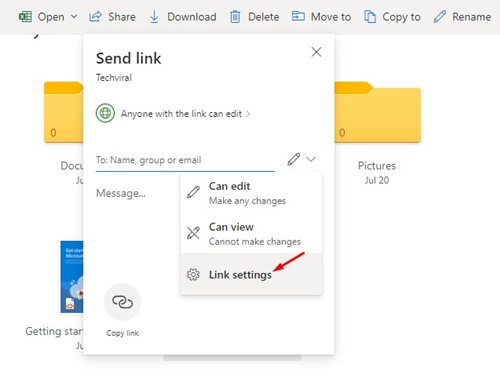
4. On the Send Link menu, click on the Edit button below. Next, click on the Link Settings option.
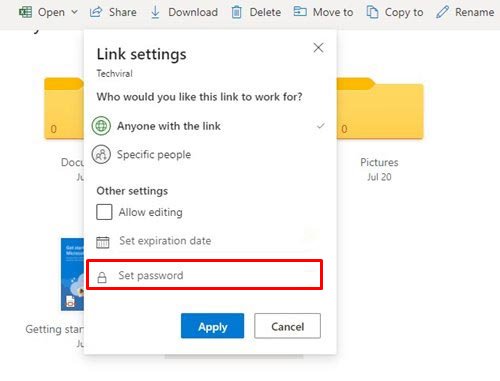
5. On the Link Settings menu, enter the password on the ‘Set Password’ field and click on the Apply button.
That’s it! You are done. If anyone tries to access the OneDrive Link, they will be prompted to enter the password.
So, that’s how easy it is to password protect an Excel file on Windows 10. Of course, you can also rely on other utilities to password protect excel files. But both of the methods that we have shared were free and required no additional app installation. If you have any doubts about this, let us know in the comments.


