The rivals of the iOS platform have already enabled the screen record feature; we are talking about Android. This feature was much appreciated by the people as it helped them to record their screens.
Following that, Apple also introduced a screen recorder in iOS 11. The feature is even available on the latest version of iOS, but many users don’t know how to enable and use it.
Steps to Record Screen in iOS Natively
Hence, if you are looking for ways to record screens on your iPhone, you may find this guide helpful. In this article, we will share some simple steps to record screen in iOS natively. Let’s check out.
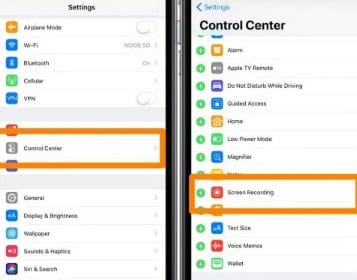
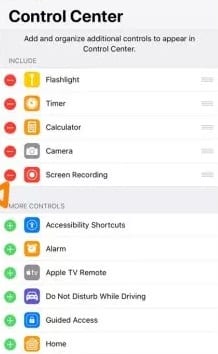
1. First, go to Settings and then look for Control Center. You will find the “+” icon placed against the screen recording option. You have to click on that icon to proceed with the method, so do it up.
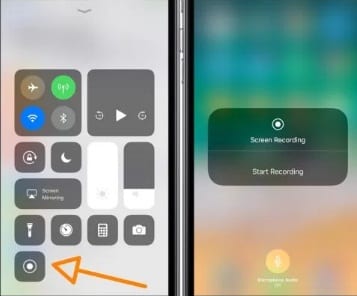
2. The above step added the Screen Record toggle in the control panel of your device. Now close the tasks and reach the home screen of the device. Swipe above the screen, and then through the Control panel, use the Screen Toggle button to either start or stop the recording of the screen.
3. If the screen record feature runs, the icon will be turned red, and the blue bar will be shown on the top of the screen. The blue bar indicates the elapsed time and is also used to stop the recording. Tap on the blue bar, and you will see the option to stop recording.
That’s it! This is how you can record the screen on your iPhone natively.
So, this guide is about recording screen on your iPhone without installing any third-party app. If you need more help recording your iOS screen, let us know in the comments below.